A little history
About 10 years ago, Japanese scientists and designers began creating robots that imitate the behavior and movement of fish.
The experiment was intended as a way to study the lifestyle of real, living sea and river inhabitants. The first controlled models were produced by Sedensha Co LTD, but they were controlled by signals traveling along a wire. Radio-controlled prototypes soon appeared.
https://www.youtube.com/watch?v=DrjsGdIWw28
Improvement of samples of underwater robots (in particular, at the Japanese Institute of High Technologies) has led to the emergence of devices that imitate turtles, swordfish, seahorses, stingrays and other amazing inhabitants of the seas and oceans. More recently, they even managed to create a high-tech robot that looks like a jellyfish!
The inventions of Japanese designers, initially aimed at solving scientific problems, soon became the basis for the creation of mass production of water toys for children and adults. In recent years, the New Zealand company ZURU has been very successful in this activity, whose high-tech toys are widely sold in more than 40 countries around the world.
Fishfish swimming. How robofish swim close up
For the test, we took fish from our store - 4 Chinese analogues of “Happy fish” in the colors: pink, blue, green and orange, the type of fish is clown.
- Soon
Green robot fish Robofish. Robofish
Coming soon
- Soon
Blue fish robot Robofish. Robofish
Coming soon
- Soon
Pink robot fish Robofish. Robofish
Coming soon
- Soon
Orange robot fish Robofish. Robofish
Coming soon
How do robot fish behave in an aquarium?
These technical devices are made in such a way that they do not work outside of water. On land they can be stored for a long time.
However, as soon as artificial fish enter the water, they turn on and begin to imitate the movements of real decorative aquarium animals:
- synthetic fins straighten out,
- LEDs turn on,
- micromotors make robots move at different speeds up and down, forward and backward, turn around their axis and even turn over with their back down.
They move their silicone fins and tail just like they are alive!
It is very easy to operate high-tech devices, since they turn on independently when they enter the aquatic environment. You only need to periodically change small batteries, since a pair of batteries lasts for 5–6 hours of active work. When you need to temporarily disable RoboFish, you just need to take them out of the water, and reactivation is possible after any period of time.
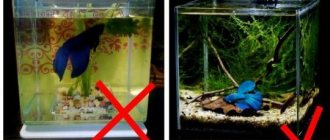
If you place decorations in the aquarium, install artificial plastic aquatic plants, and lower robotic fish into it, you can create a great corner that imitates the beautiful underwater world!
Automatic aquarium control system on Arduino
I would like to share my first experience of creating such a thing as an Arduino aquarium. Previously, I had not worked with electronics at all, and, moreover, I did not know how microcontrollers are programmed. But still I decided to try my hand and would like to share the results.
The emergence of the idea of creating an aquarium
It just so happened that I was mainly involved in .NET programming and learned it bypassing C++.
This is probably why I never met microcircuitry and microcontrollers, although the desire to get acquainted with them grew almost every year. Especially in recent years, when I learned about Arduino. But it was necessary to come up with a practical application for it. And this issue was quickly resolved. There is an aquarium in our room, and every day we had to crawl under the table and turn off the lights for the fish, and then turn them on in the morning. Additionally, the fish had to turn on the heater when they were cold and turn it off when they were warm. Sometimes my forgetfulness led to the death of fish in the aquarium and I had to buy new ones. The fish also needed to periodically change 2/3 of the water. And for our aquarium this procedure was very long and unpleasant.
First of all, I looked at ready-made solutions for aquariums. There are quite a lot of them. Mostly these are videos on YouTube. There are also quite a few interesting articles on geektimes. But for my goal - studying and getting to know the world of microcircuit technology - it was too difficult, and there was no detailed manual “from scratch” on the Internet. The idea of developing an aquarium controller had to be postponed until the basics of microelectronics themselves were studied.
Introduction to microelectronics
I started my journey with a ready-made Arduino learning kit. Probably everyone collected something similar when they got acquainted with this platform:
An ordinary light bulb (LED), a 220 Ohm resistor. Arduino controls the light bulb using a C++ algorithm. Let me make a reservation right away that by purchasing any ready-made Arduino kit or its equivalent, you cannot assemble a more or less useful thing. Well, except for a tweeter or, say, a home thermometer. You can study the platform itself through lessons, but nothing more. For useful things I had to master soldering, printed circuit boards, printed circuit board design and other delights of electronics.
Building your first aquarium prototype
So, the first thing I started with my aquarium prototype was to formulate on paper the requirements for this device.
The aquarium should:
- Glow in the morning, afternoon, evening and night in different colors;
- Turn on the white light for the fish in the morning, increase the brightness of the white light during the day, decrease it in the evening (simulating daylight) and turn it off at night;
- Air bubbles (aquarium compressor) for fish should appear only in the evening and turn off at night;
- If the fish are cold, the aquarium should glow blue, if it’s hot, then red;
- Temperature ranges beyond which the “light alarm” should be triggered must be customizable
- The aquarium should always display the date and time;
- The start and end times of day intervals must be configurable. For example, the morning does not always start at 9:00 AM;
- The aquarium must display information about air humidity and temperature outside the aquarium, as well as display the temperature of the water inside the aquarium;
- The aquarium must be controlled from a remote control.
- The date screen should light up when you press the remote control button. If nothing is pressed within 5 seconds, then turn off.
I decided to start by learning how LCD and Arduino work.
Creating the main menu. Working with LCD
For LCD I decided to use the LiquidCrystal library.
Coincidentally, in addition to the Arduino, my kit included an LCD screen. He could display text and numbers. This was enough and I began to study how to connect this screen to Arduino. I took the basic connection information from here. There are also code examples for displaying “Hello World”. Having figured out the screen a little, I decided to create the main menu of the controller. The menu consisted of the following items:
- Basic information;
- Time setting;
- Date setting;
- Temperature;
- Climate;
- Backlight;
- Devices;
Each item is a specific mode for displaying information on the LCD text screen.
I wanted to allow for the possibility of creating a multi-level menu, where each sub-level would have its own implementations for displaying the screen. Actually, a base class was written in C++, from which all other submenus will be inherited.
class qQuariumMode { protected: LiquidCrystal* LcdLink; public: // To prevent the screen from flickering, a bool variable isLcdUpdated was provided. bool isLcdUpdated = false; // Exit submenu or menu. void exit(); // The loop method will be different for each submenu option. Actually, he is responsible for displaying // text on the screen. It will be called from the main loop of the controller program. virtual void loop(); // Methods that are marked virtual will be overridden individually in each // menu. virtual void OkClick(); virtual void CancelClick(); virtual void LeftClick(); virtual void RightClick(); }; For example, for the "Devices" menu, the implementation of the base class qQuariumMode would look like this: #include "qQuariumMode.h" class qQuariumDevicesMode : public qQuariumMode { private: int deviceCategoryLastIndex = 4; //Submenu options in the Devices menu enum DeviceCategory { MainLight, // control of the main light Aeration, // control of the aerator Compressor, // control of the Vulcanius compressor, // Control of the volcano Pump // Control of the pump }; DeviceCategory CurrentDeviceCategory = MainLight; char* headerDeviceCategoryText = NULL; // Link to the “driver” with which the device is controlled BaseOnOfDeviceHelper* GetDeviceHelper(); public: void loop(); void OkClick(); void CancelClick(); void LeftClick(); void RightClick(); }; This is what happened as a result of implementing the first menu level:
Hardware part. Nuances of connecting components
I would like to say a few words about the hardware of the aquarium controller. For the controller to work properly, I had to purchase:
- 1 x Arduino Uno/Mega. Subsequently, I decided to work with Mego;
- 1 x Real time clock, for example DS1307;
- 2 x Relays type RTD14005, needed to control the compressor and aeration, because both operate on 220V AC;
- 1 x Piezo beeper;
- 1 x IR receiver;
- 5 x IRF-530 MOSFET transistors with N channel. (3 for RGB tape, 1 for white tape, 1 for water pump);
- 1 x RGB LED strip. If you plan to immerse the LED strip in water, then you need to isolate it from water. My tape is inside a silicone tube and filled with transparent sealant;
- 1 x White LED strip;
- 1 x LCD screen;
- 1 x Sealed temperature sensor for measuring water temperature. I used DS18B20;
- 1 x Temperature and humidity sensor. I used DHT11;
Each component has its own connection type and its own drivers for operation. I will not describe the nuances of connecting all components, as they can be found on the manufacturer’s website or on the forums. If you plan to use the same components as I do, then you won’t have to change the source code.
Damage to components
Be careful. Try to read about the connected component first. It must be operated exactly in the voltage range for which it was designed. This is usually indicated on the manufacturer's website. While I was developing the aquarium controller, I destroyed 2 sealed temperature sensors and a real time clock. The sensors failed because I connected them to 12V, but they should have been connected to 5V. The real time clock died due to an “accidental” short circuit caused by me.
RGB LED strip
Particular difficulties arose with LED strips. I tried to implement the following scheme:
When connecting to the Arduino, I used pins that support PWM (pulse width modulation). When all 3 pins were simultaneously turned on to maximum voltage, my tape got very hot. As a result, if you left it for an hour or two, some of the LEDs stopped glowing. I believe this was due to some resistors failing. Another disadvantage of this scheme is the different brightness of the LED strip for each color. For example, if I set the maximum voltage on the red component of the tape, then I get a conditional brightness of the red tape of 255 units. If I turn on the red and blue components at the same time at maximum voltage, then the brightness will be 255 + 255 = 510 units, and the color will be purple. In general, this solution did not suit me.
It was decided to implement the following algorithm:
void LedRgbHelper::Show(RGBColorHelper colorToShow) { // The RGBColorHelper class contains information about the proportion of each component in color. // In addition, contains information about the brightness of the color int sumColorParts = colorToShow.RedPart + colorToShow.GreenPart + colorToShow.BluePart; // share of each component in the total color float rK = 0; float gK = 0; float bK = 0; if (sumColorParts != 0) { float redPartAsFloat = (float)colorToShow.RedPart; float greenPartAsFloat = (float)colorToShow.GreenPart; float bluePartAsFloat = (float)colorToShow.BluePart; float sumColorPartsAsFloat = (float)sumColorParts; int brightness = colorToShow.Brightness; // determine the relative brightness of each component in the color. rK = redPartAsFloat / sumColorPartsAsFloat; gK = greenPartAsFloat / sumColorPartsAsFloat; bK = bluePartAsFloat / sumColorPartsAsFloat; // determine the absolute value of the component in color rK = rK*brightness; gK = gK*brightness; bK = bK*brightness; } uint8_t totalCParts = (uint8_t)rK + (uint8_t)gK + (uint8_t)bK; if (totalCParts <= 255){ // apply voltage to each color component. in total we should get no more than 255 units. analogWrite(RedPinNum, (uint8_t)rK); analogWrite(GreenPinNum, (uint8_t)gK); analogWrite(BluePinNum, (uint8_t)bK); } } In this embodiment, red and purple had the same brightness. Those. in the first case, the red LEDs shone with a brightness of 255 units, and in the violet color, red was with a brightness of 127 units and blue with a brightness of 127 units, which in the end was approximately equal to 255 units:
LED strip white
The LED strip was probably the easiest thing to do.
The only difficult point is ensuring a smooth change in brightness as the time of day changes. To implement this idea, I used a linear algorithm for changing the brightness of a white LED strip.
void MainLightHelper::HandleState() { if (!IsFadeWasComplete) { unsigned long currentMillis = millis(); if (currentMillis - previousMillis > 50) { previousMillis = currentMillis; switch (CurrentLevel) { case MainLightHelper::Off: { // If the off state is declared, then reduce the brightness of the white light by one unit per cycle. if (currentBright != 0) { if (currentBright > 0) { currentBright—; } else { currentBright++; } } else { // In case of complete shutdown, stop the white fading animation. currentBright = 0; IsFadeWasComplete = true; } break; } case MainLightHelper::Low: case MainLightHelper::Medium: case MainLightHelper::High: { // In case of setting the white light level, gradually increase or decrease the brightness in one loop step if (currentBright != CurrentLevel) { if (currentBright > CurrentLevel) { currentBright—; } else { currentBright++; } } else { currentBright = CurrentLevel; IsFadeWasComplete = true; } } break; } // apply the voltage of the required value to set the brightness of white. analogWrite(PinNum, currentBright); } } }
The pulsation of the "volcano"
The idea for implementation came to me by accident. I wanted to simply turn the decorative volcano on and off by applying low voltage and high voltage to the transistor. In a fish store I found a good volcano with an outlet tube for a compressor and an LED isolated from water.
It came with an adapter that outputs 12V DC and input 220V AC. I didn’t need the adapter, since I managed the power and brightness of the volcano via Arduino.
The pulsation of the volcano itself was implemented as follows:
long time = 0; int periode = 10000; void VulcanusHelper::HandleState() { if (IsActive){ // time - cos argument in conjunction with the specified period. // the remaining coefficients are the deformation of the function and the displacement along the ordinate axis time = millis(); int value = 160 + 95 * cos(2 * PI / periode*time); analogWrite(PinNum, value); } else { analogWrite(PinNum, 0); } } The volcano perfectly illuminates the aquarium in the evening, and the pulsation itself looks very beautiful:
Water pump. Changing the water in the aquarium
The water pump helps to quickly change the water in the aquarium.
I purchased a pump that runs on 12V DC. The pump is controlled via a field-effect transistor. The device driver itself can do two things: turn on the pump, turn off the pump. When implementing the driver, I simply inherited from the BaseOnOfDeviceHelper base class and did not define anything additional in the driver. The entire operation algorithm of the device can be implemented by the base class. I tested the pump on the stand:
Although the pump worked fine, I came across one thing that wasn't obvious. If you pump water into another tank, the law of communicating vessels will begin to apply. As a result, I became the culprit of the flood in the room, because if you turn off the pump, the water will still go to another tank, if its water level is lower than the water level in the aquarium. In my case, this is exactly what happened.
Infrared port and the desire to replace it
I controlled the aquarium via the infrared port following the example of preliminary training. The essence of the example is as follows: when the controller is connected to the network, I poll the actions left, right, up, down, ok one by one. The user himself chooses which remote buttons he associates with each of the actions. The advantage of this implementation is the ability to bind any unnecessary remote control. The aquarium is trained through the Learn method, the essence of which is shown below: void ButtonHandler::Learn(IRrecv* irrecvLink, LiquidCrystal* lcdLink) { // Initialize the reception of the infrared signal from the sensor irrecvLink->enableIRIn(); // The results of signal decoding are placed in this variable decode_results irDecodeResults; … … while (true) { // If the results have arrived and they can be decoded if (irrecvLink->decode(&irDecodeResults)) { // continue to receive signals irrecvLink->resume(); // Trying to decode the signal from the remote control. if (irDecodeResults.bits >= 16 && irDecodeResults.value != 0xC53A9966 // fix for Pioneer DVD ) { lcdLink->setCursor(0, 1); // Display the decoded value in HEX format lcdLink->print(irDecodeResults.value, HEX); // Store the received signal in Arduino RAM irRemoteButtonId = irDecodeResults.value; … … Later I came to the conclusion that the remote control is inconvenient. Simply because you have to look for it and it’s an extra device in the house. It is better to implement control via a mobile phone or tablet. I had the idea to use a Raspberry PI microcomputer and run an ASP.NET MVC 5 web application on it via Mono and NancyFX. Next, use the jquery mobile framework to make the web application cross-platform. Communicate with Arduino via Raspberry via WiFi or LAN. In this case, you can even abandon the LCD screen, because all the necessary information can be viewed on your smartphone or tablet. But this project is still only in my head.
Printed circuit board and its manufacture
One way or another, I came to the conclusion that I needed to make a printed circuit board.
This happened after so many wires appeared on my stand that when assembling the finished device, some of them began to disconnect due to accidental pressure from other wires. This happens unnoticed and can lead to unclear results. And the appearance of such a device left much to be desired. Assembly on circuit boards (using Arduino Uno):
I designed a single layer PCB using Fritzing. The result is the following (using Arduino Mega):
The worst thing about making a printed circuit board was drilling. Especially when I tried to create a Shield type PCB, i.e. she dressed herself using Arduino. Drilling more than 50 holes with a thin drill is a very tedious task. And the most difficult thing is to take my wife’s new iron and persuade her to buy a laser printer.
By the way, if anyone is afraid of laser ironing technology, I’ll tell you right away - it’s very simple. I got it right the first time:
The assembly itself also turned out to be simple - it was enough to solder the main components onto the board:
But despite this, this was the first and last time I created a printed circuit board at home. In the future I will only order from the factory. And most likely you will have to master something harder than Fritzing.
Conclusion
The aquarium firmware project is posted on GitHub. It is adapted for Arduino Mega. When using Uno you have to get rid of some functionality. There is simply not enough memory, performance and free pins to connect all the modules.
Comparison of Chinese and original fish
Test | Original | China |
| operating time before the first discharge of the included batteries | 90-105 min. | 60-75 min. |
| operating time after “rest” on the same batteries | 20-45 min. | 20-45 min. |
| the next 2 tests after “rest” | 10-30 min. | 10-30 min. |
| Cycles of work with replacing batteries (we carried out 7 cycles one after another, the fish work flawlessly) | 5 out of 5 | 5 out of 5 |
| Quality, packaging | the tail is made of better quality than the Chinese one slightly transparent plastic beautiful packaging The set also includes a fish stand | almost the same as the original, only in our case the coloring is less colorful plastic is not transparent looks cheaper than the original, but in water there is no strong difference |
| Instructions | in Russian literally in 2 sentences | in English, but you don’t really need to know anything - I opened the package and placed it in water |
| Price | 600 rub. | 240 rub. |
Robot fish (robofish) have taken the toy market by storm. Nowadays there are many fakes of the original, and so we decided to figure out why Chinese fish are worse in contrast to the original (produced by ZURU) and whether this is true. In the end, we will say that Chinese fish swim just as well, not nearly inferior to the original fish.
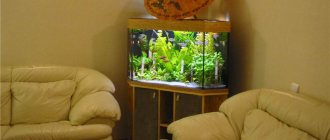
Electronic aquarium
Having an aquarium at home with bright tropical fish that will look and move as if they were alive, but nevertheless, will not need to be fed - do you think this is impossible? Not anymore.
In 2012, Zuru provided us with this opportunity.
The innovative toy Zuru RoboFish made a splash at exhibitions around the world.
ROBO FISH robot fish are practically no different from real aquarium fish. They completely copy bright and colorful tropical fish. Robot fish swim just like real ones. They know how to sink to the bottom and float up, change the speed and direction of movement. The tail movement mechanism is absolutely realistic, automatically activated in the water. Powered by two LR44 batteries (installed). Two extra batteries and a stand for storing the fish are included.
Robo-fish are not afraid to be on land. If the Robo Fish is taken out of the water, it freezes and will patiently wait until it is released again into its native element - water.
What is so interesting about Robo Fish and why are they so attractive to kids and adults?
Slightly larger than regular aquarium fish, interactive fish toys are actually quite complex devices. Their design is equipped with a miniature motor powered by a battery, a movable tail controlled by a motor and responsible for the direction of movement of the toy, a sensor thanks to which the fish avoids hitting the glass of the aquarium and the decorative elements located inside, and other modules. All this, of course, was reflected in the cost: you can buy the Robo Fish toy from Zuru in foreign online stores for an average price of $10. You can find interactive fish much cheaper on Amazon.com: there they cost $5 and up.
Despite the complexity of their design, electronic fish are safe to use and are recommended by the manufacturer:
- for children's entertainment: one or more fish can be placed directly in the bath while the child is bathing. Automatically activated when entering the water, the fish will swim there - and the baby will watch them. Or catching is also completely safe. Bath, basin, jar of water: any container with interactive robotic fish will be fun for a child;
— for decorative aquarium design: RoboFish electronic fish do not need to be fed, they are not capricious regarding the temperature and purity of water, they go well with any decorations and aquatic plants in the aquarium - and at the same time create a feeling of comfort and the presence of “living creatures” in the house;
- for jokes and pranks: will dad, mom or grandma be surprised if in a filled bathroom, under a layer of foam, there suddenly turns out to be a floating fish? You can check!
By the way, the Robo Fish does not need to be controlled: it activates itself when placed in water and turns off when removed from it. Among the few disadvantages, perhaps, is the need to periodically replace the batteries: one battery lasts approximately 6 hours of operation. A nice thing is the wide selection provided by the manufacturer. These are robotic fish, differing in:
- sizes: length 7.6 cm, 12.7 cm, 20 cm, 45.7 cm and more (up to 1.7 meters), for an aquarium or even for a large pool; - design: translucent, colored, speckled, striped, etc. In most cases, the design of floating fish toys repeats the appearance of real fish - tropical, brightly colored; — temperament, speed of movement and functions: the manufacturer has provided fish with different speeds of movement in the water, robotic fish that swim in five directions (up and down, right, left and straight), or imitate eating food at the bottom of the aquarium, other options; - the presence or absence of backlighting: the Robo Fish LED series has built-in LEDs that turn on while in the water and play the role of colored decorative lighting in the aquarium - interactive fish floating and glowing in different shades look especially impressive in the dark; - by name and other factors: Clown Fish, Purple Dottyback, Yellow Lantern and others - each fish has its own name and even a halo of the original’s habitat in nature - it can be found on the manufacturer’s official website ZuruRoboFish.com in the products section.
Trying to guess all the desires of users, the developers of floating toys also provided the opportunity to purchase accessories for them. These included plastic corals, castles, houses, small transparent plastic bowls, compact aquariums and even nets that can be used to catch overly nimble electronic fish. Accordingly, you can buy a robotic fish separately, in a set of several specimens of different colors, or with selected accessories.
well...it's better to see it once
Advantages and disadvantages
Robot fish can swim in any container of water. They can be placed in an ordinary jar, in a bathtub, in a mini-aquarium, or in a children's pool.
- The main advantage is that in this case there is no need to purchase and use auxiliary technical equipment - filters, aerators, compressors.
- There is no need for aquarium chemicals to combat algae, since it is enough to simply pour out the old water and add fresh water.
- There is no need to purchase fish food and, accordingly, clean the aquarium of debris.
In addition, real ornamental fish can get sick, and the only “disease” of RoboFish is associated with a drop in the voltage of the autonomous batteries.
By the way, when purchasing such a toy, you should make sure that you have two spare batteries.
Just like in a real “living” aquarium, an aquaworld inhabited by robotic fish can be decorated with underwater grottoes and castles, artificial plants can be placed and fixed (and not necessarily aquatic ones!), colorful soil can be beautifully laid out, and even the water can be tinted with non-aggressive dyes. In short, using RoboFish at home or in the office allows you to use your personal imagination to its full potential.
Of course, robots (including those that look like fish) will never completely replace living beings. Artificial moving fish are not suitable for lovers of real, natural nature. However, as a toy or colorful decoration, an aquarium with RoboFish can decorate any room and bring joy to your children!
You can buy robofish (robo fish) right here on the website
From a technical point of view, this device can be called an electronic device that turns on when it comes into contact with water.
This “toy” for children and adults was invented several years ago by Japanese engineers and designers. In principle, scientists and engineers from the Land of the Rising Sun have long been at the forefront in the process of creating various technical innovations, which then become popular throughout the world. This is exactly what happened with robot fish, the demand for which is only growing every year.
The electronic device, located inside a waterproof plastic case, consists of an electronic chip (control element) and a micromotor. Of course, there must also be a power supply. Its role is usually performed by small batteries (for example, alkaline batteries RL44, A76 or similar). The sizes of artificial fish can vary, and the most common are “toys” that are about 7–8 cm long.
The color range of aquarium robots is varied: red, blue, green, black, gray, spotted, striped. It is impossible to list all the types of colors of these “toys”.
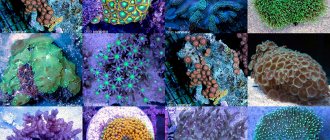
It should be noted that artificial electronic fish most often imitate certain types of living aquarium fish.
LEDs built into the device body turn on when ambient light decreases. In the evening and at night, the aquarium is illuminated by the fish themselves; it is a very original night light, where the light source is a flock of floating robots, very similar to real inhabitants of the water element.
Invented relatively recently, small aquatic robots received the international name RoboFish, which literally means “robot fish.” Precisely and without excessive imagination.
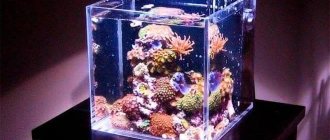
Small tabletop aquarium with USB power, lighting, pump, organizer and clock
A small tabletop aquarium is an interesting decoration for a computer desk or a good gift. A 1.5 liter transparent aquarium is combined with a clock and an organizer compartment. The aquarium has color LED lighting, and you don’t need to bother with a water pump or aerator - everything is already provided. Powered by batteries or USB. Review of a small tabletop aquarium. More like a gift or a trinket for the table than a serious aquarium. The capacity is only 1.5 liters. Although it may be someone’s first aquarium with their first fish.
Looks great on a computer desk. Suitable as a stationery organizer
Power supply: USB or batteries (3*AA). The rear panel has a power connector, pump and backlight switches.
By function: 6-color LED backlight or two color changing modes. There is voice acting: the sounds of frogs, birds, the sound of water, etc. The watch has a built-in calendar, alarm clock, and thermometer. Dimensions: 24 x 20 x 10 cm. Weight about 700 g.
I received the aquarium in a small box, slightly dented.
I was most worried about the glass - but it was packaged well.
Inside, the aquarium rests on foam inserts + a bag. The kit includes artificial greenery, soil, and a MiniUSB cable for power.
Appearance of the aquarium
No batteries included.
The lamp has a flexible metal “leg” and is quite bright.
The pump is located inside and supplies water to this faucet. At the same time, aeration is obtained (due to the waterfall).
As promised, there is a compartment for stationery
MiniUSB cable for powering the aquarium and aqua soil. There is very little soil, it is large (painted pebbles).
I washed the container, then took it apart, I was really curious what kind of pump was inside. It's not very difficult to understand. The design is simple, cheap, but well thought out - there are connectors, connecting tubes, etc. This was clearly not done just once. True, the food is made simplified. Two batteries (3V) power the clock and LED backlight, and all three are connected to the pump. The pump can also be powered from USB (there are no additional power switches).
We take out the tube from the pump (rubber seals are visible). Please note - the LED lamp is connected using JST (model) type connectors.
We take out the plastic podium from the container; the pump is hidden under it. The aquarium pump is very small, without a built-in filter (the sponge is separate), without markings, and very low performance and power. The sponge is used to filter debris. If you have artificial fish and artificial plants, its function is reduced to a minimum.
Appearance of an aquarium pump
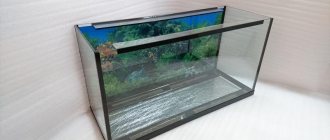
Acrylic tank 1.5 liters
Plants from the kit (very inexpensive) and aqua soil
We wash everything, load it, fill it with clean water without chlorine and at room temperature.
Let's check the pump's operation. Consumption with lamp and pump is about 0.2A at 5V. When operating on batteries, the water pressure is slightly weaker. It makes more sense to leave the batteries as a reserve.
Screen consumption report
But without lighting, consumption is reduced by more than half.
Separate lamp consumption
I released fish and snails.
Housewarming now)))
The most interesting thing is the aquarium. It’s nice that “modern” functions such as an organizer or a clock are combined, but first and foremost this is an aquarium. A clock, or rather a multifunctional unit with a clock, calendar, alarm clock, thermometer and backlight and voice control is a very interesting thing. There are several colors and modes with changing the backlight color. There is a voice function - various sounds of nature, apparently to calm you down. I don’t use it much, I prefer the “gurgling” sound of the pump. The pump works quietly, the falling water makes a small noise - this is actually a soothing sound. The aquarium turned out to be small, it is better not to add more than 1-2 small fish. As an option, you can breed snails or shrimp. Or you can not bother and leave the artificial vegetation and launch an artificial fish, which will imitate movements from the flow of water. The child appreciated the “natural” aquarium)))) So you can take it as a gift as an inexpensive trinket. A real aquarium, of course, is no substitute for this.
The tabletop aquarium can be purchased for $26.59 with coupon HXF5PER.
Thank you for your attention!))))
The product was provided for writing a review by the store. The review was published in accordance with clause 18 of the Site Rules.
Test results in more detail
1. The original floats for about 90-105 minutes, after which it floats for another 20-30 minutes, but due to the lack of battery power, the movements are sluggish and there is no particular sense, after drying and “resting” it floated for about 30-45 minutes, then the same amount , as a result, the average operating time is about 3-4 hours.
2. Chinese fish swim for less than 60-75 minutes and stop moving almost immediately after the battery runs out. After a “rest” they swim again, without replacing batteries, for about 30-60 minutes, so the operating time of Chinese fish and the original ones is approximately the same. Also, after the “rest”, the fish also swam for some time, in total about 3 hours.
3. After 3 battery replacement cycles (this is about 10 hours of operation), both the original and the Chinese fish work flawlessly.
As a result, we think it doesn’t make sense to overpay 2 times for the original, especially since after an hour the fish are already fed up with swimming and if you put them in the bathtub when bathing a child, you won’t bathe him for more than an hour either. In the end, it all depends on the batteries; the better they are, the more the fish will swim, and the operating time will be approximately the same.
RECOMMENDATIONS: fish swim better in square containers, because... in round ones they almost always swim in a circle. Change the batteries after thoroughly wiping the fish from the water.
Decorative mini aquarium USB
Detailed information about methods of payment and delivery of goods
The main currency on the site is the Russian ruble, the choice of displaying prices in another currency (Tenge, Hryvnia, US Dollar, Euro, Belarusian Ruble) at the top of the site.
All products, with the exception of “SugarBae” products, will be shipped within 3 business days from the date of payment of the order.
Tourmaline, jade rugs and pillows “SugarBae” will be shipped within 5-7 business days from the date of payment of the order!
Delivery is carried out directly from the manufacturer!
DELIVERY
For individuals:
Throughout Russia: by the postal service of JSC Russian Post
To other countries: by the postal service of the country that will be indicated in the order.
For legal entities:
JSC Russian Post: to the post office or by courier to the door;
Transport company: based on the tariff, delivery to the point of delivery or office.
COST OF DELIVERY
On the checkout page you will see all possible delivery methods for the selected products!
For physical persons :
180 rubles - in Russia (except for the Republic of Crimea);
650 rubles - to the Republic of Crimea, to the CIS countries and neighboring countries. If another currency is selected, the amount will be automatically recalculated at the ruble exchange rate.
Free delivery is valid for orders over 2,700 rubles or also at the exchange rate to the ruble in the selected currency.
For legal entities:
from 550 rubles - calculated individually, depending on the batch size, packaging and remoteness of the region;
DELIVERY PERIOD
For individuals: from 10 to 30 working days (depending on the work of postal services).
For legal entities: from 15 to 30 working days!
PAYMENT
We do not work with cash on delivery (payment at the post office upon receipt)!
Our online store operates a 100% prepayment system, i.e. payment after placing the order, and not upon receipt at the post office!
If it is not possible to pay for the order during a business day, you must notify us by email [email protected] or contact the “Online Consultant” directly on the website, indicating the exact date of payment for the order.
PAYMENT METHODS (select when placing an order)
- “Bank card” (Visa, MasterCard, Maestro and MIR) - commission 0%
- “YANDEX money / Yu money” (electronic wallet) - commission 0%
- “QIWI wallet” (direct transfer to another Qiwi wallet) - commission 0%
- “Sberbank-online” (payment through the personal account of Sberbank of Russia) - commission 1%
- “Sberbank of the Russian Federation” (in cash through an ATM or a branch of a Sberbank branch) - commission 1%
- “ Bank card ” (for residents of the CIS countries and neighboring countries) - commission 10%
- "QIWI wallet" (via the Robokassa payment system) - commission 10%
- "Svyaznoy" (payment in cash) - commission 10%
- Euroset (payment in cash) - commission 10%
- “From a mobile phone account” (Beeline, MTS, Tele2) - commission from 5% to 10% ( depending on the operator)
- “Payment terminal” (cash payment at any terminal) - commission from 0% to 5% (depending on the terminal)
Payment via Qiwi wallet is a convenient way for buyers living in the CIS and neighboring countries, because It is possible to choose a different currency.
For legal entities:
Payment only by bank transfer (we issue an invoice for payment). Please note that we work without VAT, due to the taxation of the simplified tax system (income 6%)
ORDER VALIDITY DURATION
Due to the fact that we do not reserve goods, the order is valid within one working day from the moment of registration. If you were unable to pay for the order immediately after placing the order and did not inform our support team of the payment date within 24 hours from the moment the order was placed, the order will be automatically canceled on the next business day!
To extend the validity period of your order, contact the “Online Consultant” or send an email to [email protected] .
HAPPY SHOPPING!