An aquarium without a filter is a mockery of its inhabitants. Every self-respecting aquarist takes care of everything: the size of the reservoir, the compatibility of the fish, the condition of the water. Maintaining the necessary balance in the pool is ensured by equipment: filters and aerators. These are the devices that need to be purchased first. But the cost of these devices sometimes exceeds the cost of the aquarium itself. Therefore, it makes sense to make a homemade external filter yourself.
An external filter is convenient because its design does not steal the useful volume of a home pond. It is easier to care for. It can be integrated into the interior as an integral part or, on the contrary, hidden from view.
Why do you need a water purifier?
The aquarium filter performs the most important functions by maintaining a constant internal environment in the tank.
The purpose of this device is to:
- mechanically purify water from dirt;
- eliminate harmful decomposition products of organic matter by physical, chemical and biological means;
- mix water, improving gas exchange;
- in some cases, additionally enrich the water with oxygen.
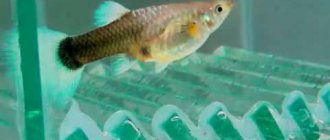
Often, pampered tropical fish even die in a tank in which the water is not constantly filtered. It is not for nothing that aquarists around the world have not stopped using devices from this group for many decades.
81: Homemade cheap internal super filter. BALANCE.
I am often asked to give advice on which internal filter to choose, since external ones are quite expensive.
Honestly, it’s difficult to advise anything here - as a rule, all internal filters have a tiny size of filter material, through which water is also washed with high pressure, which makes it impossible for bacteria to develop normally. In other words, most internal filters have zero biofiltration.
Some introductory information:
As a rule, the cause of most fish diseases, bacterial attacks, plant death, and rapid development of algae is a weak or absent bio-BALANCE in the aquarium. Even mechanical turbidity in water (suspension) is also the result of balance problems.
Conversely, aquariums with an “iron” balance delight owners with their “problem-free” operation.
Bio-Balance in the aquarium:
A very large number of chemical and biological processes occur in the aquarium.
The main processes are the nitrogen cycle (albeit not complete):
1) The aquarist feeds the fish, and the fish themselves find what to eat in the aquarium. The fish are joined by snails and other inhabitants of the aquarium.
Plants also consume nutrients from soil and water, including CO2 and light.
2) All these living creatures and vegetation produce waste products. Fish and snails “pee” and “poop”; old roots and leaves of plants die off.
Uneaten food is also added here.
This organic matter already contains a very toxic substance, urea, and when it decomposes, ammonia/ammonium is released - quite poisonous for fish.
3) That is, this organic matter must be removed from the aquarium!
This is done in two ways:
a) By an aquarist - using weekly water changes (usually 30% of the volume of the aquarium per settled water), as well as “siphoning” the soil once every two weeks and sometimes washing the filter from coarse detritus;
b) Processed by bacteria and microorganisms.
The main ones in this process are nitrifying bacteria, which convert ammonium/ammonia into nitrites (which are less toxic), and nitrites into nitrates - into an even less toxic substance.
4) Organic matter processed by bacteria is good nutrition for plants; its excess is also removed through water changes.
5) Oxygen is necessary for the life of fish, bacteria, and at night plants. During the day, plants receive carbon dioxide for photosynthesis. The saturation of water with these gases from the air is ensured by round-the-clock AERATION.
It must be emphasized that round-the-clock aeration is very important for an aquarium.
and that aeration saturates the water not only with oxygen, but also with carbon dioxide, necessary for plants.
It is precisely the balance of all these processes that is BioBalance
in aquarium.
With a good, stable balance, the water in the aquarium will be crystal clear, the algae will be very uncomfortable compared to the plants, and the fish will rarely get sick.
It is very easy to spoil the balance due to inexperience. For example, in most aquariums it is enough to turn off the filter or aeration at night and these very necessary bacteria will suffocate and, instead of purifying the water of toxic organic matter, on the contrary, they will poison it by decomposing. The result can be very disastrous for all living things in the aquarium.
Bio-filtration.
A very important point in creating this Balance is the life of bacteria. Including nitrifying ones. It is these bacteria that allow the aquarium to cope with any changes, such as overfeeding the fish.
These bacteria live on any surfaces in the aquarium. But as a rule, the surface of the aquarium walls, plants and soil alone is not enough for a stable balance. Therefore, an effective biofilter is necessary, especially for beginners.
I have verified more than once that the advertising is not entirely accurate; it refers to the notorious “balls” and ceramics as a biofilter. But in fact, bulky padding polyester and a good sponge are much more effective than these “innovations”. The main thing is that there should be a lot of this filter material so that bacteria have enough space to live - this will give a greater margin in the stability of the Balance.
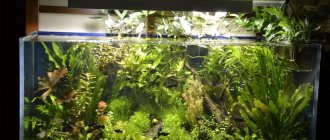
Of course, the best solution would be a volumetric external filter filled with sponges and padding polyester. An example is my converted external filter (Tetra EX 1200 Filter Conversion for Ground Aquarium).
But novice aquarists cannot always afford (or consider it unnecessary) a good external filter and buy an internal one, which as a biofilter is zero in efficiency.
Cheap and effective internal filter.
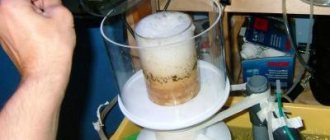
Large foam sponges have long established themselves as excellent biofilters for fish breeders. They are really excellent biofilters, they are easy to rinse and the dirt is visible. You just need to add a low-performance pump to them. This is exactly what I did.
Take this construction not as a guide to action, but as information for thought.
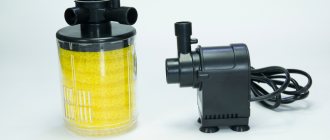
We took a tiny Chinese internal filter for 150-200 rubles (it was used once not as a filter, but as an additional sprayer during repair work on the external filter). This filter had the inscription 320 l/h on it, i.e. under “ideal conditions” it can pump 320 l per hour of water. ATTENTION: it is not designed for a 320 liter aquarium, but can simply pump a certain amount of water per hour. In reality, it is not suitable for any normal-sized aquarium due to its extremely low efficiency, but in a three-liter jar it will make a revolution with its flow.
After this filter was found in the garage, two sponges were purchased for it: one large one, for entry, for 100 rubles. and the second, small one, for 70 rubles. to the output - to break the output stream.
The filter canister was removed and an L-shaped tube from some kind of filter was glued in its place. The material is similar to plexiglass. I checked: both the tube and the filter material dissolve very well in acetone - so I simply dissolved an equal amount of both materials in acetone (the dismantled canister and pieces of the tube) and firmly glued it with the resulting glue. A large sponge was put on this tube, and a small sponge was put on the outlet tube (without air leakage). That's it, the effective filter is ready
Filter designs
Functionally, filters are divided into internal and external . The designs of internal filters are ordinary. They tend to be small in size and have low performance. They operate using a microcompressor that supplies air through a tube. Air bubbles rising in the tube capture water with them and raise it above the water level in the aquarium. The resulting flow of water passes through the filtration material and thus the aquarium is cleaned of dirt. Such filters, in accordance with their operating mechanism, are called airlift filters .
External filters are most often used for large-volume aquariums. They are driven by an electric pump, which forces aquarium water through the filter material located in the filter housing. Such filters are complex, relatively large in size and are installed next to the aquarium or hung on its wall.
Types of filters
All filters are conventionally divided by type of design and filtering method.
By type of construction they are:
- Internal,
- External,
- Biofilters.
The internal ones are located directly in the aquarium. This is the cheapest option, but you can’t rely on the quality of cleaning. It is advisable to use such devices in small containers. They require more frequent care, which is not very good for the inhabitants of the reservoir, since constant interference with the aquatic environment disrupts its biobalance. Another problem faced by owners of internal filters, especially the bottom design, is frequent blockages and low performance.
External filters are good because they do not take up space in the aquarium. Caring for it is not particularly difficult. Replacement of filter layers is required much less frequently compared to internal filters.
Biofilters are a different story of water filtration. An incredibly beautiful addition to the interior that fits organically into it. Requires more complex, but very pleasant in its essence, care.
Common mistakes
It often happens that you cannot assemble the filter yourself. If the unit does not fit tightly into the housing, then most likely the filtration baskets are overfilled or incorrectly placed. Sometimes the drainage holes are not aligned correctly. It happens that the rubber gaskets do not fit into their grooves.
The causes of filter leakage can be:
- The device head clamps are not tightly closed. This can happen due to the usual carelessness of the master. The human factor takes place in any field of activity. Fixing the problem is not difficult - just tighten the clamps more tightly.
- Gasket/seal contaminated. Of course, this will not happen in a newly assembled filter, but this happens in operating installations. The rubber seals must be cleaned of mucus and dirt, preferably lubricated with Vaseline or another substance. To avoid this problem, it is important to check the system status once a month.
- The gasket is not inserted correctly.
How to clean the device yourself?
A homemade filter will not need cleaning for a long time. If the installation has been in operation for a long time, you can clean it yourself. To do this, you need to disconnect the filter from the power supply and flush the system of dirt and mucus. For convenience, it is better to use several types of filter material. Mechanical cleaners should be washed at least once a week.
Read also: Crafts from a Barbie doll on the theme of autumn
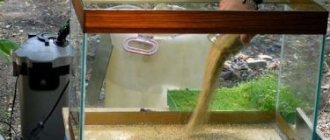
How to make an external aquarium filter at home
Let's consider one of the options for making a homemade external filter for an aquarium .
The design diagram looks like this:
- the filter takes a cylindrical shape, the device will be positioned vertically,
- an electric pump is responsible for the movement of water, which must be installed at the top of the structure,
- water flows from the bottom of the structure through the fillers, and then flows back into the aquarium,
- filter materials - different filler options are possible.
To make the device you will need:
- two interconnected plastic pipes with a rubber cuff inside,
- two plugs for the ends of the pipe,
- fitting,
- faucet,
- electric pump,
- nuts,
- FUM tape,
- wrenches included in the set.
How to make your own silent aquarium filter
crazy hands
The price of a finished deep biological treatment station for a family of two or three people is no less than 60 - 70 thousand rubles. At the same time, a septic tank of sufficient productivity, made by yourself, will cost 3-5 times less; however, it will provide a much worse degree of purification.
At high groundwater levels, soil purification becomes problematic; dumping sewage onto the terrain or using it for irrigation is also not an option: the smell of sewage knows no mercy and is overwhelming. What to do?
The obvious solution is to attach a biofilter to a one- or two-chamber septic tank.
General principles
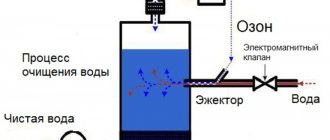
- The most effective scheme is a biofilter with aerobic bacterial cultures and forced aeration. With a minimum volume, it provides the maximum degree of purification of septic tank wastewater.
This is the most effective, but not the only solution. Here is a diagram of a septic tank with an irrigated anaerobic filter.
- Efficiency will require costs. Forget about cheap aquarium compressors: their performance will not be enough. Our choice is special compressor stations for septic tanks with a capacity of 60-120 liters per minute.
The compressor in the photo has a capacity of 60 l/min.
- Simply supplying air to the bottom of the biofilter tank is not enough. One vertical chain of bubbles will aerate a small portion of the effluent volume. The simplest aerator is a sewer pipe with a diameter of 40-50 mm, plugged at one end, with frequent perforations made with a drill with a diameter of 4-5 millimeters.
Tip: if the pump performance is sufficient, you can use tees to assemble a simple comb that will saturate the entire volume of the biofilter container with air.
Capacities
We have already found out that a container with an aerated biofilter is only one of the chambers of the septic tank, the last one on the path of wastewater.
What materials can it be made of?
- The ideal solution is a polyethylene water container. As a rule, in its lower part there is a pipe for a relief valve; in our case it will be useful for connecting the compressor. Of course, through a check valve: getting septic tank wastewater into the electric air pump is clearly not in our interests.
A horizontal polyethylene container is a ready-made section for a septic tank.
- In a brick or concrete septic tank, it is possible to fence off a small section in the secondary sump and provide it with two overflows - inlet and outlet.
- Finally, an old steel barrel can serve as a container. A simple instruction will help protect it from rust: the outer and inner surfaces are covered with two layers of bitumen mastic.
Filling
Actually, we have already mentioned the most affordable options.
- Expanded clay is the cheapest filling possible. The large surface area is provided by its porous structure.
Expanded clay is used as filling.
- Somewhat more expensive (but also somewhat more effective)... yes, plastic dish scourers. They are placed in a container without compaction, filling its entire volume.
DIY external filter
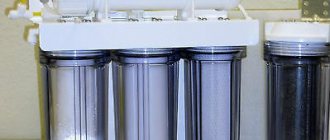
Before you begin making an external aquarium filter, you need to prepare all the components. To work you will need:
- water pump;
- sewer pipe having a diameter of 110 mm;
- 4 plugs;
- 4 input glands;
- Mayevsky crane;
- transparent hose with a diameter of 80 mm;
- a tap that will regulate the outlet pressure;
- selected fillers;
- silicone
Don’t forget to prepare the necessary material. Often, in the manufacture of filter systems, pumps are used that were used, for example, in old submersible filters. It should be noted that such a device can be used for both classical systems and nanoaquariums. The latter have gained popularity due to their compactness and ease of placement in any room. Step-by-step process for making an external filter for an aquarium with your own hands:
- As the basis of the filter device, you can take a connecting coupling, the internal diameter of which is identical to the diameter of the internal pipe at the point where the plug enters. You can use plastic plumbing pipe or coupling for repair. It is necessary to cut a piece 17-20 cm long.
- In one plug, cut 5 holes into which the Mayevsky tap will then be installed, as well as seals. It is necessary to take into account the fact that the holes must be made 1 mm smaller than the diameter of the seals and tap.
- Fix all parts tightly; for better sealing, it is recommended to coat the joints with silicone.
- Place a hose on the pipe that comes out of the pump and secure it tightly. It is necessary to select the size of the hose as accurately as possible so that it fits tightly onto the tube. Then insert the structure into the seals and tighten it. The pump should fit tightly onto the plug. Pull the wire from the pump into one of the small glands, cutting it first.
- Insert a PVC tube into the second steel piece. Then put a hose on it to collect the liquid. The distance between the bottom of the filter and the pipe must be at least 1 centimeter. Coat the plug with silicone and then insert it into the coupling.
- Trim the protruding sides on the two plugs so that they can be easily placed inside the housing. Then drill multiple holes: one should correspond to the diameter of the intake pipe, the rest should be made small so that water circulates in the filter unit. Close the pump so that it is located inside between the two plugs.
- Make the bottom cover of the filter device. To do this, you need to remove the end part of one of the plugs with holes. Reduce the diameter of the cut ring by about 1 cm.
- Cut a ring from the tube, the height of which should be equal to the distance between the two plugs. Assemble the parts together and place filler in the filter element.
- The external filtration system for the aquarium is ready. During the work, one of the small seals remained unused. The temperature sensor can be removed through it so that it does not interfere with the inside of the aquarium.
If a larger filter is needed, a more complex model can be made using a similar principle. The assembly diagram is identical to the previous one, but a biofilter and foam rubber can be used as filter materials, which will be placed on a mesh partition.
Difficulties may arise when cutting foam rubber into the required pieces. Experts give the following advice: moisten it in water and leave it in the freezer for 1-2 hours. After this time, the material can be cut into convenient pieces. Allow the foam to dry, and then begin the process of placing it in the filter unit.
SAMP manufacturing process
First, we decide on the dimensions of our future biofilter for the aquarium (I chose my dimensions based on the size of the cabinet).
We glue the body according to the same principle as the aquarium, which I talked about in the previous article. I recommend using at least 5mm glass thickness for the case. (personally, to make my biofilter, I used 6mm), partitions can be made from 4mm. glass
After gluing the biofilter housing is completed, it must be dried and filled with water to check for leaks. After this we begin to glue the partitions.
The first and third partitions must be glued at a distance of 2 cm from the bottom; for convenience, a piece of foam plastic of the appropriate thickness can be placed under the partition. We thoroughly degrease the adhesive areas. Do not forget that there must be gaps between the partitions and side walls of 1-2 mm. Next, we fill these gaps with silicone.
If you want everything to work out beautifully, it is advisable to glue the partitions not all at once, but one by one, so that when gluing subsequent ones you do not disturb the location of the previous ones.
When gluing 2 and 4 partitions, it is necessary to place matches under them to ensure a gap of 2 mm. (which will later be filled with silicone).
Nitrogen cycle
In order to effectively influence the living conditions of the aquarium inhabitants, it is necessary to have an understanding of the processes occurring in the aquarium and the filter.
The main water pollution occurs as a result of feeding the inhabitants of the aquarium. Moreover, it does not matter whether the food is completely eaten or its remains have fallen to the bottom. Uneaten food and metabolic products secreted by fish are the main suppliers of organic compounds participating in the cycle of biological transformations with the help of various microorganisms (nitrogen cycle).
Nitrogen cycle
The first stage of this cycle, called mineralization, consists of the utilization of complex nitrogen-containing organic compounds to simple inorganic ones. The result of the decomposition of animal waste products is ammonia NH3, which is dangerous for living organisms even at a concentration of 0.01 mg/l. Ammonia interacts with hydrogen ions H+ present in water, or with water molecules, to form ammonium ions NH4+, a less dangerous but also toxic substance.
The ratio of ammonia to ammonium depends on a number of factors. One of which is the active reaction of water (pH). At pH values below 7.0 units, the ammonia content in water is negligible. So, at a pH value of 7.0, the proportion of ammonium is 99.5%, and ammonia is 0.5%. At pH values greater than 7.0 units, the proportions are somewhat different. At pH = 7.5, the ammonium content is 96%, and ammonia - 4%, and at a pH value of 8.0, the proportion of ammonium will be 92%, and ammonia - 8%.
Water temperature can also affect the ratio of ammonia and ammonium, at the same pH value. At higher temperatures, the ammonia content in the water will be higher. And since most of the inhabitants of the aquarium come from warm tropical waters and, accordingly, the water temperature for keeping them lies in the range from 24 to 30 ° C, ammonia can become a significant problem.
The second stage of the nitrogen cycle is called nitrification; it is the process of biological oxidation of ammonia and ammonium ions, first to nitrites NO2, and then to nitrates NO3. These processes take place in an aerobic environment (i.e. rich in oxygen) under the influence of nitrifying bacteria present in the aquarium. The main role of the nitrification process is to convert highly toxic nitrogen compounds (ammonia, nitrite) into low-toxic compounds (nitrates).
Nitrates are also harmful to aquatic organisms, but their effect is much weaker than that of ammonia and nitrites. Nitrates are the end product of the nitrification process, since they are no longer broken down, but only accumulate in the water, negatively affecting fish. You can reduce the concentration of nitrates in the aquarium by replacing some of the old water with fresh water. Aquatic vegetation plays an important role in the absorption of nitrates.
Unlike nitrates, nitrites are poisonous even in small doses. Their maximum concentration should not exceed 0.1 mg/l. Since even a short stay in such water can cause damage to some internal organs of fish.
The principle of operation of the biofilter
Special bacteria act as a biofilter. Their purpose is to convert ammonia into nitrates. With only filler, without beneficial microflora, filters for cleaning aquarium water are useless. Mechanical elements can only trap dirt, but do not disinfect it.
There are 2 types of bacteria that are used to purify water:
- nitrifying - engaged in the oxidation of ammonia to hydroxylamine, which is processed into nitrite and nitrate;
nitrobacteria - convert nitrites into nitrates, which have a significantly less harmful effect on fish.
Beneficial bacteria are present on their own in the aquarium, but in small quantities. They are not like a separate substance that can be collected and poured. The hosts’ task is to provide a comfortable place for bacteria to reproduce. If there is sufficient nutrition, this happens quickly.
Filter types
Currently, two types of filters are widely used in the aquarium hobby: internal and external. Let's look at them in more detail.
External
The device is divided into many sections and looks like a box. Each section is responsible for a specific type of filtration.
There are two large types of external type devices:
- External hanging (waterfall). The filter is placed outside the aquarium. Water enters the device directly from the tank or is pumped by a powerful pump.
- Canister. The unit has the shape of a barrel. It has very large capacity. A powerful electric pump is installed at the top. Through a flexible intake hose, water from the aquarium enters the canister, then passes through sections with filter material and is discharged under the influence of sediment back to the fish. This type of device is the most multifunctional.
Currently, external filters are improved by adding equipment for heating and aerating the water.
Interior
Otherwise, such devices are called airlifts. Their operating principle is very simple and consists in lifting the filtered liquid through a special tube using air bubbles from the compressor (aerator). Such filters cannot be used for very large tanks, maximum volume is 200-300 liters.
The internal filter belongs to one of four types:
- Donny. It has the form of a plate or group of plates that are placed above the bottom and sprinkled with soil. Airlift works thanks to the tube. The unit is difficult to operate, especially for beginners, because to clean it you will have to dig up all the soil.
- "Head". The filter is equipped with a removable electric centrifugal pump, which significantly increases the efficiency and power of the entire system.
- Internal biofilter. It looks like a box divided into many sections. One of them has a container for the water collected in the aquarium, in which beneficial bacteria from the “native” reservoir for the fish settle. The effectiveness of such a product greatly depends on the volume of the aquarium.
- Glass type. Attached to the electric pump is a plastic cup with small slits for liquid intake. Inside the housing there is a filter material in the form of several removable cassettes with a sponge. If desired, you can replace the cassettes with platinum activated carbon.
Which type to choose is up to you. Then, with a little practice, you can make such a device yourself.
What is SAMP
SAMP is a separate container connected to the aquarium; it is a separate aquarium in which all aquarium equipment (pump, compressor, heater) can be placed.
Of course, SAMP will work as a biofilter for an aquarium only after some time (a month or more), when nitrifying bacteria populate the substrate in the filter (bioballs, lava, expanded clay and any porous material). And the larger the colony of nitrifying bacteria, the less problems you will have with the growth and development of your fish.
Filter materials
The following are used as filter materials:
- Cotton wool, foam rubber, padding polyester. These materials are reused many times. It is enough to wash them to remove silt and accumulated dirt. For the first tier, foam rubber is used. And for the top one - cotton wool or padding polyester.
- Rings. They are made from ceramics. Serve for uniform water movement.
- Bio-balls. Made from plastic. They are used to wash all components of filter materials. Can be used to house a colony of bacteria.
- Sintered glass. These are porous granules made from glass using special technology. Used for breeding bacterial colonies.
- Zeolite. This is a sorbent. Designed to absorb ammonium and nitrites.
- Activated carbon. Purchase special carbon for aquarium filters. Medical or construction will not work.
- Peat. Residents of the underwater world love it for regulating the acid-base balance of water and preventing the growth of fungi.
Filter wool Ceramic rings Bio-balls Sintered glass Ceramic tubes Zeolite Activated carbon Peat
First step
First you need to secure the pump. To do this, make a hole at the bottom of the container. The fitting is screwed tightly into it. It is better to take a plastic one so that you don’t have to change it in the future. It should have an intake valve that works one way only. This will be the water intake point.
Two holes are made in the top of the container. A pump will be attached to one from the inside, and a release valve will be installed in the other.
Second step
It's time to start making filter cartridges. Plastic flower pots are suitable for these purposes. Their diameter is slightly smaller than the diameter of the container. Holes are burned in each cassette through which water will pass. The number of tiers with filter materials is unlimited.
The cassettes are assembled in order: from bottom to top.
Foam rubber is placed in the first, lower cartridge. This cassette should be located just above the hole with the inlet valve.
The second cartridge contains material for finer filtration: padding polyester or cotton wool. Fiber can be used.
The third cassette contains a sorbent and filter material: zeolite, sintered glass, peat, and others. This tier is for bacteria.
The fourth cartridge contains padding polyester or cotton wool to filter out large particles, such as peat or coal dust.
Third step
Hoses are attached to the valves. Their length is calculated taking into account the height of the pool and the distance to the device.
All connecting seams are coated with silicate sealant. You can take the one that is used to make aquariums.
Fourth step
The entire structure must pass a leak test within 24 hours.
Making an external filter for an aquarium with your own hands is not difficult. It is enough to know the operating principle of the device and the elementary laws of physics.
Let's look at the SAMP design in more detail.
The first compartment is designed for mechanical water purification. You can load it with washcloths, sponges, padding polyester, and a crumpled skein of fishing line. Moreover, it is advisable to use washcloths with different degrees of porosity so that they do not clog quickly, and thereby filter the water well.
It is necessary to put an elastic plastic mesh at the bottom (you can use the bottom of plastic fruit boxes) on the racks.
The 2nd and 3rd compartments are filled with a substrate (bioballs, lava, expanded clay, porous ceramics, etc.) to populate nitrifying bacteria. Under the grid I placed sprayers connected to the compressor.
A 200W heater was installed in the fourth compartment. In my case, discus need a temperature of 28-30 degrees, so I used two heaters for a 400 liter aquarium. The second heater was placed in the aquarium.
A pump is installed in the fifth - return compartment (in my case, 2500 l/h for a 400 l aquarium)
If the length of the SAMP is less than 50 cm, then it is desirable to simplify the design; for this, compartments 2, 3 and 4 can be combined by removing the partitions.
Filling options
The most common and affordable materials for filling an aquarium filter system are padding polyester and foam rubber. They are able to take any form and also act as mechanical and biological filters. The pores of these materials provide enough space for bacteria to spread. It is necessary to periodically rinse the filler to get rid of mucus that clogs the filter system. In addition, silt can settle in the pores, which should not be inside the filtration system, interfering with its operation. There are several options for filling external aquarium filters:
- Filter wool is a budget-friendly filler that is suitable for repeated use. It is easy to clean, with its help the filter space is filled quite tightly, which eliminates the possibility of leakage. It is the best option for use at the final stage of cleaning.
- Ceramic rings are used to uniformly distribute water flows, which ensure the transport of oxygen to the bacteria.
- Plastic bio-balls. Their movement in the water promotes uniform washing of all filter materials. It should be noted that this filler can be used as a substrate to support the vital activity of bacteria.
You can fill the aquarium with various materials
- Sintered glass. The most convenient option is to purchase the material in the form of balls. A special baking technology promotes the formation of pores in products. The latter contain beneficial microorganisms that process nitrites and nitrates. The efficiency of glass is significantly higher than that of other materials used for biological treatment.
- Ceramic tubes are used to breed bacteria in small pores.
- Zeolite is a low-cost, but very effective sorbent that quickly absorbs an element such as ammonium from water. With its help you can get rid of nitrates in the aquarium.
- Activated carbon. Many experts argue about the advisability of using this material for cleaning aquariums. Some people tend to think that it is better to use small granules for filters. It should be noted that they should have many pores, because this indicator affects the absorption efficiency. In addition, the quality of the material can be determined by the presence of characteristic shine and special dust. Before placing material into the filter system, it must be thoroughly rinsed.
- Peat is a natural material for filtration systems. It is affordable, successfully copes with many tasks - it reduces the Ph level, slows down the growth of fungi, and has a positive effect on the inhabitants of the aquarium.
All of the above fillers can be found on the shelves of pet stores.
Biological filters and their elements
Modern aquarium filters perform not only biological, but also mechanical cleaning. A number of devices are supplemented with chemical filtration components. When selecting this information, experienced aquarists take into account.
The basis of biofilters for an aquarium are considered to be microorganisms that process ammonia. For their development and maintenance of their vital functions, an appropriate substrate is required.
A biological filter is constructed from the following types of fillers:
Foam rubber
This biofilter filler is used by beginners. After all, with the help of such raw materials, mechanical cleaning of the liquid from large and small impurities is carried out. Beneficial bacteria are planted on the foam rubber. Foam rubber is suitable for completing small tanks where the load level is low. But such material needs regular cleansing from mucus and silt.
Bioceramics
The external biofilter is constructed from biological ceramics and ceramic rings. This substrate promotes the development of beneficial bacteria and the spraying of oxygen-rich liquid.
Special plastic
Balls are prepared from this raw material, the surface of which is covered with notches. When water passes through such a filter, it is saturated with air, feeding beneficial microorganisms.
Glass filter
Glass fillers are also used to clean aquarium liquid from organic residues. For their preparation, porous glass is used, for the preparation of which baking technology is used. The diameters of such balls reach 0.8–1.2 cm. Beneficial microorganisms settled in such balls rid the reservoir of nitrates and toxic components.
Internal fitting
Making an external filter for an aquarium is much more difficult than making an internal one. This is due to the fact that the latter is simpler in structure, so even a novice aquarist can make it. To make the device you will need:
- plastic bottle with a capacity of no more than 0.5 liters;
- padding polyester;
- a plastic pipe whose diameter is equal to the neck of the bottle;
- hose and compressor;
- pebbles
Follow the filter manufacturing instructions.
The latter will be used as a filler. Step-by-step master class on making a filtration system:
- Divide the bottle into two parts so that one is larger than the other. The smaller part should have a neck. Point the bowl upside down and apply enough force to get a tight structure.
- Make holes on the outside of the circle for water to pass through. Their diameters should be 3−4 mm. The optimal placement option is 2 rows of 6 holes.
- Pass the pipe through the neck of the bowl so that there are no gaps between them.
- Make the pipe long enough to be located above the surface. The structure itself should not be at the bottom, preventing the flow of liquid.
- Pour a layer of gravel onto the bowl, and then lay out the padding polyester. Install the hose into the tube and secure it. Place the structure inside the aquarium. After turning on the compressor, the device will start working. After a little time, live bacteria will begin to appear in the device, which are necessary for the breakdown of ammonia into nitrates.
The principle of operation of the filter is as follows: air bubbles entering the pipe move upward and then attract water flows. The air-saturated liquid enters the top layer of gravel, then moves downwards, ending up in the aquarium. Cleaning is carried out by a layer of padding polyester, which prevents silt from settling on the gravel.