Preparing an aquarium for launch is not as easy as it might seem. This includes choosing a place for it, preparing water, selecting plants, fish, soil, as well as laying it out. It will not be a discovery for many that not every place is suitable for an aquarium, not every water is suitable for the inhabitants, not every plant is suitable for the first start, not every fish will withstand any conditions. Because of these reasons, an aquarium for beginners seems somewhat intimidating. No, in fact, everything is not that complicated, but if you don’t want to see a disastrous result in a few days, then step-by-step instructions describing the entire process will help you.
Site selection and preparation
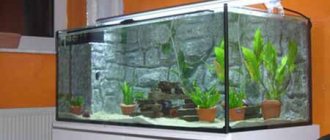
You have an aquarium of the required size, you already know who you want to put there. Where can he find a place in your home?
Choosing a location for an aquarium
You don’t need to constantly move it from place to place, you need to choose one. This should not be a window sill or a place where there may be a draft or direct sunlight. And also make sure that the place is not noisy and there is no indoor radiator nearby.
The surface of the selected location must be clean and level, capable of withstanding high pressure. The edges of the aquarium should not protrude. If the surface is unable to support the weight, the bottom may crack. For more uniform unloading, you can look for soft substrates or rugs.
It is advisable that there be an outlet nearby, since the necessary equipment to support life inside will be connected to it.
After choosing a location, you need to prepare the aquarium itself for launch. It is necessary to wash it without using chemicals (no soap or detergent), you can do this with baking soda or salt. Rinse the walls with water 4 times. And also, as an option, it is recommended to fill it with water to remove traces of sealant and other harmful substances. At the same time, you can check that it is definitely not leaking anywhere. Some people leave it flooded for several days to further wash away toxic substances, after which they rid it of water.
Preparing the soil
The soil is an important part, because it allows you to create an organic microclimate, is a nutrient medium and does not allow places of stagnant water to appear. It is where 90 percent of beneficial bacteria live. Read more about choosing soil in a separate article.
Rinse the soil. If you choose pebbles or gravel, then you need to prepare salted water and boil them for 1 hour. If sand is used, heat it in a frying pan for 30 minutes, stirring constantly. After this, you need to sift the sand through a fine sieve to rid and remove small impurities. The soil is ready.
Now fill the aquarium 1/3 with water and lower the soil there. You can do this evenly over the entire bottom, you can make small slides and hillocks - it’s at your discretion. But the soil should fill the bottom by at least 4–5 cm.
Compressor
Next on the list of required equipment for an aquarium is a compressor, because it supplies air and aerates the water. When purchasing a device, pay attention to:
- power;
- noiselessness;
- air flow adjustment.
To understand the power you need, you need to multiply the volume of the aquarium by 0.5. Usually the packaging contains information about the power of the device. You can check the noiselessness only by turning on the compressor. Regarding the adjustment of the air flow, it is carried out either by a valve that blocks the flow, or by changing the performance. The second option is more economical in terms of electricity consumption and quieter.
We come up with a design
If the initial start-up of an aquarium includes a number of specific actions, then this is the moment when you can use your imagination. Now you can install driftwood, put stones, houses, pots, rocks and other accessories. Don't forget to treat them so as not to spread the infection. You can place them in random order and see what happens. Many people draw on paper how they would like all the accessories to be arranged and then place them there. No one is stopping you from moving them at your own discretion, but in order not to disturb the inhabitants, of course, it is better to do this in advance.
Aquarium decorations
When setting up a new aquarium, driftwood prepared in the summer will be used: pear roots, black currant branches, alder roots. During the summer, the driftwood and branches were prepared accordingly, peeled of bark, then soaked in frequently changed water, and then boiled in a salt solution for about 6 hours. You can read more about preparing driftwood in this article on how to prepare driftwood for an aquarium.
Natural coarse sand from the shore of the Gulf of Finland in St. Petersburg, about 2-4 mm in size, was used as soil. The collected soil is about 50 kg. Prepared before use in the aquarium: washed and disinfected. You can read more about preparing the soil in this post on how to prepare soil for an aquarium. Coconut shells will also be used as decoration for decorating the aquarium.
Soil from the shore of the Gulf of Finland
Pour in water and let it sit
Fill with tap water at room temperature. It is advisable to use special indicators (they can be purchased at a pet store) to check the parameters and make sure that they meet the standards; if not, then it is recommended to let the water sit for 12 hours, during which time the chlorine will be removed from the water. Fill with water.
A little useful advice. You can use a regular garden hose and the laws of physics. Raise a container of water above your aquarium, lower one end of the hose into it, and on the other part of the hose, apply a couple of suction forces so that some of the water gets inside it, and lower it into the aquarium. According to the law of communicating vessels, water will begin to flow through the hose. To avoid splashes, you can either place a plate on the bottom and direct the hose at it, or direct the water onto the glass of the aquarium.
Water preparation
After 2–4 days the water becomes slightly cloudy. This means that bacteria have begun to multiply. After a few days, the water will become clear, perhaps a little yellow. You can buy a special starter with beneficial bacteria and bring it inside. If you know someone with an existing aquarium that has favorable conditions, you can ask them for a filter squeeze, this will greatly help establish the environment when you are trying to start the aquarium for the first time.
Buying fish
Keeping and caring for fish is a responsible matter, because they are living creatures that require care and attention. Before you get pets, you should decide on the type of inhabitants. It is better for novice aquarists to breed fish that do not have complex contents, namely:
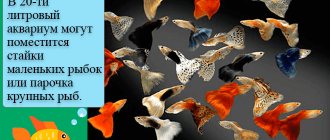
- mollies;
- guppy;
- zebrafish;
- barbs;
- platies;
- swordtails.
The above phenotypes are distinguished by their endurance, small size and bright color. Together with them, catfish are introduced, which clean the tank from food debris and organic matter, helping the owner. If you want to have exotic or larger pets, then aquarium professionals recommend purchasing the following types of fish for beginners:
- black-striped cichlamosis;
- astronotus;
- Sumatran barb;
- glass perch;
- fighting cocks.
These species are also beautiful, colorful and hardy, but they will have to be cared for more carefully. Phenotypes also require a lot of space - from 50 liters of water per specimen, and are characterized by aggressive behavior, so these species should not be kept with small fish.
Selim plants
After 5–7 days we can plant the plants. But to create a good microclimate, it is recommended to plant simple aquarium plants first: hornwort, nayas, vallisneria, anubias, elodea, Indian fern, riccia, hygrophila, ambulia. Any of these plants will cope perfectly with the formation of a biological environment.
Try to set the lighting to about 0.35 watt/l. Turn on the lights for 8 hours every day.
Launching fish
1–2 days after settling with plants, you can make your first introduction of fish into the aquarium. But only for now the most unpretentious and hardy. For example, viviparous species, barbs or zebrafish. Schooling fish have 5-6 individuals. If you have a desire, then get ampullaria snails or hymenochirus frogs.
A little about settling fish. When you bring in new fish, pour out some of the water from the container with the fish and fill this part with water from the aquarium. Leave the fish for an hour. If the fish are in a bag, you can place it in a common aquarium so that the same temperature is established. Over the course of several hours, gradually replace all the water, and then send the fish to a community aquarium.
On the first day, it is advisable not to feed the fish, because they are under a certain stress, do not be afraid, nothing will happen to them during the day and they will withstand a short hunger strike.
Remember, you don’t need to think that you can start the fish earlier; follow the instructions provided if you don’t want to start the aquarium again later.
Additional lighting
Now let's move on to discussing additional lighting for an aquarium with fish, which is also very important and necessary. The development of plants, the growth of fish, their reproduction, etc. will depend on the lamp. It is better not to use incandescent lamps for an aquarium; they are more suitable for terrariums. Yes, the price may be attractive, but they are still not recommended for use for such purposes, since they have high heat transfer and can provoke algae outbreaks.
It is better to opt for fluorescent lamps. They have plenty of advantages:
- there will be a little heat, which is what we need;
- have a wide range of spectral radiation, which is important;
- can cover a large surface area;
- they contain actinic light, which has a beneficial effect on some inhabitants of the “bottom of the sea”;
- among them there are lamps with high luminous efficiency, these are marked: VHO (Very High Output) or HO (High Output).
Beginners are advised to use T5 lamps, which, with a relatively small diameter, have high luminous efficiency and spot light emission.
There are also metal halide lamps that create a “sparkling light” effect in the tank (like the sun in shallow water). But they have the same disadvantage as incandescent lamps - a lot of heat generated. Familiarize yourself with the rules for caring for such common aquarium fish as: clownfish, veiltail, gura, guppy, barb, parrotfish, mollies, goldfish, swordtail, platie, zebrafish, betta, astronotus, lalius, minora, discus, arowana , surgeonfish, dario dario, angelfish, macropod, macracanthus, cichlids, rhodostomus and labeo.
To avoid overheating of the water, you will have to additionally equip the aquarium with cooling fans, and also turn off the lamp for at least an hour every day.
And the cost of such lighting is a bit steep. When purchasing, pay attention to the lamp power. Consider one important point - the power of the light flux should not fall below 0.5 W per liter of water. More is okay, but not less! Also consider the color temperature of the lamp:
- 5500K-6500K - for lighting shallow fresh water tanks, sometimes for a reef aquarium;
- 10000K and more - for reef aquariums, deep-sea marine plants and fish;
- 20000K and more - for deep-water artificial reservoirs.
When purchasing additional lighting, you can use this sign:
| Aquarium length | Volume (l) | Lamp length(cm) | Lamp power (W) | Number of lamps (pcs.) |
| 40 | 25 | 30 | 8 | 1 |
| 50 | 45 | 45 | 15 | 1 |
| 60 | 55 | 45 | 15 | 1 |
| 80 | 128 | 60 | 18 | 2 |
| 100 | 250 | 90 | 30 | 4 |
| 120 | 300 | 100 | 38 | 4 |
| 130 | 325 | 120 | 36 | 4 |
| 150 | 375 | 120 | 36 | 4 |
| 160 | 400 | 150 | 58 | 4 |
We monitor the biological environment
We monitor the condition of the aquarium and the fish living in it. If everything is fine: the fish are cheerful enough, the ecosystem has been established, then after another week you can continue populating with new plants and breeding new fish. It is advisable to clean the filter before moving in, as it has done a great job of cleaning. When you start breeding fish, follow the rule that for 1 fish up to 5 cm in size you need 2-3 liters of water. There is no need to overcrowd the fish, otherwise harmful substances will begin to accumulate. And also when moving in a new inhabitant, make sure that he can live with other fish; if not, then it is better to refuse breeding him.
It is advisable to check the water parameters. If you notice one of the reasons: the fish have sunk to the lower layers, cluster together, swim in pairs or in a flock, or tuck in their upper fin, you can change the water by 10–20 percent.
In about 2-3 weeks the balance will be completely established. Don’t forget to clean the filter, periodically change the water, and clean the soil.
Heater
Another component of aquarium equipment is a heater, which comes in three types:
- bottom - it is installed in the ground, which has a beneficial effect on plants;
- external flow - placed outside the tank, cutting into the filter hose, which guarantees uniform heating of the water flow;
- submersible - lowered into water to a certain mark.
When purchasing, be sure to find out about its power and functionality of the thermostat (it will control the temperature itself and, if necessary, turn the heating on and off).
Important! If the thermostat breaks and switches to heating mode, you can simply cook all the inhabitants of the artificial pond. Therefore, be careful and be sure to ensure that the device is in good working order!
If you don't know what heater power to choose, remember: 1 watt of power per liter of tank volume. But no more!
Why are all the steps so important?
As you can see, you need to delve into the information, but there is nothing difficult about starting an aquarium from scratch. Many hobbyists don’t know where to start and try to quickly introduce fish into their first aquarium; as a result, the new inhabitants die. An aquarium is its own biological system in which a certain balance needs to be established. After all, microorganisms, algae, and bacteria live in it. A certain balance must be established between everyone. Do not forget to make sure that the fish can live comfortably with other fish and with plants. Make sure that no harmful substances from outside get inside later, maintain this balance. As a reward, you will receive your own beautiful aquarium, which you can constantly enjoy.
Previous
AquariumStep-by-step instructions for creating an external filter for an aquarium with your own hands
Next
AquariumCorrect installation of LED lighting for an aquarium
Connecting equipment
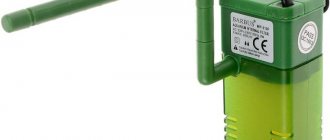
I pasted the back wall of the aquarium with a purchased background. Connected the equipment. Filtration in the new aquarium is implemented as follows. An external Atman DF-1000 filter with a capacity of 1500 liters/hour was installed as a filter in the new aquarium. To ensure biofiltration. You can read about external filters here. And also an Atman pump with a fine-pored sponge with a capacity of 1200 liters/hour for mechanical filtration of water. The fact is that, in addition to other inhabitants, the new aquarium will contain ancistrus catfish and algae eaters, and they, swimming near the bottom, raise a certain amount of turbidity, especially during feeding.
External filter Atman DF-1000
The filter and pump have proven themselves very well even when used in a 200 liter aquarium. Therefore, I decided not to buy new equipment, but to use what I already had. The heating pad is also from Atman, from a previous 200 liter aquarium. Although a new heating pad from the Italian company Aquarium Sistems was purchased, it is still in reserve. The old one copes quite successfully. A Schego compressor will also be used.

