Many experienced aquarium keepers will not breed fish without the necessary equipment to set up an aquarium. One of the leading roles is played by filtration systems, which are used to purify water from mechanical and biological components and to saturate the liquid with oxygen. You can purchase internal and external filters for an aquarium in specialized stores or make them yourself, which will save you a lot of money.
The filter plays an important role in the aquarium
Types of devices
All filters for cleaning aquariums are divided into external and internal. The latter work directly inside the aquarium, while the former purify the water outside the fish house.
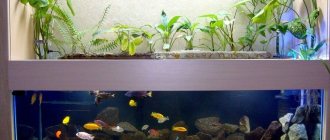
External filtration systems differ in power, type of design and content. Today, small hanging devices for small aquariums, a variety of phytofilters, and also canisters are produced. In addition, there are large filtration systems called sumps. External filters have a number of undeniable advantages:
- fit organically into the design of the aquarium;
- have significantly greater power and efficiency compared to internal systems;
- do not take up space inside the aquarium;
- Suitable for large volumes of liquid.
In this video you will learn how to make an external filter:
Of course, such devices also have some disadvantages, for example, the filtration system requires a separate location. This is not critical if there is free space next to the aquarium. The price of external fixtures is much higher than internal ones.
If desired, you can hide the filters, or turn them into a decorative element. To save money, you can make your own filter device from scrap materials. The advantage of homemade filters is that the system will be customized to the characteristics of a specific container.
You can make the filter yourself
How to care
It is necessary to carefully monitor the operation of the equipment: filtration occurs without interruptions and leaks. As pollution occurs, the power decreases and the water pressure weakens. Filter sponges are periodically checked and replaced with new ones when worn out.
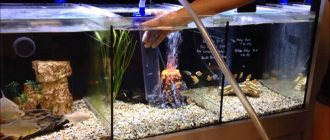
Cleaning
The filter device must be washed with water taken from the aquarium to prevent disturbance of the bacterial environment. The filler is washed with extreme care. Thorough rinsing is detrimental to beneficial bacteria.
A complete flush is carried out every six months.
Filling options
The most common and affordable materials for filling an aquarium filter system are padding polyester and foam rubber. They are able to take any form and also act as mechanical and biological filters. The pores of these materials provide enough space for bacteria to spread. It is necessary to periodically rinse the filler to get rid of mucus that clogs the filter system. In addition, silt can settle in the pores, which should not be inside the filtration system, interfering with its operation. There are several options for filling external aquarium filters:
- Filter wool is a budget-friendly filler that is suitable for repeated use. It is easy to clean, with its help the filter space is filled quite tightly, which eliminates the possibility of leakage. It is the best option for use at the final stage of cleaning.
- Ceramic rings are used to uniformly distribute water flows, which ensure the transport of oxygen to the bacteria.
- Plastic bio-balls. Their movement in the water promotes uniform washing of all filter materials. It should be noted that this filler can be used as a substrate to support the vital activity of bacteria.
You can fill the aquarium with various materials
- Sintered glass. The most convenient option is to purchase the material in the form of balls. A special baking technology promotes the formation of pores in products. The latter contain beneficial microorganisms that process nitrites and nitrates. The efficiency of glass is significantly higher than that of other materials used for biological treatment.
- Ceramic tubes are used to breed bacteria in small pores.
- Zeolite is a low-cost, but very effective sorbent that quickly absorbs an element such as ammonium from water. With its help you can get rid of nitrates in the aquarium.
- Activated carbon. Many experts argue about the advisability of using this material for cleaning aquariums. Some people tend to think that it is better to use small granules for filters. It should be noted that they should have many pores, because this indicator affects the absorption efficiency. In addition, the quality of the material can be determined by the presence of characteristic shine and special dust. Before placing material into the filter system, it must be thoroughly rinsed.
- Peat is a natural material for filtration systems. It is affordable, successfully copes with many tasks - it reduces the Ph level, slows down the growth of fungi, and has a positive effect on the inhabitants of the aquarium.
All of the above fillers can be found on the shelves of pet stores.
What does it consist of and how does it work?
A biofilter for an aquarium is an original device that is easier to assemble yourself, at home. Of course, there is equipment from manufacturers. However, regardless of type, they perform several types of cleaning. Most often this is a biological and mechanical type, but aquarists also additionally purchase chemical fillers (activated carbon, zeolite).
That is, in such devices the biofilter is only one of the components, albeit the predominant one due to its importance. However, in some cases, only biological filtration is needed. Then it’s easier to assemble the device yourself.
There are several varieties of such filters, differing in housing type, fillers and other characteristics. But, regardless of this, they all have a simple principle of operation:
- Take a container;
- Fillers are poured into it (soil, expanded clay, foam rubber, ceramic rings, foam glass, etc.). They necessarily have pores in which colonies of beneficial bacteria populate over time;
- A hose with a working element that creates a flow is connected to this body (most often a compressor is used);
- Water flows through the biofilter fillers, and at this moment the microorganisms living in the container process hazardous compounds;
- Water that is already purified and safe for fish enters the aquarium, and the remaining nitrates in it are absorbed by the planted living plants.
We recommend reading the article: Why does the water in the aquarium become cloudy?
DIY external filter
Before you begin making an external aquarium filter, you need to prepare all the components. To work you will need:
- water pump;
- sewer pipe having a diameter of 110 mm;
- 4 plugs;
- 4 input glands;
- Mayevsky crane;
- transparent hose with a diameter of 80 mm;
- a tap that will regulate the outlet pressure;
- selected fillers;
- silicone
Don’t forget to prepare the necessary material.
Often, in the manufacture of filter systems, pumps are used that were used, for example, in old submersible filters. It should be noted that such a device can be used for both classical systems and nanoaquariums. The latter have gained popularity due to their compactness and ease of placement in any room. Step-by-step process for making an external filter for an aquarium with your own hands:
- As the basis of the filter device, you can take a connecting coupling, the internal diameter of which is identical to the diameter of the internal pipe at the point where the plug enters. You can use plastic plumbing pipe or coupling for repair. It is necessary to cut a piece 17-20 cm long.
- In one plug, cut 5 holes into which the Mayevsky tap will then be installed, as well as seals. It is necessary to take into account the fact that the holes must be made 1 mm smaller than the diameter of the seals and tap.
- Fix all parts tightly; for better sealing, it is recommended to coat the joints with silicone.
- Place a hose on the pipe that comes out of the pump and secure it tightly. It is necessary to select the size of the hose as accurately as possible so that it fits tightly onto the tube. Then insert the structure into the seals and tighten it. The pump should fit tightly onto the plug. Pull the wire from the pump into one of the small glands, cutting it first.
- Insert a PVC tube into the second steel piece. Then put a hose on it to collect the liquid. The distance between the bottom of the filter and the pipe must be at least 1 centimeter. Coat the plug with silicone and then insert it into the coupling.
- Trim the protruding sides on the two plugs so that they can be easily placed inside the housing. Then drill multiple holes: one should correspond to the diameter of the intake pipe, the rest should be made small so that water circulates in the filter unit. Close the pump so that it is located inside between the two plugs.
- Make the bottom cover of the filter device. To do this, you need to remove the end part of one of the plugs with holes. Reduce the diameter of the cut ring by about 1 cm.
- Cut a ring from the tube, the height of which should be equal to the distance between the two plugs. Assemble the parts together and place filler in the filter element.
- The external filtration system for the aquarium is ready. During the work, one of the small seals remained unused. The temperature sensor can be removed through it so that it does not interfere with the inside of the aquarium.
If a larger filter is needed, a more complex model can be made using a similar principle. The assembly diagram is identical to the previous one, but a biofilter and foam rubber can be used as filter materials, which will be placed on a mesh partition.
Difficulties may arise when cutting foam rubber into the required pieces. Experts give the following advice: moisten it in water and leave it in the freezer for 1-2 hours. After this time, the material can be cut into convenient pieces. Allow the foam to dry, and then begin the process of placing it in the filter unit.
Why do you need a biofilter?
The enclosed space of an aquarium requires human participation in replacing water, which over time becomes unsuitable for life. For this purpose, biofilters are installed, the main function of which is to oxidize ammonia formed due to the decomposition of uneaten food, fish metabolic products, and the work of harmful microorganisms. The filter creates a nitrogen cycle in the aquarium, during which ammonia is converted into nitrite, nitrite into safe nitrate. The biological cleaning method occurs due to the microorganisms entering the biofilter.
Ammonia and some compounds are poisonous. For fish in an aquarium, the lethal dose of poison is 0.2 mg/liter. For some fish, the maximum content of poison in water is 0.02 mg/liter. But even with such a concentration, the fish will be uncomfortable. In the absence of harmful substances, the inhabitants of the aquarium get sick less, and the risk of water “blooming” is reduced. You can also make a phytofilter for an aquarium with your own hands.
The best way to reduce the amount of poison is to replace the water in the reservoir in parts. However, such a procedure should not be carried out every day, since it is stressful for the inhabitants and a kind of imbalance.
Internal fitting
Making an external filter for an aquarium is much more difficult than making an internal one. This is due to the fact that the latter is simpler in structure, so even a novice aquarist can make it. To make the device you will need:
- plastic bottle with a capacity of no more than 0.5 liters;
- padding polyester;
- a plastic pipe whose diameter is equal to the neck of the bottle;
- hose and compressor;
- pebbles
Follow the filter manufacturing instructions.
The latter will be used as a filler. Step-by-step master class on making a filtration system:
- Divide the bottle into two parts so that one is larger than the other. The smaller part should have a neck. Point the bowl upside down and apply enough force to get a tight structure.
- Make holes on the outside of the circle for water to pass through. Their diameters should be 3−4 mm. The optimal placement option is 2 rows of 6 holes.
- Pass the pipe through the neck of the bowl so that there are no gaps between them.
- Make the pipe long enough to be located above the surface. The structure itself should not be at the bottom, preventing the flow of liquid.
- Pour a layer of gravel onto the bowl, and then lay out the padding polyester. Install the hose into the tube and secure it. Place the structure inside the aquarium. After turning on the compressor, the device will start working. After a little time, live bacteria will begin to appear in the device, which are necessary for the breakdown of ammonia into nitrates.
The principle of operation of the filter is as follows: air bubbles entering the pipe move upward and then attract water flows. The air-saturated liquid enters the top layer of gravel, then moves downwards, ending up in the aquarium. Cleaning is carried out by a layer of padding polyester, which prevents silt from settling on the gravel.
Common mistakes
- When assembling the external filter, the component elements are not properly sealed, which increases the likelihood of a leak. Do not skimp on the sealant when gluing.
- Neglecting to check leaks or not taking enough time to identify defects can lead to leaks. The adhesive curing time and conditions must also be fully observed.
- Lack of pump power will not provide the necessary filtration of spacious containers. For an aquarium with a volume of 100 liters, a pump with a capacity of 500 l/h or more is suitable.
If you have doubts about your skills, it is better to buy a ready-made external filter. Poorly made equipment will cause a lot of problems for the aquarist and the fish.
Previous
AquariumHow to make the best nutrient soil for plants in an aquarium with your own hands?
Next
AquariumStep-by-step instructions for starting an aquarium from scratch: location, soil, water, fish
Bottom filter device
There are several types of bottom filters that can be used for both large and small aquariums. This way you can make a filter system for a round aquarium. The first option is to make the device from a plastic box. The housing is a durable plastic box with a lid. The latter should tightly cover the base. It is advisable to make the lid or body of the box transparent so that you can see the degree of contamination.
A plastic pipe is glued into the lid, then holes are made on the side. It should be noted that they must be of such a size that fish do not get into them. You must first prepare filter elements, which are then placed inside the box. It is recommended to use a ceramic water sprayer, which can be easily found in stores.
Another option is to make a filter unit using a glass jar, which will act as a housing. The container volume should be no more than 1 liter. Close the jar with a plastic lid, and then make holes to allow liquid to enter. Using another lid, make a partition on which to then lay the filtering material. An alternative to a glass jar can be a ceramic container filled with nylon threads or quartz sand.
Using the methods described above, you can make homemade filters for an aquarium. The main thing is to arm yourself with perseverance, ingenuity and patience. Self-made equipment will help not only save money, but also get a device that is ideal for each specific case.
Tips for aquarists
If the filter suddenly fails and there is a very large release of contaminants back into the water, emergency measures must be taken. Such decisive actions most often include a complete reboot of the aquarium.
It is produced in several stages:
- First, all residents should be resettled in separate tanks.
- Throw away the old soil or treat it thoroughly by rinsing it under running water and calcining it in the oven for at least an hour at a temperature of 180-200 °C.
- Replace all filter elements and the device itself, and, if necessary, the aerator.
- The decorations should be washed with a stiff brush and then soaked in a concentrated (dark) solution of potassium permanganate for 15 minutes.
- The aquarium container itself can be washed with potassium permanganate or peroxide. The ideal option is to fill the container with a bright pink permanganate solution for at least three hours.
- Having refilled the soil, installed decorations and equipment, it is necessary to fill the aquarium with settled water. Allow the system to settle for 4-7 days, and only then plant the plants and, after a couple of days, introduce the fish.
This case describes a process carried out to neutralize nitrate contamination and attack by blue-green algae (cyanobacteria) that have settled in the pores of the filter material. Remember that restarting is a dangerous process for fish; it should be resorted to only in extreme cases so that the risk is justified.
Basic Rules
Beginners among aquarists should remember a number of simple rules for working with a filter.
What you should pay attention to first:
- Some unpretentious small fish, for example, guppies, catfish and platies, can live without a filter, provided that there are 10 liters of water per individual for viviparous fish and 15-17 for one catfish.
- Investigate the noise issue. The threshold of 45 dBA, especially at night, cannot be exceeded. Higher intensity noise will be annoying and even make it difficult to concentrate.
- Even if you trust Chinese brands, it is better for beginners to choose inexpensive devices of Polish, Italian and German origin - they are more reliable and easier for an inexperienced aquarist to handle.
Take proper care of your pets, and they will delight you for many years.
Plants for phytofilter
You cannot use any indoor flowers. In order for the filter to function as efficiently as possible, they must have the appropriate characteristics. It is important that they grow quickly and absorb nutrients well. For example this:
- Ficus repens;
- Spathiphyllum;
- Fittonia;
- Chlorophytum crested;
- Tradescantia.
Plants that do not tolerate high humidity and are characterized by short growth are not suitable. Their roots will eventually begin to rot and will endanger the lives of all fish.
Substrate for phytofilter
It is one of the most important elements, but does not carry any cleansing function. Soil is needed solely to hold the plants so that they can freely take root. Therefore, it is better to choose a light substrate. These include expanded clay, filter ceramics, and gravel.
The layer should be at least 10 and no more than 20 cm. The more, the better, but it is important not to overdo it, since oxygenated water must reach the roots, otherwise they will begin to rot.
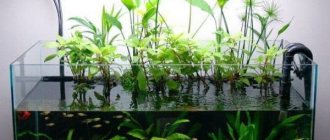
Why do you need a phytofilter?
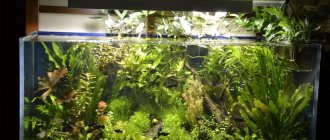
In fact, this is another type of filtering equipment. However, its main difference is its exclusively natural purification. This is a large structure that includes a pump, pumping water, a pot and indoor plants. They are planted in a special substrate through which a current constantly passes, and thus natural water purification occurs. Nitrates and phosphates released from food residues, fish feces and rotting plants are absorbed by the roots of indoor flowers.
Of course, bacterial cleaning can be carried out by both ordinary and underwater plants. However, in some cases, it is not possible to plant natural bushes of the same Vallisneria, Echinodorus, Hygrophila due to their incompatibility with the inhabitants of the aquarium (a striking example is cichlids). But in order for the indoor underwater world to remain clean and the fish not to die, it is necessary to ensure high-quality filtration. A phytofilter for an aquarium is designed to cope with such a task.