4.7
(9)
When starting an aquarium, you need to take into account a lot of nuances so that in the future it pleases the eye and does not cause problems. Among the mandatory elements that a home underwater world should be equipped with is an aquarium lid.
A ready-made version can be bought at a pet store or ordered directly from a specialist. But many people are also interested in a DIY aquarium lid. It’s not surprising, because this design is more affordable, and if its manufacture is approached responsibly, it can last no worse than its store-bought counterpart.
Why is it better to make it yourself?
- Aquarists purchase tanks of different sizes for fish. But not a single standard model will fit the original container of an unusual shape.
- The standard one is equipped with only two electric lamps. This is not always enough to fully illuminate the tank. The lack of light causes the fish to experience discomfort.
- Factory models mainly consist of several parts. Every time you change the water or clean the tank, you will have to disassemble it, which is not very convenient.
- The lid is located very low above the water level. Then the lamps begin to heat it up - by five degrees or more. And also, due to the low location of the structure, condensation begins to form.
- Standard models have too narrow compartments for tubes and wires. Therefore, it is difficult to install a mechanism that takes water for purification.
- Factory models are not equipped with ventilation systems. And so that the fish do not suffer due to lack of oxygen, you will have to periodically open the aquarium.
Based on these reasons, we can conclude: it is better to make the roof for the house of the wards yourself.
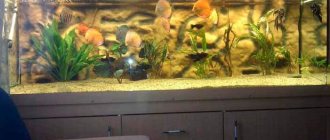
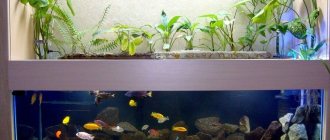
Photo of a piano lid for an aquarium
Next Previous
Next Previous
Conclusion
There are at least three more models of lids with other types of cutting. We will not describe or focus on them, since they are not often used in manufacturing. There is another option that we all often see in pet stores on aquariums - this is a “ butterfly” , that is, two removable flaps and a block of lighting in the center. An example in the photo below. This version of the lid is mass-produced by all aquarium factories. It has its pros and cons. This will be a separate topic..
If you use any of the lid options in the description, you can leave your opinion in the comments. Your review will definitely be useful for other aquarists. Thank you for visiting the page. Good luck to all!
How to make a lid for an aquarium
Before you make an aquarium lid with your own hands, it’s worth figuring out what the end result will look like. You need to find out the dimensions of the sides of the container and the necessary elements. It’s also better to make a drawing: it will be much easier to work.
Example drawing for a cover
It is important to think about cleaning the tank: depending on the location of the parts, cleaning it later may be inconvenient. The material must be waterproof, resistant to elevated temperatures, safe and environmentally friendly. Experience shows that foamed PVC is the best option.
Before assembling the structure, all parts must be degreased to avoid problems in the future.
The side walls and the top are created separately and then assembled. They are glued together with glue - not just any glue is suitable for PVC, but in this case you can use “liquid nails” - that’s what construction glue is called. Immediately before gluing, it is better to take measurements of all the parts again and check if they match in size. If everything is correct, you can proceed to connecting the parts. It is very important to ventilate the work area when gluing so as not to be poisoned by glue fumes.
After gluing the walls, a corner is glued to each inner corner of the workpiece. Stiffening ribs are also installed on the inner sides of the side walls - elements designed to increase the rigidity of the structure. They are placed vertically, with the top close to the top, and the bottom close to the aquarium itself. Then carefully fill the glued areas with sealant. They make all the necessary holes: for wires, hoses, maybe for pouring out food.
Now that all the main work has been done, all that remains is to give the resulting item an aesthetic appearance. To do this, the structure is covered with self-adhesive paper or painted. However, painting a material such as PVC is a complex process. It is necessary to prime the surface or use special paints.
Filter in the lid
You can make a design with a filter that needs to be installed in the aquarium. To do this, in addition to the holes for the wires, you need to make several holes in the case for fastenings. The filter should be located in a corner near the rear wall as far as possible from the hatch. If the need arises, a platform can be made for the device.
Backlight
One of the important parts of the work is creating the backlight. The number of lighting lamps depends on the volume of the tank. Their wires must be properly connected, insulated and placed in metal holders located at the desired height. For cartridges, a piece of plastic is attached to the inside of the structure. Be sure to take into account all measurements, and then the lighting fixtures will not touch the water. And by using the inner surface of the lid, you can increase the amount of light. If you cover it with foil, the reflected light from the lamps will delight the fish.
Why do you need a lid for an aquarium?
Some novice aquarists believe that it is necessary solely as a decorative element. But in fact, it performs a number of essential and irreplaceable functions:
1. Reduces water evaporation. This is especially noticeable in the summer, when the temperature in the aquarium rises and the level begins to drop rapidly, which leads to fluctuations in the concentration of organic matter and can affect the health of the inhabitants;
2. Protects water from dirt and various objects dangerous to fish. For example, if there is a cat at home and it shows curiosity about underwater inhabitants, this can lead to undesirable consequences. An aquarium lid will protect pets from domestic predators;
3. The practical part of the “can” design. A lamp is attached to it, and sometimes a filter, compressor, etc. are connected to it. Moreover, it can be used as a stand. That is, on top you can put a net, food, tweezers and other devices that should be at hand;
4. Protects pets from jumping out. Sometimes some species of inhabitants can jump out of the water. This may be an accident due to high activity, changes in atmospheric pressure, etc. Therefore, in order for animals to remain safe and sound, it is better to additionally protect them from such danger;
5. Maintains optimal temperature.
That is, this product has a lot of purposes, as well as positive aspects. At the same time, there are practically no shortcomings. Accordingly, if possible, it is better to make a lid to simplify the care and operation of the aquarium.
Use of other materials
The aquarium cover can be made from other materials: PVC sheets, laminate boards that were left at home after the renovation was completed; ordinary plastic or panels for wall coverings, glass or plexiglass.
What to make from, everyone decides for themselves based on their capabilities and preferences. The main thing is that the quality of the homemade aquarium lid is no worse than the finished one.
Cover for an aquarium made of PVC panels (plastic)
This material is very popular due to its strength and lightness. It cuts easily and sticks well. It can be decorated, painted, etc. But the most important thing is that he is not afraid of water. The manufacturing process itself is as follows:
1. Cut the plastic according to the measurements and drawing. This is done using a stationery knife;
2. Next, in the resulting pieces we immediately make holes for wires and tubes. To do this, you can use the same knife or another suitable tool;
3. Putting the details together. First, the side walls are glued together, and then the top panel. For this, you can additionally use plastic corners. Special glue (liquid plastic) is best suited for this. However, it is worth considering that it is quite toxic, and therefore this procedure must be carried out in a ventilated area;
4. We attach vertical stiffeners to the side walls from the inside. The upper edge will rest against the lid itself, the lower edge against the glass;
5. A hole is cut for feeding feed (any shape).
Many people are interested in an illuminated aquarium cover. In fact, the aquarist is faced with one task, namely gluing in fluorescent lamps.
To do this, two plastic strips (slightly smaller in width than the walls) are glued on the inside of the lid, along the entire length. A lamp is inserted into the resulting groove, which can be fixed with the same glue. All wires are laid in a special channel.
However, today aquarists are increasingly turning to LED lamps. Their only peculiarity is that they are not mounted into the lid itself. LEDs together with substrates are soldered onto an aluminum profile and connected to a wire. But you need to think through the design of such a lamp so that it can last even if the aquarium is without a lid. That is, it is installed on a stiffening rib, clings to the walls, etc. In this case, the design itself is only necessary to cover the lighting fixture.
Ready-made options
Of the ready-made structures, we recommend the one known in Russia. It offers customers a variety of options - rectangular and panoramic aquariums. Available in small ones - 40x25 cm, and designed for a large tank - 120x40 cm, and rare 100x40 cm. There is almost any lid for a panoramic aquarium - from 50x30 to 120x40 cm. Color is not only black or gray, but also in the tone of oak, walnut, alder and others.
produces simple, inexpensive designs with a five-year warranty. engages in custom-made lid manufacturing, creating designs of any complexity.
Classic lid for a rectangular aquarium
The “classic” lid is used on rectangular aquariums, most often within a length of 1000 mm. For small volumes, the lid is convenient for maintaining the aquarium. The upper part opens completely, leaving only the lower perimeter on the aquarium.
The lighting is installed on the upper surface of the cover; limiters are also provided to prevent spontaneous tipping. The rear wall has holes for ventilation and for external filter hoses.
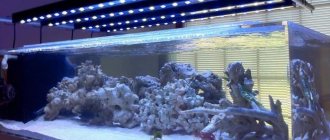
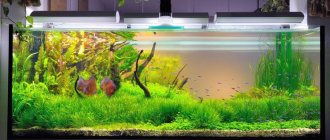
Photo cover “classic” for an aquarium with 1, 2 and 3 T-8 lamps
Next Previous
Next Previous
