| Place | Name | Characteristics in the rating |
| Best Outdoor LED Lights from AliExpress for Small Aquariums |
| 1 | ZHONGJI 50/60/70 Aquarium LED Lighting | Availability of a controller in the package |
| 2 | Amatslite LED 5W/10W/15W | Best for a small aquarium |
| 3 | NICREW SUNSUN ADE Series light | Most popular on AliExpress |
| The best outdoor LED lights from AliExpress for medium and large aquariums |
| 1 | Chihiros WRGB 2 60 | Best functionality |
| 2 | Nicrew ZJL-80A | Retractable bracket and hybrid type of glow |
| 3 | PopBloom | The smartest lamp for an aquarium |
| 4 | WATTSHINE | High efficiency, manual control |
| The best submersible LED lights for aquariums from AliExpress |
| 1 | GreenSun LED Lighting | Easy installation and can be used as a main light |
| 2 | HNGCHOOIGE | The best spotlight for spotlights |
| 3 | TOPINCN | Aerator lamp with remote control option |
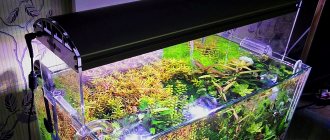
A properly chosen lamp is the basis for creating a harmonious ecosystem in an aquarium. It is as important as the filter, heater and aerator. While fish can somehow manage without additional lighting, plants simply will not survive without artificial lighting. The intensity, spectrum of radiation, and length of daylight hours are important here.
Another reason for using artificial light is the intensive proliferation of algae in bright daylight. Therefore, aquarists prefer to dose lighting to avoid outbreaks of rapid algae growth. So if you don’t want filamentous, blue-green, brown or red algae to dominate the aquarium instead of bright and juicy aquatic plants, take care of organizing the lighting. Fortunately, AliExpress has a large selection of lamps for every taste and budget.
Analysis of the possibility of using light emitting diodes (LED) for aquarium lighting
Currently, modern light sources in the form of LED lamps, spotlights and linear tubes are widely used in lamps for lighting aquariums. According to aquarists, the use of LED lighting sources instead of incandescent lamps and fluorescent lamps allows not only to reduce energy costs several times, but also to improve plant growth and avoid additional heating of water, which is especially important in the summer.
Significant energy savings and the virtual absence of heating the aquarium water are obvious. The degree of influence of light emitted by LEDs on plant growth can be determined based on the Graph of plant growth activity depending on the wavelength of light and the Graph of the dependence of LED emission intensity on wavelength.
During growth, in plants (algae), under the influence of light energy, three processes simultaneously occur - photosynthesis, photomorphogenesis and chlorophyll synthesis.
During photosynthesis, inorganic substances are converted into organic substances with the release or absorption of hydrogen or oxygen. Photomorphogenesis usually occurs during plant germination from seeds and development of the root system. Chlorophyll is the green pigment in plants that gives their leaves their green color. Thus, the growth activity of algae is mainly influenced by the process of photosynthesis and chlorophyll synthesis.
The graph above shows that for active plant growth, the light source for illuminating the aquarium must provide good radiation only in the spectral regions of 400-500 nm and 600-700 nm.
To determine the suitability of LEDs for lighting an aquarium, consider a graph of LED radiation versus wavelength. As can be seen in the graph, the maximum power of light emission from LEDs lies in the range of 420-460 and 480-650 nanometers. Thanks to this, the effective lighting power, due to the concentration of radiation in the range necessary to ensure active plant growth, will be even higher.
The results of the analysis allow us to conclude that lamps that use LEDs as a light source are ideal for lighting an aquarium
. Due to the narrow emission spectrum of an LED lamp, when replacing an incandescent lamp in an aquarium illumination with an LED one, its power can be reduced not by 8 times, as for indoor lighting, but by 12. For example, to fully replace an incandescent lamp for lighting an aquarium with a power of 25 W, you will need an LED lamp with a power of only 2 W.
End caps
It remains to close two ends. To do this, check their width on each side of the aquarium.
Please note that sometimes these dimensions may differ from each other by a couple of millimeters. Therefore, it is necessary to take measurements on both sides, and not make them identical initially.
Measure rectangular blanks on PVC plastic and cut them to the specified dimensions. Next, use a knife to cut all the PVC plastic partitions along the edges. Something like that.
The side walls should seem to fit into the lid itself and only then attach to it.
For rigidity we still use plastic corners.
We coat all joints with glue and sealant. The finished lid design will look like this from the inside and outside.
To create a more attractive look, paint it in dark colors.
Or cover with dark decorative film. It will look completely different.
It is best to apply the paint in several layers, otherwise the PVC panel may show through when the lamps are on.
Foamed PVC cover
The second material for making the lid is a foamed PVC sheet, do not confuse it with hollow PVC lining. Get a thickness of at least 8mm.
It is sold in large rectangular plates.
You can make either a one-piece or two-section design.
The front part of the lid opens, the back part is fixed.
At the front, to create greater rigidity, it is better to use two sheets glued together rather than one. Here the loops will twist to reveal this half.
In case of larger sizes, screw a simple aluminum edge along the entire length onto the second fixed part again to provide rigidity. They usually go to door thresholds.
Glue rectangular or triangular inserts made of the same thick-walled PVC foam along the entire perimeter at the joints of the horizontal and vertical parts of the lid.
These sides serve as supports with which the lid will be installed on the glass of the aquarium. Therefore, it is initially made slightly wider than the container itself.
That is, to find out the size of the lid, take the length or width of the aquarium, add two thicknesses of PVC plastic wall, and also leave 4-5 mm for play.
This will make it easy to put the lid on and off the top of the jar.
The material is easily cut with a stationery knife and glued with superglue. All seams and seams are filled with cast cosmofer.
Cut technological holes at your discretion and in accordance with the recommendations above.
To add beauty, after assembling the frame, all that remains is to cover the lid with decorative film. Don't forget about the reflective material on the inside.
Electrical and lighting connections are the same as discussed above.
Installation and connection of lighting lamps
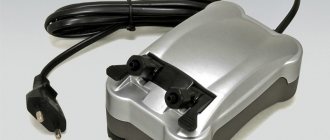
Let's start installing the lighting. First, let's do this using regular LED light bulbs.
Two switches are required to turn the backlight on/off. Skip the bulky two-button indoor switches, the little 'buttons' look much better."
The current in the circuit will be insignificant, so they will withstand such a small load.
The bulbs should be evenly distributed over the area, some along the edges of the lid, others in the center. The extreme ones will light up from one button, the middle ones from the other.
Each light bulb will require ceramic sockets. How to attach them to the lid? Plastic pipe clamps work best here. For E27 cartridges 32 mm is suitable.
The clamp itself must also be screwed to the inner wall of the lid. If you used single rather than double PVC panel, you will need to make square reliefs. Otherwise, the self-tapping screw will make a hole in the wall.
Cut out square spaces from the same PVC plastic as the lid and glue them inside where the bulbs will go.
Then screw the clamps into these places using small screws.
Insert a 2*0.5 ball screw into each cartridge. How to properly connect the lamp socket is in a separate article.
The outer sockets are connected by one wire, the middle ones by another. To avoid damaging the conductors when connecting several light bulbs, do not cut their copper cores, but simply remove the outer insulation using the ring under the screw.
This parallel connection of several lamps in a row is widely used in the manufacture of cosmetic mirrors.
Cartridges with a charged thread are inserted into the clip holder and stay there perfectly.
When connecting the wires to the switch, do not forget that it is the phase conductors that must pass through it. Zero goes straight into the paws, without a switch.
Small holes are drilled for the microswitches in a convenient place on the lid, where they are glued.
After connecting all ends, check the functionality of the backlight. To prevent the threads from hanging or dangling, glue them to the outside of the lid.
They can also be hidden in a separate box or cable channel.
Cover the aquarium with a lid and turn on the light. Don't forget to drill holes in the plastic for cables and hoses.