A decorative background for an aquarium is an important part of the design, without which the artificial tank will seem unfinished. A film for an aquarium depicting mountain landscapes, forests, or just a plain background will help complete the composition and cover wires and equipment that spoil the overall impression of contemplating fish and underwater plants. But if you glue the film incorrectly, bubbles will form on the surface, which will give the pond an untidy appearance. In order for the decorative background to last a long time and look neat, you need to know how to stick the film correctly.
What is the background for?
An aquarium background is an attractive decorative element that can be purchased at any aquarium store.
It performs several important functions:
- The wall behind the aquarium, which “interrupts” the seascape, is hidden from view. When “diamonds” and “stripes” are visible through the water column, the reservoir looks unnatural.
- Hides electrical wires, sockets, parts of equipment that are located behind the aquarium.
- A correctly selected panorama creates a sense of perspective inside the water tank, visually expanding the space.
- Absorbs light glare, thanks to which the inhabitants of the reservoir feel in an environment close to natural conditions.
- A beautiful background makes the aquarium landscape rich and rich, without taking away space from the fish.
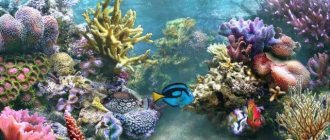
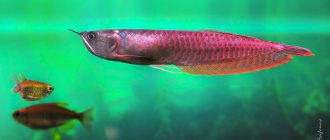
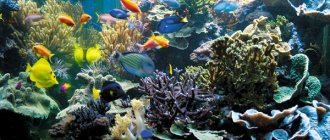
All these functions will work if the background is in harmony with the aquatic environment, and its execution is neat and durable. It is advisable to stick to a marine theme, which depicts aquatic plants, corals and fish. If the aquarium is oversaturated with plants and other decor, it makes sense to choose a monochromatic option.
Varieties
As you can tell, the decorated back of the aquarium plays an important role. But each aquarium owner has his own vision for decoration. Next we will talk about the types of backgrounds:
- Store-bought. This is a ready-made background that can be purchased at a specialty store. Materials used in production: polyurethane, stone, wood. It is easy to install such a purchase, and it will serve for a long time.
- Filling with color. This method of “decoration” was used by grandparents. Firstly, it can be dangerous for underwater inhabitants; secondly, it is unrealistic to evenly distribute the paint without gaps with a brush; thirdly, the process takes a lot of time, which is not worth it.
- Sticker or film. The beauty of using a background like this is its simplicity. Modern printing capabilities allow you to create film with any design, even a photograph.
Advantages of background film
There are several background options that can be mounted inside or outside the aquarium. Sometimes these two types are combined with each other. The background that is installed inside has some limitations. It should be chemically neutral to the aquatic environment, its reliefs should not take up the lion's share of space from the fish.
The most affordable way for beginner aquarists is a background film. It belongs to the external variety of aquarium backgrounds and does not come into contact with water. Its advantages are as follows:
- Low price, which does not in any way affect the stunning effect of this decor option.
- A huge selection of pictures that can be found in the store.
- Installation is quick and easy, without assistants, without the use of special tools.
- The film on the back wall saves space in a small aquarium, which cannot be cluttered with decor and plants.
- This interior solution is easy to change from time to time. In this way, the water landscape will also change.
- The film material glued on the reverse side does not come into contact with the aquatic environment. Does not harm fish and is a durable material.
It is easier to glue a film background onto a small aquarium. Even if there are a few unsmoothed bubbles left, they will not be noticeable. When you decide to use this type of decor for large containers, you need to be especially careful. Otherwise, all efforts to arrange the internal space of the home for aquatic inhabitants can be reduced to zero.
The film can be sold in three versions:
- With an adhesive solution applied on the reverse side under a protective layer. At first glance, it seems that gluing self-adhesive film is the easiest way. However, not everyone can do this smoothly and accurately the first time.
- Regular film, with a smooth, clean surface on both sides. To attach it to the back wall of a glass tank, you must use adhesive solutions or attach it with tape.
- A film with a paper base on the reverse side. Experienced aquarists advise to immediately separate the paper, otherwise it will not be possible to align the background with the glass surface.
Most often you have to deal with ordinary film, which is glued using means that ensure adhesion to glass.
Direct gluing
Direct gluing can be used if design changes are not expected. Getting rid of the pasted film is problematic and will require a lot of time, so you must first evaluate whether it is worth making a permanent design.
It is also allowed to paste the background from inside the aquarium. The film is made from materials that are safe for its inhabitants and does not affect the quality of water. The only limitation for gluing the background internally is the use of methylene blue in the aquarium, which will color it.
The background film is glued to a surface that has been previously cleaned and wiped dry. Gluing is done in the same way as when using a base board. The only difference is that the excess decor is cut off and not wrapped around the base. It is convenient to trim off the remaining background with a cutter. Additionally, after smoothing the film with a soft cloth, the aquarium is left without water for 2 days so that the glue adheres tightly to the glass. When filling a reservoir, you should not pour water over the wall with the background.
If the film needs to be removed, it will be very difficult to do so, as it leaves traces of glue on the glass. It is impossible to wipe them off with a sponge. To remove glue residue, use tape, which is glued to the stain and peeled off after 2 minutes. The tape will take any remaining glue with it. The procedure is troublesome and lengthy. This is taken into account when gluing the background to the glass.
How to glue a background to an aquarium with glycerin
There are several ways to attach film to the back wall at home. Experience shows that ordinary medical glycerin copes best with the task. It is absolutely colorless and non-toxic. Unlike soap solution, it does not leave annoying streaks.
Required material and tools
To glue the film to the aquarium, you need to prepare the following material and tools:
- a bottle of glycerin;
- background film;
- 5-10 napkins;
- stationery knife;
- silicone spatula.
On a note! The spatula successfully replaces an out-of-use plastic card. If you have a hard piece of cardboard at home, you can use that.
Stages of work
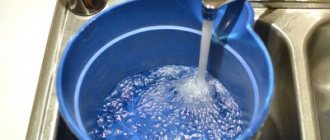
Before gluing the background to the back wall of the aquarium, you need to free it from aquatic inhabitants, drain the water, wash, clean and dry. The size of the film must be adjusted to the dimensions of the rear window minus 3-5 mm. If the edges of the film protrude, this will affect not only the aesthetics, the film will quickly peel off. The excess must be cut off immediately, before the film is glued. It will not be possible to do this exactly on the spot.
Next we proceed as follows:
- Place the aquarium on a flat surface (table, floor) with the back wall facing up. You must make sure that the surface is clean, free of dust and lint. It's better to play it safe and clean it with glass cleaner.
- Apply glycerin drops evenly onto the surface of the glass. 50 ml of product is enough to glue the wall of a 50 liter aquarium. Brushes should not be used as they may leave lint.
- Carefully glue the film on top, gently pressing it to the surface.
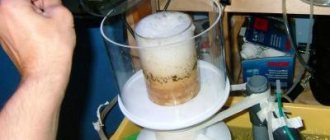
- Now you need to slowly scrape the glycerin to the center of the film using a silicone spatula.
- After the glycerin is collected in one place, we begin to distribute it evenly over the surface. It is necessary to move the spatula in all directions, from the center to the edges of the aquarium.
- Glycerin protruding from the edge should be immediately removed with a napkin. To prevent the spatula from getting dirty with glycerin, you can wrap it in a napkin.
- After the work is completed, you need to carefully inspect the surface again for the absence of folds and bubbles.
You can paste the film within 15-20 minutes. Unlike water or soap solution, glycerin hardly forms bubbles. Therefore, all that is required from the aquarist is to straighten all the folds and expel excess glycerin to the edges. The glycerin film holds very tightly. If necessary, it can be removed and replaced with another one.
Options on sale
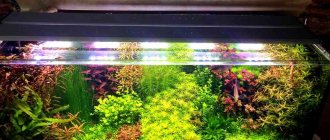
You can, of course, not make the back wall of the aquarium with your own hands, but buy it ready-made. The background can be monochromatic or with different images, for example, landscapes, a view of the seabed, algae and other pictures. There is a three-dimensional background for the aquarium that looks very effective. Also on sale, photographic backgrounds are divided into film and relief. The advantages of the first are:
- low cost;
- diversity;
- easy replacement;
- ease of installation.
Such a back wall can be installed using glycerin, but this installation method is very difficult. Much simpler, but no worse, you can use a soap solution for fastening. First you need to measure the film, it should be slightly smaller than the surface of the glass. You need to wipe the wall of the aquarium, spray a soap solution over it, separate the film and squeeze out the water. The best option is to use special glue.
You can make the background voluminous
There are also similar backgrounds, but with three-dimensional images. Most often, as an addition to such back walls, various groups, mountains, caves are purchased, which should be installed inside the container.
A sheet background based on PVC film is considered quite convenient and beautiful. The pictures are just as varied as in the case of three-dimensional images. Basically, such a background is attached to the back wall using special tape. But again, experienced aquarists recommend using special glue.
There is also a so-called relief background, the manufacturers of which promise non-toxic materials. There are different options for attaching such a back wall to the surface of the aquarium:
- Using silicone glue, which is included in the kit.
- By pressing a layer of soil or stones onto the back surface of the aquarium.
It is worth noting that such design of your home water corner is very expensive, and it often looks too academic. As a rule, the background has a standard width and length. If for some reason the container does not meet these parameters, for example, if it was made independently at home, then choosing a background for it will not be easy. This moment can be attributed to the negative aspects of the relief background.
The background can be glued with glue
Natural materials
Many lovers of the underwater world prefer natural materials. Foam plastic is unacceptable for aquarists, because toxic substances for fish can remain in microcracks in the structure. In order to be sure of the naturalness of the materials, it would be ideal to use stones, driftwood, and more.
Materials needed to create the background:
- A wooden board the size of glass.
- Stones for decoration.
- Glue.
- Foam.
- Resin.
Algorithm for the sequence of actions:
- Using adhesive, attach the stones to the wooden plate in the order your imagination dictates. This will be the background relief. Large stains should be filled with montage.
- After the glue has dried, the structure can be coated with epoxy. The layer should be even.
- Glued stones can be decorated with branches, artificial seaweed, various shells and other decor.
What to do if the film lays unevenly, how to get rid of folds and bubbles?
In the absence of skills in working with film, wrinkles and bubbles appear. If you couldn’t do without them, don’t be upset: you have 3–6 hours to correct the situation. What can be done:
- Poke small bubbles with a needle and press the film at the puncture site to the glass.
- Peel off the film completely and repeat the operation. It is necessary to peel off gradually, in small sections, while simultaneously stretching and leveling the film sheet. For better results, you can heat the film with a hairdryer or fan.
- For novice designers, it is better to take a thick film for their first experiments and use a soap solution to stick it on.