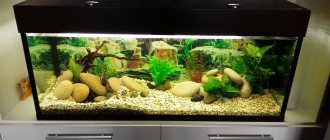
Upon careful examination of the standard rectangular shape, you can understand that making an aquarium yourself is easy. But, you should familiarize yourself with safety precautions, the properties of materials and have the appropriate tool at hand.
Buying an artificial tank at a pet store is available to everyone. However, many aquarists make their own glass aquariums.
There are many reasons for this. Let's say that the owner of the underwater world lives outside the city, and purchasing a large container is problematic in terms of delivery. Some people create glass vessels for underwater creatures to make money. But creating a masterpiece with your own hands is much more interesting than buying a ready-made one. Even if it’s handmade. In addition, making an aquarium yourself will significantly save your budget.
Which glass to choose?
Any glass will not work here. You need to choose high-quality and thick material. As the aquarium fills, the pressure on the walls will increase. Thin glass simply cannot withstand the load. How to make an aquarium with your own hands?
- For a 50x50 container, the glass thickness must be at least 5 mm;
- For an aquarium 1x0.6 – 10 mm.
These calculations apply to any type of glass. Even if it is organic, the proportions are identical.
You should know that professionals do not recommend using organic glass, as the latter quickly begins to become cloudy.
Advantages and disadvantages
Plexiglas is a synthetic substance consisting of thermoplastic resin. It is only formally called glass. Its chemical composition determines properties and application possibilities that are incomparable to simple glass.
- weighs 2-2.5 times less than silicate glass, with the same thickness;
- can be easily heated and reshaped, and after cooling is retained in the desired form;
- impact-resistant material;
- resistance to moisture, microbial activity;
- ease of machining (cutting, drilling, grinding, gluing);
- high light transmittance - no less than 90%.
Organic glass is warmer than silicate glass. The water temperature in a plastic aquarium remains stable even in the absence of a heater.
It is impossible not to mention the disadvantages of plexiglass:
- tendency to cloudiness, yellowness;
- surface damage (scratches, microcracks);
- highly flammable;
- releases harmful substances during pyrolysis;
- near heating devices, the hardness of the product decreases.
Attention! To avoid deformation of a plexiglass aquarium, it is necessary to place it away from heating radiators and powerful incandescent lamps.
Glue
How to glue a glass aquarium together? Regular glue cannot be used as a connecting material for an aquarium. You need to purchase a special sealant for aquariums. How to glue an aquarium? Before purchasing, please read the instructions and recommendations. You also need to make sure that the substrate will not harm underwater inhabitants and plants. In this case, savings are inappropriate.
Illuminated cover
The lid can be made of plastic, preferably transparent. To prevent the lid from damaging the glass, it is necessary to glue a foam edging along its entire perimeter.
The lid made of plastic material is also very comfortable for mounting LED flashlights into it, which act as illumination for the aquarium. Such lighting will not cause any harm to the fish.
In order to make the simplest diffused light, you need to purchase an LED strip that has a self-adhesive base, remove the protective strip from it and glue the tape around the entire perimeter of the plastic cover. In this article you can learn in detail about lighting and the selection of lamps.
The assembly of the lighting circuit itself, which includes LED lamps, must be entrusted to a person who understands electrics. The elements of such a circuit are lamps, a power supply, a lamp base, wires, coolers, and connectors for lamps.
Procedure:
- Make holes on the base frame for LED lamps.
- We insert the lamps into the holes and secure them.
- We connect the LED lamps to a 12 volt power supply.
- Additionally, we install coolers along the edges. They are necessary in order to prevent the water from overheating.
- Sockets for LED lamps are made on the base frame.
- Insert the lamps into the sockets and secure the structure.
- We connect all LED bulbs and coolers to a 12 volt power supply.
The seam
Glue the aquarium with your own hands. The length and width of the seam joint is selected individually according to the size of the structure:
- 50-100 liters: silicone strip is thin. In order to make such a seam, you need to lean the nose of the glue gun against your finger, and rest your finger against the glass. In order to avoid injuries, it is better to use protective gloves. After the adhesive is evenly distributed, the glasses are applied with seams to each other. There is no need to press hard. Metal corners are used to align the corners. A cardboard layer is placed under the metal. Then. Everything is shrinking. For 1 corner – 1 profile. The clamp is done using aquarium clamps.
- Tank 200 l. Construction tape is attached at a distance of 3 millimeters from the edge. The remaining space is filled with silicone. After each press, the glue will spread onto the tape. This can be done after finishing work using a spatula or blade. After all the steps, the side is placed vertically, and another glass is already leaning against it. The corner is aligned using the same scheme: profile, cardboard lining, clamp. The tape is removed until the silicone has dried.
- 200 liters or more. The margin from the edge is up to 6 mm. In this case, both sides are joined and aligned using metal corners before the sealant is applied. It is necessary to create a small gap between the walls (you can put a plank). After completion of the work, the bar is removed. The glue is distributed downward. The main thing is not to miss the gap and glue it well. Trim off excess glue and remove tape.
Advantages and disadvantages
Like any other product, a manufactured pond has its positive and negative features.
Disadvantages (applies to designs larger than 500 liters):
- quite high price;
- It is necessary to use a special coating to avoid scratches.
Among the positive aspects noted:
- Considerable service life.
- Plasticity, due to which such a reservoir is not afraid of distortions and there are no special requirements for stands for them.
- Resistant to heavy loads.
- Long term preservation of aesthetic qualities.
- The strength of products made from it is explained by the special structure of the molecules, which provides increased impact resistance.
- Modern raw materials transmit about 90% of light, which is even higher than glass.
- Increased sound and heat insulation will provide the inhabitants of the home pond with a comfortable life.
- Such structures are 6 times lighter than those made of glass.
- Maintenance is limited to wiping with a damp cotton cloth, which makes the owner’s life much easier.
Thanks to all of the above, an aquarium made of transparent polycarbonate is convenient, practical, reliable, and can last for quite a long time.
First DIY aquarium
It is clear that we are not talking about reinventing the wheel. It is almost impossible to make a panoramic aquarium at home. But you can assemble a glass box from 5 glass pieces. How to make an aquarium with your own hands?
Preparation of glass surfaces
Measure 7 times - cut 1 time. This proverb is relevant in this case more than ever. It is first necessary to outline the length and height of the future tank. Using a glass cutter, the sides are cut out according to the sketch. There is no need to grind the glass ribs, this way they will adhere better.
The bottom of the glass vessel should be located inside the side walls. Silicate glue works in tension.
It's time for construction tape (painting tape). It is necessary to glue a section of glass with tape at a short distance from the joint, at a distance of 6 millimeters from the edges. Important! Glue on both sides.
Before applying glue, all edges must be degreased with alcohol or acetone.
How to work with glue
Distribute a few drops of the connecting substance evenly around the perimeter of the wall. After a few hours, cut to a thickness of 2 mm. These will be the starting points.
Surface preparation: cover a flat area with film on which the glass will be placed. The front wall needs to be supported to prevent it from falling.
How to properly glue an aquarium? The glue must be applied evenly (the double seam must be the same thickness in all places). The future end of the aquarium is placed against the seam and secured with construction tape. The same manipulations are carried out with the remaining glasses. Excess sealant is blotted with a sponge.
After a few hours, when the glue has dried, it is necessary to additionally glue the joining seams (this will strengthen the structure). After 60 minutes, you can remove the masking tape and use a blade to clean up any uneven areas.
Complete drying of the silicone depends on the properties of the sealant. This may take several days. The future masterpiece must be exposed to the air for better ventilation. Important! It is not recommended to touch the aquarium until it is completely dry.
After gluing, the tank must be placed on its side and a load must be placed on the fresh seams (pressed down with books, for example).
How to strengthen the side parts?
To strengthen the structure, it is necessary to make stiffening ribs: from the glass from which the entire aquarium was made, it is necessary to cut strips 10 cm wide and 6 cm long less than the main side. The upper vertical sides are covered with finished strips. We glue the aquarium.
What are stiffeners needed for?
They are used to make large-capacity aquariums. This way, after filling the tank, the pressure is evenly distributed over the walls.
You can check your creation for leaks after the silicone has dried. Water is poured into the container. If it does not flow out, then everything was done correctly.
Using the same scheme, you can build a large aquarium, respectively, with a larger displacement. The main thing is to maintain the proportions of glass thickness to volume.
How to attach equipment
It all depends on the type of equipment that will be in the aquarium. You need to cut holes in the glass walls and attach small pieces of pipe to them. This will be a transition from tubing to equipment hoses.
How to make a lid?
Any suitable material can be used as a material: plastic, plexiglass, silicate glass. The volume of the aquarium plays a major role here.
Organic glass is gradually being replaced by lighter materials.
Cover frame
For a small aquarium, the frame can be made of 3 mm plastic. It is clear that you cannot simply place it on the upper edges of the tank. You must first make the sides using the same type of plastic. The frame is made from cut strips 10 cm wide. This width, accordingly, will be the height of the frame. Gluing is done using resin. Fillet welds also require additional stiffeners. To do this, you can glue metal corners.
How to install a lid on an aquarium?
Many craftsmen use PVC channels for such purposes. This cable has special grooves with which the aquarium lid is attached to the artificial pond. The thickness of the channel must correspond to the thickness of the glass. The seam joints are coated with aquarium glue.
Loops are attached to the back side, which will be responsible for lifting the lid. The hinges can be connected with bolts. You can cut a hole in the lid itself, through which you can additionally feed food to the fish.
Fact! If the plastic is soft and bends, then it can be reinforced from the inside with aluminum. You can hang a lamp on such fasteners.
In order to allow additional wires and tubes to be inserted into the structure, additional holes are drilled in the wall. This is done before gluing the sides. You can cut holes using a drill. Many craftsmen make such holes in several walls to improve air circulation.
Light
Lighting devices are selected based on the size of the aquarium, the requirements of the fish and the desires of the owner of the underwater world. Experts prefer fluorescent lamps with a color rendering index of at least 60 Ra.
The outer part of the aquarium lid can be covered with film and decorated as your imagination wants.
After the glue has completely dried, it is not recommended to place the finished structure in the place that was prepared for it. The glass box must first be tested. How to do it? Place the tank on a flat surface in the bathtub. To do this, you can build a pallet. When the tank is installed, it is filled. The aquaterrarium remains in this state for 24 hours. If the outcome is successful (if nothing leaks or cracks), the fish house is successfully completed and installed in its rightful place.
Afterwards you can arrange and decorate it to your liking.
From such a structure you can create a decorative partition between rooms with your own hands. When using this, one must not forget about good ventilation. Because with high humidity, fungal mold and an unpleasant odor may appear near the aquarium.
To prevent chips and cracks from occurring, it is better to place a leveling layer of hard material under the bottom.
Why bother making a homemade aquarium if you can buy one? Only those who love to create know the answer. Making an aquarium with your own hands is a source of pride, an indicator of creativity and interest in your hobby.
Moreover, financial losses are significantly reduced. Making 1 tank will cost less than paying for: the work of another craftsman, renting a store, paying utilities and wages to sellers. And other.
Gluing an aquarium at home is an interesting hobby that can make good money.
A self-made artificial pond can be decorated and decorated in any way you like. The advantage of such a homemade product is that it can be adjusted to any style that will be combined with the overall style of the room.
Shape selection
The simplest and most common shapes are cube and rectangle. The walls in them are located at right angles. Of course, it is possible to create an aquarium that has a curved shape: triangle, prism, triangle, etc. However, this is much more difficult and may not work the first time.
Unfortunately, it is impossible to create an aquarium in the shape of a circle or a cylinder at home. To choose the appropriate shape for a fish house, you need to use a special calculator. Most of these programs, presented in the public domain, are not limited to just calculating volumes. They have other interesting things, such as visually demonstrating the shape of your aquarium.
IMPORTANT! When deciding on the shape of the aquarium, do not forget that fish swim in a horizontal plane. Based on this, it follows that the aquarium should be chosen to be more elongated in length rather than making it taller.
From Optiwhite
Optiwhite is a fairly new material that is gaining popularity and is used to make fish tanks. This is glass, but it has a special characteristic - ultra-transparency and has a soft blue tint. Due to this, Optiwhite aquariums transmit light better and look more beautiful than ordinary glass ones. Their main disadvantage is their high price.
An Optiwhite aquarium does not have the usual greenish tint that is inherent in simple glass products. Due to this, all the colors that abound in underwater flora and fauna will look brighter and more natural. The second property is especially important for lovers of swimming pets.
However, aquariums made from Optiwhite, in addition to the high price, have other disadvantages. This material is quite fragile and scratches easily. It also requires more careful care.
Instructions
Optiwhite aquariums are made both on a frame and frameless. Metal is best suited for the base - it will blend organically with the bluish tint of this glass. Optiwhite aquariums are glued using special silicone (just like regular containers for aquatic inhabitants).
- After making the frame, start cutting the glass. If you do not have skills in this matter, you can ask for help from an experienced person.
- Optiwhite aquariums are made by combining several sheets of this material into a box. The ends of the parts must be polished.
- Be sure to degrease all surfaces before applying silicone. Optiwhite aquariums should be carefully glued - aquarium silicone is used for this.
- Aquariums made from Optiwhite are more fragile than those made from regular glass. Therefore, they are modified with stiffeners and only after that they try to fill them with water.
- Carefully made and well-glued Optiwhite aquariums will serve you for many years. They say that some types of adhesive silicone lose their properties over time, so choose the material for gluing the walls carefully.
To reduce costs, optiwhite aquariums are sometimes made by combining several materials. For example, the bottom of such a structure and the back wall can be made of ordinary glass.