4.3
(59)
When we think about getting fish at home, we simply imagine what our aquarium will look like, who will live in it, etc. However, to make the home underwater world truly pleasing to the eye, a lot of work needs to be done.
Of course, it is necessary to carefully think through the design and select high-quality equipment that will ensure a comfortable life for your pets. But perhaps the most important component is the proper start-up of the aquarium. This is not an easy job, involving a lot of different nuances.
Preparatory stage
It’s important to take a pen and notepad and write down the main parameters:
- aquarium volume;
- number of fish and their types;
- vegetation;
- other inhabitants, including snails;
- presence of light and filter;
- soil type.
It is not recommended for people who have not previously experienced keeping an aquarium to purchase containers larger than 45 liters. The same applies to fish. The simpler and friendlier they are in character, the better.
Aquarium installation
You need to choose a place in the house that meets the following parameters:
- Moving away from the heat source (batteries, radiators, heaters) - in winter, fish will face discomfort due to increased temperature conditions.
- The most darkened place away from the window and sources of artificial lighting - the sun's rays provoke the formation of algae and pathogenic flora in the aquarium.
- Reliability of the design - the aquarium must stand stably on a flat surface, which will be specially allocated for it. The surfaces of a chest of drawers, cabinets, dressing tables and other frequently used interior items are not suitable.
- Accessibility and ease of maintenance - the aquarium must have good access so that you can feed the animals or change the water at any time.
- Distance from frequently traveled places in the room, so that people do not inadvertently knock over or break an artificial pond.
Before sending the aquarium to its permanent location, it should be treated. Experts recommend using baking soda and a washcloth, which will safely remove harmful microorganisms. After treatment, the aquarium should be rinsed well with running water.
Test of strength
It’s a shame when the aquarium is fully loaded, and on the 2-3rd day a wet spot is visible from under its bottom, which definitely wasn’t there when checking in the store. You will have to perform all the manipulations in the reverse order, which requires effort, time and nerves. Experienced aquarists advise always checking the glass tank for leaks. This is done as follows:
- The aquarium is filled 1/3 with water, allowed to stand for 2-3 hours, and the result is checked at the seams.
- Add water to the maximum mark and leave for another 5 hours.
- For maximum load, place a lid or sheet of glass with a liter jar of water on top.
Particular attention is paid to joints and seams. They can only pass when the aquarium is fully loaded, and when checking in the store they will not show this. If there is no leak, you can drain the water and proceed to the next step.
Proper Packing Methods
An important condition for the successful transportation of fish is proper packaging, which can maintain acceptable living conditions for fish for a significant period of time and protect against water spills, excessive cooling or heating.
The most common type of packaging is thick plastic bags. When using them, please note that: It is necessary to use two bags, one nested inside the other, in case one of them leaks or the fish pierces it with its spines (if any). The corners of the bags should be tied (with rubber rings or tied in a knot) so that they take on a rounded shape and do not trap fish. If this is not done, fish (especially small ones) may get stuck in the corner and suffocate there or be crushed. Some stores use special bags with rounded corners, designed specifically for carrying fish. The package must be large enough; its width should be at least twice the length of the fish. The height of the bags should be at least three times greater than the width to leave a sufficiently large air space. Small adult fish of non-territorial or non-aggressive species, as well as juveniles of most species, can be packed several times in one bag (as long as the bag is large enough). Adult and nearly adult territorial and aggressive fish, as well as fish over 6 cm in length, must be packaged separately. Hard containers Convenient for transportation are plastic containers, containers with lids (intended for food products) or in plastic jars. In pet stores, fish are usually packaged in bags, but if you wish, you can bring your own container with you.
Solid containers have a number of advantages over bags: The likelihood that a fish will pierce it is minimal. They don't have corners where fish can get caught. During the trip, you can remove the cover and let in fresh air.
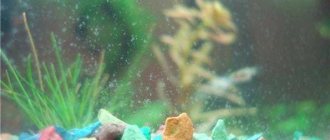
Preparing and laying the soil
After opening the package, the pebbles are poured into a deep container and placed under water pressure.
Rinse thoroughly, draining the liquid 10-15 times. The soil must be mixed well by hand. As soon as the water becomes clear, it is ready for installation.
Usually aquarium soils are ready for use without prior disinfection. If in doubt, after rinsing, you can fill it with water, adding 2-3 tablespoons of peroxide. Let stand for 3-4 hours, then drain the water.
Soil laying is carried out sequentially:
- Substrate distribution (nutrient substrate) - used if there are plants with a developed root system that need mineral supplements. If there are few plants, then the substrate is laid only in those places where they will be planted.
- Laying the soil directly - carefully pour pebbles in small portions into different parts of the bottom, leveling the surface with your hand. If there is a lot of soil, you can make beautiful mounds in which to put decorations.
The minimum thickness of the soil should be 4 cm. This is quite enough to form the bottom, as well as strengthen the rhizomes of plants. In the place as close as possible to the filter, the thickness is reduced to 1-2 cm so that fine-grained soil is not sucked into the purifier.
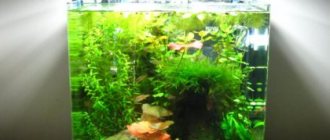
Installing decor and background
It is important to follow the main rule: a lot does not mean beautiful! First of all, fish should be comfortable and free. Some advice from experts:
- The total decor area should occupy no more than 1/20 of the bottom area.
- Avoid sharp objects that can injure fish.
- Do not use houses or towers that have windows or other openings. Bottom fish readily swim in them and get stuck.
- Buy only those decorative elements that are intended for use in aquariums.
- Driftwood and natural components are susceptible to rotting and the development of pathogenic flora on them. The water will have to be changed more often, and you can’t do without air conditioners.
To emphasize the unique coloring of decorative fish, you need to glue the background. In pet stores you can choose a lot of solutions that will favorably show off the inhabitants of the aquarium. The film with the pattern is glued to the outer part of the back wall, the edges are carefully trimmed.
Why are all the steps so important?
As you can see, you need to delve into the information, but there is nothing difficult about starting an aquarium from scratch. Many hobbyists don’t know where to start and try to quickly introduce fish into their first aquarium; as a result, the new inhabitants die. An aquarium is its own biological system in which a certain balance needs to be established. After all, microorganisms, algae, and bacteria live in it. A certain balance must be established between everyone. Do not forget to make sure that the fish can live comfortably with other fish and with plants. Make sure that no harmful substances from outside get inside later, maintain this balance. As a reward, you will receive your own beautiful aquarium, which you can constantly enjoy.
Previous
AquariumStep-by-step instructions for creating an external filter for an aquarium with your own hands
Next
AquariumCorrect installation of LED lighting for an aquarium
Equipment
If the aquarium is more than 10 liters in volume, then you will definitely need the following devices that will create the most optimal microclimate:
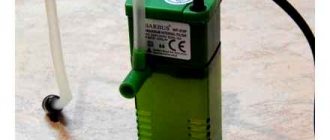
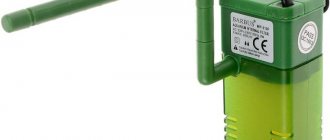
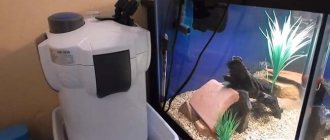
- Filter and compressor - helps purify water by removing bottom sludge and increasing the oxygen content. When choosing, you should take into account the throughput, which is selected for aquariums of various capacities.
- Lighting – water lamps are attached with suction cups to the bottom or back wall of the aquarium. Surface lighting is installed on the lid of the aquarium so that water does not fall on the device.
- Thermostat – controls the water temperature and starts the heating process if necessary.
All devices operate from the mains, so experts advise selecting a separate outlet where all the plugs can fit.
Filling with water
Before you pour some of the water into the aquarium, you must first prepare it.
If the tap water is soft, you can use it, but only let it sit for 1-2 days. This is necessary in order for chlorine to evaporate, which in large quantities is dangerous for flora and fauna. A saucer is placed at the bottom of the aquarium, onto which water should be poured. This way the jet will not break the structure of the bottom. The aquarium needs to be filled to half its volume.
Air bubbles will form on the walls - this is not scary. They will disappear in a few hours.
Newbie mistakes
The mistakes of novice aquarists most often come down to untimely cleaning of artificial reservoirs, inattention to its internal and external changes, insufficient knowledge of the habitat and norms of behavior of pets. Below is a list of common mistakes.
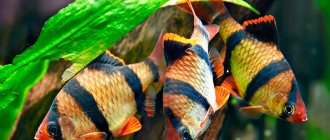
- Incorrect launch of a new fish. Aquarium fish are placed only after the artificial pond has established itself. Purchased individuals are first placed in an aquarium together with a transport container for acclimatization. Then the water from it is gradually mixed with the liquid from the home tank.
- Incompatibility of fish. You need to get aquarium inhabitants after carefully reading the special literature for each type of pet. Some individuals may not be able to live due to different preferences for temperature, water composition or temperament. There are enough varieties of predatory individuals that it is better to settle with their own kind.
- Overfeeding fish. The mistakes of novice aquarists lie in the constant desire to satiate their pets. To begin with, it is better to feed the fish no more than once a day. Then you can do this several times during the day, but keep the portions small. Live, dry and frozen food is used for nutrition.
- Place of purchase. It is best to purchase equipment, underwater interior items, soil, necessary equipment, individuals and plants in specialized stores rather than in markets.
- Lack of proper control over the aquarium. An aquarium for a beginner is not fun, but a serious step that can lead to irreparable consequences. Before preparing the tank for launch, you need to choose a convenient installation location, equip it with the necessary equipment and test the water for quality. And only then introduce living organisms.
Planting
Long plants with a well-developed root system are best planted under the back wall of the aquarium so as not to create an obstacle to the movement of fish.
Suitable for beginner aquarists:
pistia
hornwort
lemongrass
valisneria
These plants are easy to care for, grow relatively quickly and absorb phosphates and nitrates no worse than their expensive counterparts.
In order for the plant to quickly take root in a new place, you first need:
- Carry out disinfection (a mandatory step) - add 2-3 tablespoons of hydrogen peroxide to a bowl of water, place the plants with roots for 15-20 minutes.
- Inspect the roots and leaves for rot and dead leaves - remove all unnecessary elements with scissors.
- Plant bushes, forming the interior of the aquarium - you should hold the bush with one hand, bringing the roots closer to the ground. With your second hand, carefully push away the top bulk layer and distribute the roots evenly over the soil. Sprinkle with soil, if necessary, cover with large stones near the growing point, without blocking it.
When the procedure is done, the water may become cloudy. This is all due to the lower layer of soil in which the plant roots were planted. After 2-3 hours, this defect will disappear on its own.
After planting the plants, add water and turn on the lighting to a minimum. Subsequently, the aquarium will mature, namely, the growth of useful flora, which will make the living conditions for fish and plants as comfortable as possible.
Let's sum it up
After reading the article, you realized that properly starting an aquarium is a long process, but not difficult. Aqua is a closed biological system in which various organisms live and develop, interacting with each other. With proper interaction, the container will delight you with its beauty.
Within a month after starting the aqua, there is no need to siphon the soil or change the water (it’s enough to just top up the evaporated water). The established balance is still very fragile. The slightest intervention can ruin it all. The less you climb there, the better. After a month, you can start siphoning the soil weekly and changing 25-30% of the water.
Maturation of bioflora
The aquarium must undergo a complete nitrogen cycle, which is necessary to normalize the bioflora. Without this factor, it is impossible to plant fish and other inhabitants, as they may die. Need to:
- Maintain light mode for at least 8 hours.
- Leave the aquarium alone for 20 days.
- Check the condition of the water every 2-3 days. The appearance of a green coating indicates an overabundance of bacteria, which is important to control using special means.
To avoid the rapid growth of flora, you need to completely turn off the lights for a day once every 5 days. Usually, when there is insufficient lighting, the balance balances out on its own.
If it is not possible to wait that long, you can stimulate the growth of flora with the help of special preparations. They are available in liquid or tablet form. When placed in an aquarium, they quickly become active and help maintain biobalance.
During ripening it is prohibited:
- change water;
- turn on the filter;
- turn off the lights for more than 24 hours;
- siphon the bottom;
- plant fish in the first 7 days;
- add water to the desired level.
Be patient. The better the flora is formed, the easier the aquarium is to maintain.
Launching fish
It is recommended to plant the first inhabitants on the 10-12th day of maturation of the aquarium. After a week the population is increased, and after another week the process can be completely completed. They do this according to the rules:
- The brought bag of fish is carefully untied, saturating it with oxygen.
- Drain some of the water, adding the same amount of water from the aquarium.
- After an hour, part of the water is drained again and aquarium water is added.
When the water in the bag is only aquarium water and the fish get used to it, they can be planted in a new home using a net.
It is recommended to change the water in the aquarium and perform routine cleaning no sooner than 2 weeks after planting the fish. If the water becomes noticeably cloudy and a green coating appears on the walls, then forced cleaning is carried out according to all the rules.
To avoid an outbreak of bacterial growth, you need to control the amount of feed added. In the first week it is better to use ice cream or plate. They are absorbed faster without decomposing at the bottom.
After landing the fish, turn on the filter and compressor. The contaminated bottom can be siphoned, after which the missing part of the water can be added.
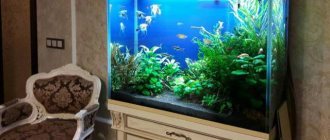
We come up with a design
If the initial start-up of an aquarium includes a number of specific actions, then this is the moment when you can use your imagination. Now you can install driftwood, put stones, houses, pots, rocks and other accessories. Don't forget to treat them so as not to spread the infection. You can place them in random order and see what happens. Many people draw on paper how they would like all the accessories to be arranged and then place them there. No one is stopping you from moving them at your own discretion, but in order not to disturb the inhabitants, of course, it is better to do this in advance.