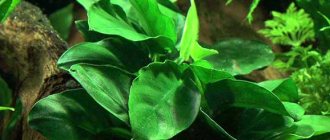
Hello! Today we will talk about how to fix moss, anubias, bucephalandra in an aquarium quickly and easily. This topic will be of interest to everyone who grows not only Anubias and Bucephalandras, but also ground-blooded plants like Hemianthus cube or Micranthemum Monte Carlo.
TOP 5 simple ways to fix moss, anubias, bucephalandra in an aquarium
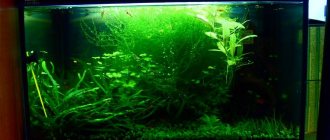
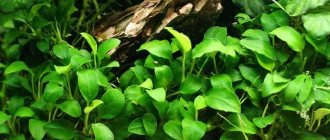
On a note ! Mosses are very popular aquatic plants among aquarists and are often used in aquascapes and shrimp tanks. Which is not surprising, because mosses in an aquarium make it more natural, natural. Also, thickets of moss are an excellent shelter for small fish and shrimp.
Moss in an aquarium
What you need to know about aquarium mosses?
The main advantage of aquarium mosses is that they are easy to move from one place to another, and this can be done even with the substrate to which they are attached. Mosses, unlike most aquarium plants, are not anchored by roots in the soil , which is explained by the absence of a full-fledged root system as such.
Another feature of mosses is their method of reproduction. Mosses reproduce by spores. When the capsule containing the spore-bearing generation ripens on the parent plant, they spill out. Most of the spores, as a rule, develop near the parent colony, sometimes even parasitizing on it. Dying mosses are replaced by young ones. This method of reproduction allows aquarium mosses to maintain a spectacular appearance for a long time.
Mosses reproduce by spores
Note ! Next, we will tell you how to fix moss, anubias, bucephalandra in an aquarium, or more precisely, in aquarium decorations (driftwood, stones). Including the most effective, but not very popular among aquarists, method of attachment.
Appearance
The thin (up to 2 mm) but long (up to 17 cm) stem for which this aquarium resident is known is covered with miniature green leaves up to 4 mm in size that change color. This is affected by age, lighting, CO2 saturation.
Instead of a root system, there are rhizoids at the base of the crop, which help it to strengthen on hard surfaces, which eliminates the need for soil. Through rhizoids, Java moss absorbs water along with nutrients dissolved in it. The appearance of Java moss is best seen in the photo.
Method one. Fastening with thread
One of the simplest methods of fastening, involving the use of ordinary thread. First, take scissors and cut the moss into small pieces, then lay them on a piece of driftwood or stone and wrap them with thread. After about 2-3 weeks, the thread will decompose in water, but during this period the moss will have time to attach itself with rhizoids .
This method has 2 serious drawbacks:
- moss does not always grow to the surface before the thread decomposes;
- on small snags (especially branchy areas) it is sometimes quite difficult to secure the moss with a thread.
ADA Moss Cotton
Please note ! Some manufacturers produce special cotton thread - for example, ADA Moss Cotton. It is not very noticeable in the aquarium, because it has a greenish tint. Completely decomposes in an average of 2-4 weeks. Although even special threads do not reduce all the disadvantages of this fastening method.
*We do not recommend this mounting method.
Method two. Fastening with fishing line
The method is very similar to that described above, but the fishing line, unlike thread, does not decompose in water. Using fishing line is a great option, say, when decorating flat stones. But with snags everything is not so simple. If you need, for example, to secure moss only on one side of a branch, but along its entire circumference, then the fishing line will be visible in open areas. There will also be problems with the design of small branches of driftwood.
*We recommend using it in certain cases. Using fishing line is a suitable option for flat rocks and large areas of driftwood.
Why it doesn't grow and common problems
The most common problem with Java moss is algae growth. Blue-green algae in the aquarium and black beard are direct enemies. If such a proximity is allowed, then the Javanese faces immediate death.
Once they appear, they are very difficult to remove. You have to get rid of the entire plant at once.
Heavy growth of moss can also cause problems. This can be dangerous, it can grow in the filter, on decorative decorations.
Method three. Mesh fastening
The next method is to use a variety of grids. An excellent option for mounting plants on a stone. If you are attaching moss, take it and cut it into small pieces with scissors, then place them on the stone and cover with fine mesh. To prevent the structure from collapsing, tie the bottom of the mesh with wire or fishing line. You can also use ready-made kits that use various plastic decorations or fine mesh stainless steel mesh. Moreover, some can even be attached to the walls with suction cups included in the kit.
Stainless steel mesh
Important ! This method of fastening allows you to create bright green and lush hummocks, but is not suitable for decorating snags. Often, aquarists install a hard plastic mesh on the back glass, which allows them to get an excellent background of their living moss.
*We recommend using it in some cases. Suitable for decorating flat stones and when using decorations with a complete mesh.
Creating a background from moss
To create a wall of moss, it is placed in one layer between 2 pieces of mesh (plastic, harmless to fish). A mosquito net (available at hardware stores) may be suitable. Along the perimeter and in some places in the middle, you can insert suction cups into the holes, which will serve as fastening of the mesh to the back wall of the aquarium. The moss needs to be laid more evenly; if you leave large areas without moss, there is almost no chance that they will overgrow on their own. The nets are fastened together (they are tied or stitched around the edges with fishing line) and this structure is secured to the wall of the aquarium using suction cups. Moss, growing through the mesh, covers it, creating a beautiful wall.
Make sure that the edges of the mesh fit as tightly as possible to the glass. If there is even a small space left between the wall and the mesh, it will serve as a trap for aquarium fish and shrimp, which can result in their death. To add rigidity to the structure, you can attach this mesh to a piece of plastic. This design is convenient to remove from the aquarium if necessary. fish fry find shelter and food (ciliates) For them, moss thickets create an ideal environment for development, saturated with oxygen and microorganisms. You can also make a carpet on the bottom.
Method four. Dry start fastening
With this method of starting an aquarium, moss is finely chopped and then applied to stones or driftwood using a rubbing motion. This method requires patience from the aquarist, since for a normal start you need to wait quite a long time - the aquarium will be under a film in the form of a greenhouse for more than 1 month.
One of the disadvantages is that mosses take quite a long time to germinate after filling the aquarium with water . Among the advantages of this method, it is worth noting that planting does not require a large number of mosses, as, in fact, other types of plants. What is important when starting large-volume aquariums.
*We recommend using it in rare cases. This method is optimal for decorating an aquarium, but it requires quite a lot of time.
Video - Java moss in an aquarium
Method five. Fastening with glue
In recent years, the method using glue has been the most popular among aquascapers. As a rule, fastening to stones and snags is carried out using ordinary cyanoacrylate glue. In contact with water, such glue quickly crystallizes, reliably fixing the moss in the chosen place.
We recommend using adhesive gel, which differs from the usual one in two important advantages:
- fluidity (it does not spread, and therefore is very convenient for spot use);
- crystallization time in water (the gel does not harden immediately, which means you will have time to glue the moss, taking into account positioning in the required place).
Cyanoacrylate glue
Important ! Cyanoacrylate glue has an extremely simple mechanism of action: when exposed to weakly alkaline agents (and this includes ordinary water, and atmospheric humidity is quite sufficient), it polymerizes - hardens, freezes, reliably bonding both surfaces to each other.
Bonding methods
When gluing moss in an existing aquarium, cyanoacrylate glue-gel is applied to the desired pieces of moss, then the moss with the glue applied to it is immersed in water and placed in the required place. To fix the moss well on the decoration, you need to press it for a few seconds.
The second option is to apply glue from a tube directly under water. To do this, you need to take the required piece of moss in one hand, and a tube of glue-gel in the other hand. The glue is carefully squeezed out in the required place, and then the moss is glued. All this is not difficult, you just need to practice a couple of times. We are sure that after using this method you will definitely share this information with your aquarist friends.
Note ! Do not apply glue in large quantities; it is best to apply it in small, measured drops. If there is a large amount of glue, it will “climb out” beyond the work area and seep out through the moss. To work with cyanoacrylate glue, you can use thin rubber gloves. They will prevent glue from getting on the skin of your hands, and working in them is quite comfortable. Without gloves and special skill, there is a high probability of glue getting on your fingers, which will most likely lead to them sticking together.
One serious danger of this glue is that when gluing materials that contain cellulose, such as cotton fabric and paper, there is a possibility of an exothermic reaction , that is, sudden heating and even combustion. But aquarists are very resourceful and they found this danger of superglue to be a huge advantage when decorating an aquarium. Due to this property, superglue is used for gluing stones and driftwood. For this purpose, ordinary cigarette filters are used. Since the production of cigarette filters uses a material containing cellulose, the quality of gluing becomes simply fantastic. The resulting adhesive seam is not afraid of water, and if, for example, you try to tear apart a glued piece of driftwood, we assure you that you will not succeed. The snag will definitely break somewhere else.
There is an opinion and fear among some aquarists that this glue is unsafe to use in an aquarium. It's a delusion. After polymerization, the glue is absolutely harmless to fish, shrimp and snails! This has been tested by thousands of aquarists around the world.
Important information ! Observe safety precautions when using cyanoacrylate glue. Do not allow glue to get into your eyes, mucous membranes, clothing or other surface objects in your home.
*We recommend this method of fastening as the most practical today. The main advantage of gluing moss is that it does not take much time. If necessary, moss can be fixed (glued) in the right place in a matter of seconds.
Varieties
There are several varieties of Java moss.
Phoenix moss
Phoenix moss (Fissidens fontanus). In the wild it grows in water bodies of North America. It looks like a mound or a fountain (hence the name in Latin). Due to its rapid growth, even inexperienced aquarists are advised to keep it.
This moss is often used as a ground cover plant, to decorate driftwood and stones in the form of green fountains.
Due to its rapid growth, even inexperienced aquarists are advised to keep it.
Phoenix moss is not picky about its conditions: it is satisfied with soft water with a temperature ranging from 15 to 28 °C. If the temperature is unsuitable, the moss takes a very long time to grow.
Flame Moss
Flame Moss (Taxiphyllum sp.). Bryophyte is so named because of its appearance, reminiscent of flashes of flame. It grows upward rather than wider, which makes it different from its moss relatives.
The optimal conditions for Flame moss are: water temperature 20-28 °C, hardness dH 4-9°, pH 6-7.5.
It grows upward rather than wider, which makes it different from its relatives
The curling of the leaves of this type of moss is due to the hardness of the water.
Pellia Moss
Pellia Moss (Monosolenium tenerum). Pellia moss has no leaves, which is why it is similar to the Riccia plant. It is heavier than water, and therefore is located at the bottom of the reservoir. The plant is easy to care for and grows quickly, creating spectacular green “pads” on the bottom of the aquarium.
It grows well at temperatures of 5-30 °C, thereby fully confirming the statement about the undemanding nature of moss in terms of maintenance conditions. This species grows in shade and in intense light, in water of any hardness. However, in unfavorable conditions, plant growth slows down and its decorative properties are lost.
Pellia Moss is heavier than water, therefore it is found in the bottom areas of the reservoir.
Crying Moss
Weeping Moss (Vesicularia Ferriei). It grows only about 3 cm in height, up to 5 cm in width. Favorable water parameters: temperature from 22-28 ° C, pH 5.5-8, dH 6-14 °.
Weeping moss tolerates very high temperatures (up to 32 °C) without losing its decorative properties, with the rare exception of yellowing of the branches.
Weeping Moss grows only about 3 cm in height, up to 5 cm in width.