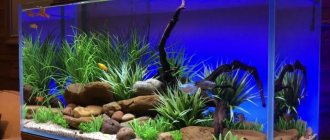
In order for the inhabitants of the aquarium to feel comfortable at night and for algae to grow well, aquarists install additional lighting above the aquarium. Covers for aquariums with lighting from the Polish company Aquael are very popular, they have a beautiful appearance, a long lamp life and provide the necessary level of lighting for plants.
In aquarium covers with Aquael lighting, one of the models is shown in the photograph, linear fluorescent lamps Aquael F15T8/D with an electronic ballast are used as a light source. The lamp life according to the manufacturer is 15,000 hours.
To illuminate the lamps, an electronic ballast is also installed in the lid in a sealed plastic case, which operates under difficult temperature conditions and often fails before the lamp burns out. As a result, the actual service life of the aquarium lighting due to possible ballast failure is much shorter.
The cover with the burnt-out ballast came to me for repair. An external inspection and checking with a multimeter the lamp filaments, fuse, resistors and semiconductor parts of the ballast did not reveal a malfunction. Ballasts are not sold separately as spare parts in aquarium stores, but only as a set with electrical wiring, pads and a lamp for $22, which is half the cost of a new aquarium lid. What’s even more interesting is that the cost of the original fluorescent linear lamp Aquael F15T8/D is also $22. I had to think about how to reduce the cost of repairing the cover with Aquael lighting.
The analysis showed that it is economically feasible to replace the F15T8/D linear fluorescent lamp with an LED linear lamp. Got a question. How does the lighting emitted by LEDs affect the growth of plants and aquarium inhabitants?
Preparatory activities
Before repairing a damaged aquarium, perform the following steps:
- Relocation of phenotypes is performed before restoring leaking containers. After all, carrying out activities with a full tank is problematic.
- Vegetation, substrate, and liquid are removed from the tank. Additionally, it is washed and dried.
- Safe materials and tools are used for repairs. Specialized stores sell everything you need.
Materials
Before repairing the aquarium, prepare the following materials:
- Sheets of glass. You can cut the fabric that has the required parameters yourself. For these purposes, glass cutters and other available tools are used. The relevant organizations also prepare glass for aquariums.
- Sealant. Special compounds and gels are used to treat seams. When selecting, check whether the glass is compatible with the selected sealant. So, experienced aquarists use silicone.
- Solvent. Suitable for degreasing glass panels.
Conversion to T8 lamps
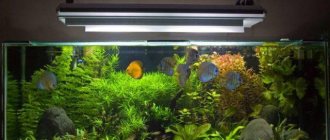
The correct selection of lighting for the aquarium is of great importance. Various types of energy-saving lamps are used to illuminate home ponds. Fluorescent lamps are very widely used to illuminate tanks with fish. Consider a T8 lamp. Its advantages:
- long operating time, more than 10,000 hours;
- low heating of the incandescent element, which does not allow harmful bacteria to develop and algae to rot;
- gradual failure, which allows you to replace the lamp in time.
Self-repair of a leaking aquarium
How to determine if an aquarium is leaking? Paper strips, which are characterized by increased hygroscopicity, and corrugated paper are used as an indicator.
Before checking, the aquarium is cleaned with your own hands from vegetation, substrate, and decorative elements. The tank is washed and thoroughly dried from the outside and inside.
The container is filled with liquid. After this, paper strips are applied to each seam.
It is not difficult to determine whether an aquarium in use is leaking. A damp spot will appear on the paper. The contact of the paper with the joint can be 3–5 minutes.
Cleaning joints
Before treating the seam with glue, the remnants of the used sealant are removed from it. When selecting a tool, the characteristics of the gaps are taken into account.
To clean the gap, the dimensions of which are 1–3 mm, use a blade. Larger holes are cleaned with a knife or other sharp instrument. These procedures must be performed carefully so as not to injure your hands.
How to fill joints?
Before replacing the gel or silicone composition, perform the following procedures:
- Carefully remove previously applied sealant. What to do if the gap is small? Treatment with the solution and application of the composition is carried out using a thin brush.
- To obtain a more even seam, the edges of the glass sheet are glued. Such actions are performed when painting frames of window systems or leaking products.
To ensure that no sealant remains at the joint, it is “pushed” into the seam with a thin object.
After 12–24 hours, the condition of the seams is checked again. A white piece of paper is used for indication. The absence of leakage indicates that all activities were carried out correctly. If the seams are leaking, then the above processes are repeated. In this case, it is very important to ensure that all elements of the tank are positioned correctly and accurately.
The prepared water is poured into the repaired tank after 24–36 hours. This period is required to remove toxic components.
If the lamp does not work
Very often, a lighting device stops working due to exposure to an aggressive environment, as a result of which the sockets in which the lamps are installed oxidize and fail. Or moisture may penetrate into the light source. Only a complete replacement of lighting equipment will help here. We release the lamps from the protective panel, if it is provided for in the design. We remove the lamps, dismantle the sockets, “biting off” the oxidized wires.
In place of the old ones, we install modern moisture-proof cartridges, the design of which does not allow moisture to penetrate the contacts and cause the lamps to burn out.
It is better to completely change the wiring too. Then we install the lamps in the niche of the lid, carefully seal all the holes, check and connect.
Restoring the integrity of the aquarium
Repairing an aquarium at home involves not only restoring the seal, but also replacing the glass on which cracks have appeared. Before you do all the work, you need to familiarize yourself with the steps.
Removing damaged glass
Removal of broken glass begins after thorough cleaning and drying of the tank.
If the glass is cracked in a frame-type aquarium, then before removing it, the grooves are cleaned of silicone or sealant applied by the manufacturers. To make it easier to disassemble the aquarium, use a file or a small knife.
How to disassemble the glue tank? For these purposes, cuts are made using a cutter, a sharp tool. Once you disassemble the tank, move on to the next processes.
Watch a video about replacing cracked glass.
Cleaning the glue
After removing the glass sheet, remove any remaining glue using a brush or scraper. The use of solvents and other substances is permitted.
Blanks
Before changing the glass, a canvas is prepared that has the required dimensions. A template is created to simplify the process.
Installation process
Ribs and joints are treated with silicone and other sealants that have a non-toxic composition. As soon as the new glass sheet is placed in the prepared place, it is fixed. Tapes and ropes are used for fixation.
If the aquarium is large in size, then the walls are fixed using denser tapes. After this, the ribs are treated with silicone glue. A sponge or small roller is suitable for applying it.
The joints and ribs of the tank are processed 2-3 times. This approach helps to increase the level of strength and reliability of the structure.
Testing
High-quality glue, which contains silicone, dries within 1–1.5 days. After this, clean water is poured into the container for 2–3 hours. This time is enough to check the quality of the work performed. Corrugated paper is used for testing. If a leak is detected, we repair the tank again.
Pouring water for several hours helps remove toxic and foreign substances. The test fluid is drained. Settled water is poured into the aquarium.
Repairing a damaged aquarium is not difficult. Some professional aquarists periodically disassemble and reassemble the container. In the process, the old silicone layer is removed, the glass sheet is cleaned, and it is degreased. Such actions help to increase the level of strength of the product.
What types of work are there?
In general, aquarium repairs are divided into two types: repairs of the “mechanical” part and the electrical part. And additionally – modernization of the aquarium. The first type includes replacement or restoration of structural elements; for the second, restoration of wiring, switches, starters, lamps, lamp drivers, starters (for fluorescent lamps).
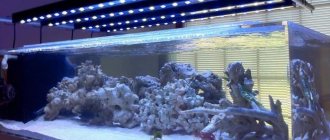
The most interesting thing for an aquarist is improving the characteristics of the aquarium. The main ways to improve the quality of life of fish and aquarium plants:
- increasing the number of lamps;
- installation of reflectors for uniform distribution of light flux;
- replacing lighting with LED analogues (now this is the highest quality lighting);
- recalculation of the required light parameters and then more accurate selection of lamps.
The most “regular” thing in the aquarium hobby is the routine cleaning of the deflector and the body itself.
How to choose a new aquarium?
In some cases, restoring the tank is problematic. Therefore, novice aquarists select a new one. The following criteria are used as a guide.
Capacity
Tanks made from the following materials are available for sale:
- Silicate type glass. It is characterized by increased strength, reliability and fragility. Therefore, it is problematic to use products made from such raw materials.
- Acrylic glass products. They can withstand significant loads. But upon contact with sharp objects, small scratches remain on the surface.
The containers and shapes differ:
- Square.
- Rectangular.
- Round.
- Non-standard.
Some phenotypes require rectangular structures that feature a low tank wall height.
The supplied containers also differ in size. When determining this characteristic, the number of individuals, necessary equipment, and vegetation are taken into account.
Selecting a cabinet
When selecting a cabinet, experienced aquarists are guided by several factors:
- Material. For the cabinet, raw materials are selected that can withstand prolonged exposure to moisture.
- Dimensions. It is necessary to proceed from the dimensions of the purchased container.
Under large-sized tanks, cabinets are placed, which are characterized by increased strength and reliability, and the presence of metal structures.
Lid
The cover includes components such as a lighting fixture, a glass insert, and a frame made of moisture-resistant raw materials. Some tank models come with a lid, which is equipped with everything necessary. The lid can also be purchased separately. They are sold in specialized stores.
Equipment
Experienced aquarists purchase equipment along with the tank:
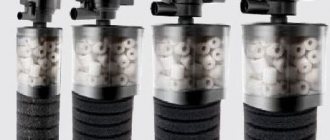
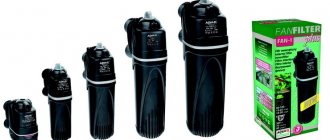
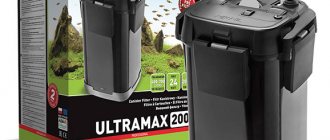
- Mechanical filters. They are used to purify aquarium water from impurities, organic substances, and food debris.
- Aerators.
- Lighting equipment. It is equipped with fluorescent lamps. Power is determined individually.
- Heating equipment. Some phenotypes prefer water that is heated to 25–30 degrees.
Almost any aquarium can be repaired. But to carry out all activities, experience and the required tools are required. Therefore, it is necessary to begin repairs after preparation and studying the features of the process.
DIY aquarium repair video
AdminAuthor of the article
Did you like the article?
Share with your friends:
What types of work are there?
In general, aquarium repairs are divided into two types: repairs of the “mechanical” part and the electrical part. And additionally – modernization of the aquarium. The first type includes replacement or restoration of structural elements; for the second, restoration of wiring, switches, starters, lamps, lamp drivers, starters (for fluorescent lamps).
The most interesting thing for an aquarist is improving the characteristics of the aquarium. The main ways to improve the quality of life of fish and aquarium plants:
- increasing the number of lamps;
- installation of reflectors for uniform distribution of light flux;
- replacing lighting with LED analogues (now this is the highest quality lighting);
- recalculation of the required light parameters and then more accurate selection of lamps.
The most “regular” thing in the aquarium hobby is the routine cleaning of the deflector and the body itself.