A holiday at sea is an unforgettable time that you want to capture not only in amazing and funny photographs. On long winter evenings, seafood in the form of fancy shells will remind you of the sun, salty breeze and a wonderful vacation.
But will all shells bring joy and pleasant sensations? If they are not properly cleaned and treated, then not all.
Shells, by their nature, are “houses” in which marine life lives. This means that organic remains may remain inside, if not the “hosts” themselves. Consequently, if they find themselves in an unfamiliar environment, they will die (if they are alive) or begin to decompose under the influence of temperature and humidity. To avoid an unpleasant and very pungent odor, you need to properly treat the shells.
How to collect correctly
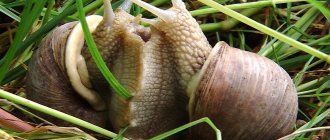
While relaxing on a sandy or rocky beach, many tourists like to collect sea shells. They are used to make jewelry, crafts, and paintings. Shells are collected, given as souvenirs, and even used for soil drainage. Seashells are the hard shells of mollusks, their shells. Usually there is nothing in shells found on the beach, they are empty. True, inside some you can find a living or dead sea mollusk.
The contents of the shell must be removed, otherwise the unpleasant smell of decomposition will ruin the entire collection. Under no circumstances should a shell with a clam be placed in a bowl of cold water. The remains of the animal discolor the shell. You can place the sink on dry sand with the hole facing down. Sometimes the contents leak out after a few minutes. If this does not happen, then the mollusk is removed by boiling, freezing or burying.
Expert opinion
Zakharova Irina Yurievna
Cleaning professional with 15 years of experience. Our best expert.
Ask a Question
Important! Some species of marine shellfish are protected by law. They are prohibited from being destroyed for the sake of a beautiful shell and taken outside the country where they live.
There are several types of sea shells (rapana, scallops, cerithiums, tricia reticulata, mussels, oysters). They have different shapes and appearance. The shells are collected in a plastic bag. They are first cleaned of sand, dirt, and internal contents. Before putting sea shells into boxes, they need to be sorted by type and size.
See also
How to quickly and easily wash an umbrella at home
True, the surface of the shells usually has a limescale deposit, which gives them an unsightly appearance. Dull shells are not suitable for decorations and souvenirs, which is why they are first cleaned, polished, and varnished.
Collecting shells
This exciting activity for children and adults turns into a real hunt for beautiful and rare shells, which become interior items. But before you put your loot in the bag, make sure that no one lives inside.
Some shell inhabitants are listed in the Red Book and are protected by law. There is no need to destroy rare inhabitants because of beautiful seafood. Make sure there is no living creature inside. This will make cleaning the shells easier and save you from having to deal with unpleasant odors.
But even dead shells can contain organic remains of their dead inhabitants. Therefore, processing will have to be carried out in any case.
Processing stages
There are several ways to clean the surface of sea shells. Before removing limescale, it is necessary to remove the dead shellfish from the inside.
Organic Removal
The remains of the mollusk give the shell an unpleasant odor. You definitely need to get rid of them before making a decoration or craft from the shell.
Boiling
You can remove the shellfish by boiling. True, it is forbidden to throw shells into boiling water, otherwise they will crack. First, they are placed in a pan, filled with cold water and slowly heated over a fire. Boil the shells for about 3-10 minutes, depending on the size. Then the water is cooled for an hour and drained, and the contents are removed from the shells using tweezers.
Important! It is not advisable to boil shells with a thin shell and a glossy surface. Boiling water can cause cracks or ruin the appearance of the sink.
Freezing
Experts advise putting the shells in a sealed package or bag and placing them in the freezer for 4 days. True, first the shells need to be cooled in the refrigerator at a temperature of +2...+4 degrees for several hours. When they cool down, they are placed in the freezer. You need to freeze the shells for at least 3-4 days. It is also necessary to defrost the shells in two stages. First, they are placed from the freezer into the refrigerator for 12 hours, and then placed in cold water. The entrails are removed using tweezers or a fork.
Burying
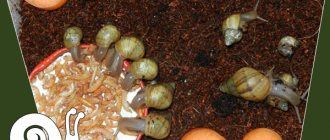
There is another natural way to clean dead shellfish from your shell. It can be placed on an anthill so that the ants eat the contents. A cleaning method such as burying the shell in the ground for one month will help you get rid of the shellfish inside. During this time, the inhabitants of the soil (worms, bugs) will eat the contents of the shell.
Important! After removing the clam, the shell should be washed with a brush in warm soapy water.
Cleaning sinks at home
After removing the mollusk, the surface of the shell must be washed to remove limescale. There are several ways to clean the shell.
See also
How to clean a watch at home with your own hands
Soaking in water
First, it is recommended to thoroughly wash the shells in warm soapy water, wash and remove all dirt. It is better to put the shells in salted liquid and leave for several days. The water needs to be changed every 5-6 hours.
Instead of salt, you can add a little vinegar to the liquid. Sometimes shells are completely filled with vinegar essence diluted with water, after lubricating the shells with baby cream. You can soak cotton wool in vinegar, stick it around the outside of the sink and wrap it with film or foil. This compress is left for 5-6 hours. Then the shells are cleaned with a washcloth, causing the lime to fall off in pieces.
Important! After using vinegar, sinks may become dull. Varnishing will help restore their shine and color.
Bleach
You can bleach shells using chlorine bleach, which is diluted with water in a 1:1 ratio. The shells are immersed in the solution for 1-2 hours. After bleaching, wash them with a washcloth in warm, clean water.
Toothpaste
Ordinary toothpaste will help remove limescale from the shell. Spread it over the entire surface of the sink. The shell covered with toothpaste is left for 5-6 hours or overnight. Then the shell is placed in warm water. The paste is cleaned off the surface with a brush or washcloth. All the lime comes off the sink along with it.
Important! You can first try to clean the shell with toothpaste and remove the remaining limescale with a vinegar solution.
Final coating
Varnish will help give the shell a beautiful appearance, shine and intense color. Before applying varnish to the shell, the shell is dried for several days, and the surface is lubricated with glycerin or vegetable oil.
Mineral oil
Not every product can be used to varnish shells. It is better to buy an oil varnish for wood or painting. In appearance it looks like liquid honey. This varnish is made on the basis of oils, and after application it takes a long time to dry.
See also
TOP 10 means for cleaning a dishwasher at home and how to do it at home
Polyurethane matte or glossy spray
The surface of sea shells can be coated with a polyurethane spray. This aerosol varnish is made on an oil base. They cover furniture, antiques, and various crafts. The spray dries quickly and is perfectly absorbed into the surface of the shell.
Clear nail polish
Sea shells can even be varnished with ordinary nail polish. It is advisable to use transparent, with oil of some plant.
Important! Any varnish is applied in 2-3 layers. The interval between applications is several minutes or hours (depending on the type of product). The varnish should dry at room temperature.
How to remove starfish smell. 20 simple tricks for working with seafood
Shrimp, squid, mussels, cuttlefish and octopus... How many possibilities all these seafood conceals in skillful hands. They make excellent pastas, pizzas and lasagnas. They will decorate any table, stewed or baked, or complement salads. Finally, they will simply be an excellent snack for beer...
Unfortunately, you won’t find fresh seafood in our stores; we are not in Italy or Greece. Only residents of coastal areas can be lucky in the pursuit of fresh food. Everyone else has to be content with bags of frozen and, most often, already boiled shrimp and mussels.
They can also be cooked deliciously, the main thing is to defrost them correctly and not to overcook or overcook them, otherwise the delicious product will turn into rubbery rubbish. 20 simple tips will help you avoid this.
How to choose
1. If you buy live shellfish, their valves must be closed. When opening the shell, you should be able to see the muscles contracting. You should definitely smell fresh seafood and buy only those that smell good of the sea and a little fish.
2. If you bought frozen seafood, you need to smell it after defrosting. They should smell like the freshness of the sea. If there is an unpleasant odor, it is not recommended to eat them.
Important! Seafood can be very poisonous, so you need to be careful when choosing and before cooking. If the product raises the slightest doubt, throw it away immediately, don’t regret it.
Preparation
Shrimp on ice Photo: www. globallookpress. com
3. It is better to defrost shrimp and mussels gradually in the refrigerator. And the squid should be filled with cold salted water.
Storage
4. Freshly frozen (gray) shrimp do not last long even in the freezer. They can be kept there for no more than a week, so you need to buy such shrimp shortly before cooking.
How to boil
5. Live crayfish and shrimp should be placed in already boiling salted water.
6. Most of the seafood we buy is already boiled and then frozen. They do not need to be boiled again. You just need to defrost and warm it up in very hot water, which does not need to be brought to a boil.
7. Gray shrimp - raw. They need to be boiled in boiling water for 3-4 minutes.
8. Squid meat cooks very quickly; it is important not to overcook it, otherwise it will become rubbery. But if this happens, then the squid needs to be stewed in a small amount of broth for about 20 minutes. The meat will become soft again.
Fry
9. Before frying, any seafood must be defrosted. Drain the water. If you defrost it in a frying pan, the seafood will give a lot of water, it will not melt. And the seafood will turn out rubbery, not stewed or fried.
10. The taste of unrefined coconut oil, highly heated with garlic, a pinch of cinnamon and pepper, perfectly complements seafood. But its specific taste is not for everybody.
Make it more tender
11. Shrimp meat in the shell will be very tender if you do not boil them in water, but steam them. Medium shrimp take 5 minutes to cook.
12. Another good way is baking or stewing in sauce. Cream, tomatoes with the addition of herbs or garlic are suitable as a sauce.
Remove odor
13. For large shrimp, the black intestinal vein must be removed, otherwise it will give the meat an unpleasant taste.
14. Finely chopped garlic, added during frying, will remove the strong smell of seafood and make the sea smell more refined.
15. A tablespoon of vodka added when baking seafood in the oven can remove a strong smell.
Simple recipes for preparing rapana
You can prepare different dishes from the rapana clam by combining it with the appropriate ingredients. Let's get acquainted with the most popular recipes:
Recipe No. 1: Salad of rapana and vegetables
Ingredients:
- 200g. peeled and cooked rapana;
- 1 medium can of canned corn;
- 1 medium-sized cucumber;
- 2 small tomatoes;
- classic mayonnaise.
The rapanov are washed well and removed from the shell. In this case, you can use different methods, the main thing is not to disturb the consistency of the seafood delicacy. In a separate bowl, mix table salt and soda, obtaining a homogeneous paste, where the shellfish are sent. Rub soda-salt powder well on shellfish to remove mucus with a black coating. If necessary, the procedure is repeated several times, after which the soft body of the animal is washed in running water.
In a separate bowl, mix corn (without the canned solution), diced tomatoes and cucumbers. Add boiled (no more than 5 minutes) in salted water and cooled rapana to the prepared salad, and then season everything with mayonnaise.
Rapan chops
Ingredients:
- 250g. Rapanov;
- 3 tablespoons vegetable oil;
- 1 chicken egg;
- 3 tablespoons flour;
- 1 tbsp lemon juice;
- a pinch of salt and ground black pepper.
The shellfish are washed and removed from the shell. The body is cut lengthwise, beaten with a special hammer and sprinkled with lemon juice. Sprinkle pepper and salt on top and then allow to marinate a little. Next, the meat is dredged in flour and beaten egg. Pour oil into a hot frying pan and fry the shellfish for 2.5 minutes on each side.
Preparation
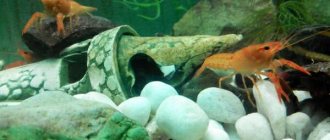
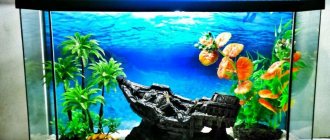
Having found a particularly lovely seashell on the shore, and eager to immediately put it in your home aquarium, you should not rush - first you need to process the future decoration as follows:
- First of all, they check whether the shell is empty - there should be no remains of the owner in it, otherwise pieces of flesh will decompose and poison the water in the tank. If the sink is not empty, it cannot be used.
- After making sure that the sink is free, it is brought home and thoroughly cleaned with a stiff brush, removing dirt and other build-up on the surface. Immediately after this, the shell is sent to boil over low heat for 3 hours to completely destroy bacteria and germs.
- Having finished with heat treatment, the hot shell is sent to a basin with cold water, where the future decoration is soaked for 24 hours. The disinfection procedure will save the lives of fish in the aquarium and eliminate the possibility of developing infections and poisoning the aquatic environment. Only after all the above manipulations can the shells be immersed in an artificial pond.
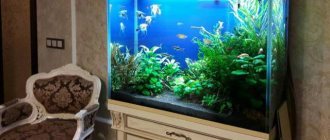
Sea or river shells are a simple and convenient way to decorate an aquarium and give the tank a natural look. However, before using shells, you should make sure that their placement will not adversely affect aquatic flora and fish, and only then begin planning the design and selection of shells. In addition, it should be remembered that shells found in the wild must be carefully processed before diving, otherwise the owner risks the life of small pets.