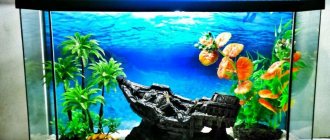
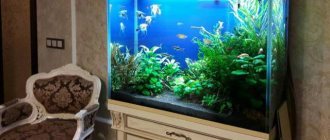
A beautiful indoor aquarium is an original addition to the interior and the pride of an aquarist. But sometimes the walls, bottom and other parts of the aquarium are covered with a green or white coating, indicating the settlement of pathogenic algae in the artificial reservoir. What to do and how to clean an aquarium at home?
The occurrence of plaque indicates an imbalance in the ecosystem. Plaque can have different shades and be located on glass, soil and stones. Before you start the fight, you need to try to find out why the walls of the aquarium turn green, indicating the appearance of pathogenic algae in the ecosystem.
How to remove green deposits on the walls of an aquarium
A dense layer of green deposits in the aquarium impairs visibility.
The cause of contamination is microscopic algae - Protococcus. As a result of their growth and development, a greenish layer of cells is formed on the inside of the walls. If it is small, this is normal and will not harm the fish in any way. But if the plaque becomes so abundant that it is impossible to see through it what is in the aquarium, it’s time to take action.
Getting rid of green algae is simple: you need to wait until Protococcus completes the process of asexual reproduction by zoospores. The cycle lasts 3 weeks. During this period, all zoospores should settle on the walls and become full-fledged cells. As a result, the unpleasant green coating will gradually lighten and die off.
After 21 days, you can clean the glass using a scraper. It is easy to get rid of the remains of dead cells with a hose equipped with a water change system.
To ensure that the situation does not repeat itself, it is necessary to analyze the reasons why Protococcus appeared and make efforts to eliminate them. Most often, green deposits appear in containers that are placed in direct sunlight. High water pH also promotes algae growth. Eliminate these causes, and plaque formation will remain within normal limits.
If you clean the glass before the end of its life cycle, it will take months to scrub off the green mass on the walls of the aquarium.
How to remove brown plaque on walls
Brown coating on walls and plants appears due to diatoms.
Brown coating may appear due to the development of diatoms. If it is discovered during the start-up of the aquarium and has not yet spread to the entire area, you can get rid of it by maintaining proper maintenance. In this case, they will disappear within two weeks. It is recommended to regularly clean the glass and change up to 30% of the water. With this approach, intensive development of plants will displace diatoms.
If the appearance of diatoms is detected in an existing aquarium, you should change the liquid more often, adding about a quarter of fresh water 2-3 times a week. It is also necessary to clean glass and interior decorative elements using brushes, scrapers, and sponges.
In addition, you should pay attention to the filter. For example, the filtration rate may decrease due to air pollution or contamination of the water intake system. It is also worth reducing the daylight hours to 360 minutes per day, then increasing its duration to 10 hours over 14 days. Lamps need to be changed once a year.
Residents such as Otocinclus, Theodoxus snail, Siamese algae eater, Hypostomus plecostomus, Gyrinocheilus and mollusks will also help get rid of brown algae.
Controlling diatoms with chemicals is in most cases ineffective and can worsen the situation. Using a preventative dose of algaecides will stimulate the growth of aquarium plants, which will help get rid of the problem.
How to get rid of black deposits in an aquarium
Dark plaque is called “blackbeard” because of its characteristic appearance.
The formation of dark plaque on stones and walls indicates a “blackbeard” infection. This organism inhabits plants and decorations.
You can get rid of it by using chemicals and reducing the light level. But this will only give a partial effect and will not solve the problem. To completely destroy the “blackbeard”, an integrated approach is needed:
- Replace a quarter of the aquarium water regularly. The liquid should not contain foreign impurities; this can be verified by using special indicators.
- Clean the soil from remaining organic matter, such as dead leaves. Reduce the amount of feed if it settles on the bottom.
- Increase the lighting power to 1 W per 1000 ml of liquid. The light should be on for no more than 12 hours a day.
If successful, the black coating on the rocks in the aquarium will begin to disappear: first the color of the algae will become lighter, and then they will fall off.
How to clean rocks in an aquarium
A solution of hot water and bleach cleans stones well from plaque.
Often, algae grows not only on the walls, but also on decorative elements, which spoils the appearance. It is easy to wash stones from greenery; for this you will need the following tools:
- brush (you can use a toothbrush) or sponge;
- small capacity;
- bleach.
You can remove plaque from the surface of stones by following several steps:
- Place all stones in a container.
- Pour boiling water or hot liquid over them and leave for a quarter of an hour.
- Remove them one by one and clean each stone with a sponge or toothbrush.
- Place the decorations in a container and pour a solution of bleach and hot liquid in a 2:1 ratio for 20-25 minutes.
- Rinse with running water.
If all the conditions for cleaning the decorative elements have been met, during the second soaking the algae will first turn white and then fall off.
Organic Removal
The first step in treating any shells is to remove the organic particles that cause the unpleasant odor.
Boiling
One of the most common and effective methods that does not require special skills or tools. To do this, you will need a pan of the required volume and tweezers for removing tissue. Boiling or cooking will help soften organic residues and make them easier to remove.
- Place the collected shells in a saucepan, fill them with water so that it completely covers the surface.
- Place the container on the fire, bring to a boil and simmer over low heat for about 5 minutes. The time also depends on the number of shells and their shape. The more “twisted” the shape, the longer it will take to cook.
- Carefully remove the shell from the water and use sharp-tipped tweezers to remove any organic debris.
You need to be extremely careful not to get burned, since the extraction procedure must be carried out while the shell is still hot.
Freezing
This method guarantees the destruction of all living tissues and their unhindered removal. To do this you need:
- place all the shells in an airtight bag, fill them with water and place in the freezer for several days;
- remove the bag and let the contents melt naturally, without resorting to shock methods (pouring boiling water, defrosting using a microwave);
- Remove any residue with tweezers and rinse under running water.
Boiling and freezing are effective ways to remove organic matter and get rid of the smell of rotting flesh. But they have one significant drawback. There are shells that can be damaged by this processing method due to their fragile structure or the presence of cracks.
Burying
The method is not very fast, but the safest from the point of view of preserving the shells. To do this you need:
- Dig a hole about 45-50 cm deep. It should be spacious enough for all the shells to fit in it, with some distance between them.
- Sprinkle with soil and lightly compact the surface. Leave it for several months.
- After the set time, dig up the shells and make sure that there is no organic matter left in them.
- Soak in warm water for a few days and then rinse under running water to remove dirt.
Beetles, worms, flies and larvae living in the soil will destroy all animal tissue and eliminate the smell while the shells remain in the ground.
Methods and tools used for cleaning
Special equipment will help to clean the inner surface of the walls:
- glass scraper to remove dark deposits and algae;
- siphon to clean the soil;
- container (bucket, basin);
- net
Magnetic scraper for removing plaque
Siphon for soil purification
Net for catching fish
The scraper is selected depending on the size and type of the aquarium. It is better to give preference to magnetic. It is more expensive, but it collects dirt from the surface of the glass better. For these purposes, you can also use a regular sponge, not soaked in detergents.
A special soil cleaner will help rinse the aquarium sand without removing it outside.
If it is necessary to change the water, it is better to retrieve the fish using a net. It should also be chosen taking into account the size of the inhabitants, so as not to damage the fins when catching.
In addition to available tools, cleaning products are needed. Do not wash the aquarium with preparations that contain chemicals. If their particles remain inside, there is a possibility of harming the inhabitants. Baking soda is acceptable, but it can also be dangerous for fish. After cleaning the walls by any means, you need to rinse everything thoroughly with clean water.
If you cannot do without a special cleaning solution, it is advisable to use soap, Comet or Domestos.
Traditional methods
Since it is not recommended to use chemicals to remove plaque from glass, there are traditional methods for combating unwanted algae:
- 20 g of citric acid in powder form are dissolved in one glass of water, mixed and poured into a spray bottle. Then the walls are treated with this mixture, left for a quarter of an hour, and washed well.
- Dilute one part of ammonia in 10 parts of liquid and remove the mucus layer with the solution.
- 1 tbsp. l. acetic acid is mixed with one glass of water and applied to the surface that has begun to turn green.
Despite the fact that traditional methods are considered more gentle and safe, all inhabitants must be transplanted before using them.
Cleaning a new aquarium
After you have bought a new fish house, you must clean it before introducing the inhabitants. This is a necessary procedure. As, in principle, for any thing after purchase. After all, it is unknown where it was stored in the warehouse, how thoroughly it was cleaned in the display case, and whether it was covered with road dust during transportation. New aquarium - how to clean it?
For the first cleaning
The first cleaning is quite simple - here are the instructions:
- It is best to wash in the bathroom.
- Lay out towels or cloth in advance. After all, an aquarium is an extremely fragile container that can easily slip out of your hands when wet.
- What is the easiest way to clean a new aquarium? Prepare a brush (or dish sponge) and baking soda.
- Carefully place the aquarium on the cloth and pour hot water from the shower over it.
- We will tell you further how and how to wash a new aquarium. Sprinkle some baking soda on a brush or sponge and start scrubbing the walls inside and out with this tool.
- After cleaning, rinse the container several times to remove all remaining soda from it. You can carefully lay it on its side to wash all the walls.
- The last stage of the action “how to wash a new aquarium” is the most important. You need to very carefully remove the container from the bathroom. We recommend asking a friend for help.
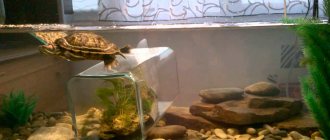
- That's all, the aquarium for turtles and fish is ready for further installation.
Prevention of plaque formation on the walls and stones of the aquarium
The level of lighting in the aquarium needs to be controlled by lighting.
As preventive measures that will prevent the reappearance of pests, you can apply:
- regular change of water, pre-settled for 5 days;
- control of daylight hours using backlighting, which should operate no more than 10 hours a day;
- filling the aquarium with plants and taking good care of them;
- launching fish that feed on algae;
- control of the amount of food: within 15 minutes the fish should eat all the food received; if it remains and settles on the stones, then the amount should be reduced;
It is worth fighting brown, green and brown plaque on the walls of the aquarium not only to give it an attractive appearance, but also to save the lives of the inhabitants. Algae can upset the balance of nutrients in an artificial ecosystem, and then the fish will feel uncomfortable there.
Prevention
Below are the rules, following which you can avoid excessive growth of algae in your aquarium.
- Daylight hours should not exceed 11 hours, ideally 8 hours. You can set the timer so that the backlight works, for example, 4 hours in the morning and 4-5 hours in the afternoon.
- Maintain the water temperature in the range of 22-27 C (optimally 24-26 C).
- Maintain the content of phosphates in the water no more than 0.8 g/l, nitrates - 25-40 mg/l.
- Choose fast-growing plants.
- Change the water in the aquarium promptly.