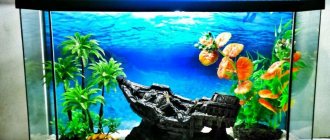
Aquarium from a jar
Read also: How to fix broken headphones
Aquarium from a jar
conditions for keeping fish in a jar
And who said that the first aquarium should immediately be “fildepers”. We are sure that almost all aquarium gurus started with a small aquarium. As a rule, the first aquarium is a 10-50 liter jar.
What aquarium fish can be kept in a glass jar?
A glass jar is the same tank as an aquarium, only relatively small, therefore, only very miniature and unpretentious fish, such as Guppies, some other viviparous fish, Killie fish, Betta fish, and also catfish, can live in an ordinary jar, for example, a three-liter one. Corridor. You are allowed to keep one goldfish at a time.
The “small” category also includes many other species of suitable size from among the characins and cyprinids (danios, tetras, neons, barbs, etc.). However, it is not a good idea to keep them in jars as they require a lot of space to float.
Mini aquarium
When playing with your baby, you often manage to create something new and unusual with your own hands. This could be a castle from a construction set that is not provided for in the assembly instructions, a doll made from an ordinary knitted sock, or. an aquarium with a fish swimming in it!
To create a toy mini-aquarium you need very little: - a small jar (this can be a decorative jar or a beautifully shaped 500 ml pickle jar); - a lid for the jar (preferably screw-on); - a self-hardening mass for modeling (an excellent material for creativity provided by the brand “Kalyaka-Malyaka”;—a plastic fish (there are probably a couple of small fish in your child’s toy arsenal);—a thin fishing line or monofilament, a thick needle;—a thin wire for creating frames of underwater plants.
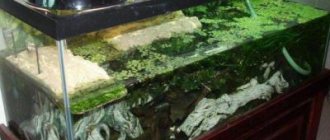
What to consider when growing aquarium plants in a glass jar
Plants certainly balance the biological system. The roots help process organic matter into safer compounds, and the leaves produce oxygen. However, the latter also has the opposite effect. In the dark, plants, on the contrary, absorb oxygen and release carbon dioxide. If there are a lot of them, then in the conditions of a glass jar, aquarium fish can suffocate overnight. Another potential problem is related to the normal growth of the plants themselves and primarily concerns lighting. For the jar, you should select only unpretentious and shade-loving plants, mosses or ferns, since they will receive light from an indoor lighting source, and the lighting regime will be irregular. In addition, these aquatic plants can be content with a minimum set of minerals, the deficiency of which is inevitable in a glass jar.
Sources:
https://fanfishka.ru/akvariumnye-stati/887-akvarium-iz-banki-soderzhanie-akvariumnyh-rybok-v-banke.html https://sdelaysam-svoimirukami.ru/2195-mini-akvarium.html https: //www.aqvium.ru/kakih-akvariumnyh-rybok-mozhno-derzhat-v-steklyannoj-banke
Adding fish
If you plan to include all the main links in a closed aquatic ecosystem, you cannot do without fish and shellfish. But before placing representatives of freshwater fauna here, it is important to make sure that all plants have taken root, taken root and are actively growing. In addition, you should definitely work on creating a microbial flora. Bacteria are the next element in the food chain of a self-contained aquatic ecosystem. Before adding fish, you need to place small crustaceans and various microorganisms in the aquarium, including pond snails, daphnia, and microplanaria. Some of them are food for fish, which do not eat algae and other plants. For this purpose, it is recommended to add infused water or water from an aquarium at a pet store.
Most of these small microorganisms remain invisible in water. Usually 10-14 days are enough for the reproduction of small living creatures to such a quantity that will be quite enough to place fish and shrimp in the aquarium. First, guppies and shrimp are added to the jar with the ecosystem. There is no need to release several dozen at once: it is advisable to repeat the procedure several times during the day, adding 1-2 individuals to the aquarium at a time. These fish reproduce quickly and eventually become food for larger fish.
Many types of fish in a small jar is not a good idea. If you want to populate an aquarium with a variety of animals in order to balance the ecosystem, you will have to be patient and have a large tank. It will take time to create species diversity: you need to make sure that each species takes root normally, so different fish are introduced in turn.
How to dilute at home, instructions for beginners
Like fertilization, danio spawning is quite simple. Aquarists should only take care of the safety of the offspring, since adults immediately after spawning tend to eat most of the eggs . Let's look in more detail at how fish reproduce in an aquarium.
Where to breed?
Usually a separate aquarium is used as a spawning ground, since in general it is difficult to monitor the eggs, and subsequently the fry.
In a separate aquarium
For spawning, a separate aquarium is most often equipped, the volume of which is 20-40 liters.
An important condition is the presence of a special mesh, which is located at a distance of 2-3 cm from the bottom. It should fit tightly to the walls so that adult Danios cannot squeeze through to the eggs that have fallen to the bottom.
Some aquarists place special spawning soil, balls, tangled wires and other objects on the bottom that can hide the eggs from hungry parents.
Of course, the spawning area must be equipped with a compressor, a small filter, a heater and a lamp. If desired, you can place plants with long shoots (for example, elodea).
After placing all the necessary items, clean water is poured into the aquarium and left for several days. Thus, preparation of the spawning area must be carried out in advance.
In a common aquarium
An aquarium with a net is necessary so that the fry can hide behind it.
Sometimes spawning is carried out in a general aquarium if there are many different shelters and plants in it.
However, most of the eggs will still be eaten - if not by the Danios themselves, then by other inhabitants of the tank. With this method, you should not expect a large offspring, so it is still better to avoid spawning in a community aquarium .
In a three-liter jar
In some cases, spawning can take place even in an ordinary three-liter jar. As a rule, this method is used by those aquarists for whom it is important to preserve the health of the females, but raising offspring is not part of their plans.
Preparation
Partial preparation for spawning was described earlier, but novice aquarists should read the detailed recommendations again.
First of all, you need to take care of the correct water parameters in the tank where the spawning will take place:
- temperature depends on the time of year (in summer 20-25 degrees, in winter 17-22);
- acidity – from 6 to 7.5 pH;
- hardness – maximum 10 mmol/l (if your water is too hard, it can be diluted with distilled water).
Important! You need to monitor the purity of the water and change approximately 15-20% of its volume every week.
An aerator must be installed in the spawning area, and plants (sparkleweed, pinnate, and others) are placed on the bottom. A net or other items necessary to protect the caviar are placed on top. The spawning area itself can be planted with various plants with long stems, ferns or moss, which create a certain comfort and facilitate the spawning process. Typically, aquarists use hornwort, elodea, Singapore or Java moss.
The aquarium itself must hold at least 10 liters of water. It is better if it is rectangular, since Danios are very active and also make constant rapid movements during spawning. Fish ready for spawning must be carefully moved into the aquarium, and one group should contain at least 5 individuals, optimally 7 or 8 fish.
Process
The male will chase the female - this is normal.
Large-bellied females should be placed in a spawning tank before spawning. Transplantation is carried out in groups (as already mentioned, from 5 to 8 fish).
Please note that spawning is carried out in the presence of males, and there should be 2 times more males than females (for example, 2 females and 4 males). Beginning aquarists have difficulty determining the sex of an individual; if such a situation arises, we recommend reading an educational article on how to distinguish a female Danio from a male, which discusses the main signs of sexual differences in fish.
If there are more pregnant females, then some of them are left in a common aquarium, and then they are swapped with those who have already spawned.
The transplant itself is carried out in the evening with the lights off, so as not to cause severe stress to the fish. If everything went well, then spawning begins in the morning. From the outside, this process looks like the males are aggressively chasing and pushing pregnant females. In fact, the males perform light pokes on the abdomen of the females, which helps them get rid of the eggs. If there are not enough males in the aquarium, then spawning will be difficult.
An important condition for successful spawning is a low water level (about 10 cm). The fact is that in nature Danios spawn almost at the very bottom, so this trick will make the spawning process easier.
Repeating the process
Inexperienced aquarists often transplant spawned females into a community aquarium, thinking that the spawning is over. In fact, after 1-1.5 weeks it is necessary to carry out another spawning, since in natural conditions Danios produce several eggs in a row.
If conditions for spawning are not provided (a separate aquarium and the presence of males), then the eggs may become overripe and the fry will not be able to develop from them. Sometimes the female does not want to spawn the remaining eggs at all, which threatens her health.
If the eggs are overripe (and sometimes it happens that they are not yet ripe), then the female will hide from the male. Otherwise, repeated spawning will take place in the same way as the first spawning.
What to do if spawning fails?
Sometimes there is a delay in spawning, and in this case it is necessary to leave the females and males in the spawning area for a couple of days, giving them food.
If it is obvious that the fish is full of eggs, but for some reason it cannot get rid of the eggs, then you need to come to the rescue.
Try carefully wrapping the fish in wet cotton wool and holding it firmly with the thumb and index finger of your left hand. Using the index finger of your right hand, gently press on the abdomen, squeezing out the calf. If everything is done correctly, and Danio is not harmed, then after 7-10 days she will be ready to spawn again.
If it was not possible to achieve spawning, then the pregnant females need to be placed in a common aquarium, and then all of the above should be repeated after a couple of weeks.
Craft “Aquarium on a plate”
Necessary elements for the craft:
- plastic plate;
- universal glue;
- colored cardboard;
- acrylic paint;
- pebbles for decoration.
Manufacturing stages:
- You need to cut out the top of the plate - about 5-7 cm. We glue this piece of plastic to the bottom side of the container as a stand.
- Paint over the plate. Let it dry for a while.
- Apply brown paint to the bottom and glue pebbles.
- Cut out the shape of a fish and seaweed from colored cardboard. We also glue them onto a plate.
How to clean the soil
The soil should be cleaned during a water change using a siphon. It can be used to remove dirt and silt that has accumulated on the surface of the substrate. But it should be borne in mind that when the layers are mixed, most of the bacteria involved in the nitrogen cycle die, and this leads to a disruption of the biological balance in the aquarium. Therefore, do not panic if after siphoning there is a white veil in the water, like fog, this is a bacterial outbreak, it will pass in 5-10 hours.
To do this, lower the siphon into the water, the other end of the hose into a bucket on the floor of the room, and use a bulb pump to pump the water until it flows by gravity. After this, begin to move the siphon along the ground, like a vacuum cleaner. The force of the water flow causes the soil to rise, but since it is heavy, it falls back to the bottom, and lighter debris is sucked into the tube with the flow of water and drained into the bucket.
Overgrown grass beds with a small number of fish and no overfeeding can be cleaned once a month. Aquariums with a small number of plants and a maximum permissible population are cleaned once a week. To reduce the load on nitrifying bacteria, after siphoning the soil, the fish are given a reduced amount of food, which is increased daily. or in general, you can leave the fish hungry on this day.
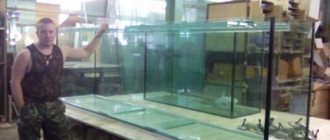
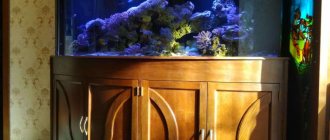
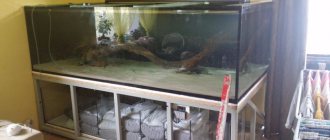
❶ How to build an aquarium
You will need
- glass, sealant, silicone glue, tools, cotton gloves.
Instructions
Before you start making an aquarium, you need to clearly understand what kind of aquarium you want to make. Decide on the size and place where it will stand. Think about the shape of the future aquarium. You can easily make a small aquarium from a glass jar. If you want to make a real medium-sized aquarium, then you should make it in a rectangular shape. It is also necessary to think through all the details of your aquarium.
Make a drawing of the future aquarium. Take this step carefully, as a correctly completed drawing will save you from damaged material. First make a small sketch, and then translate it into a detailed drawing. Check that it is done correctly.
Now you need to choose the glass from which the aquarium will be made. Glass comes in different types. For an aquarium, you must choose glass of at least M1 grade. Also, before purchasing a glass, make sure that there are no scratches, scuffs or bubbles on the glass. After purchasing glass, you need to think about cutting it. If you are working with glass for the first time, you should not try to cut glass with your own hands, as there is a high probability of ruining the material. Better trust the professionals. Contact the nearest workshop, where they will cut out blanks for you according to your drawing. Remember that cutting on a machine is more accurate than cutting by hand. Do not forget about processing the edges of the glass, as this is a very important safety point. If the workshop doesn’t do this for you, you will have to process the edges yourself. Never leave the glass edges untreated! Now you can start assembling the aquarium itself. To do this you need to use special glue and sealant. It is best to choose silicone-based glue. The choice of sealant should also be treated with attention and care, since there are sealants that, with their composition, can kill the microflora of aquarium organisms. Sealant can be black, white or colorless. There are two types of gluing - walls to the bottom and walls around the bottom. Both are in no way inferior to each other. It is worth noting that it is best to glue it first, and only then process the edges, since silicone glue grips smooth surfaces well, but may not glue rough ones. After gluing, place the aquarium to dry. Check the assembly of your aquarium. To do this, fill it with water and place it on a sheet of paper. There shouldn't be any leaks anywhere. If it does appear, then do not rush to throw away your aquarium. Everything can be corrected. If the leak is very small, then you don’t even have to touch it, since the grains of sand in the aquarium will soon clog it, and water will stop flowing through the leak. If the leak is of an impressive size, then it is necessary to re-glue this part of the seam. After making the body, you can proceed directly to decorating your aquarium. Don't forget about the backlight and filter.
Video on the topic
Helpful advice
Glass cutting is best left to professionals.
Features of breeding depending on the species
The genus of zebrafish includes many species, so the reproduction process of some of them has special features:
- If you breed pink Danios, be sure to prepare a separate aquarium for spawning. For successful reproduction it is necessary that there are two males for every female.
- Leopard Danios spawn for two months. Interestingly, one pair of fish remains faithful to each other throughout this entire period.
- Golden Danios are also faithful to each other, and after one spawning they can remain a couple for the rest of their lives.
In general, Danio reproduction is quite easy and predictable.
Terrarium for hamsters
Such dwellings provide for ventilation and sound insulation systems. Their prices vary depending on the size, quality, and included accessories. Among the materials from which structures are made, experts recommend choosing inorganic glass; it is much stronger than other options.
Advantages and disadvantages
The proportions of the terrarium are designed to provide sufficient air for all its inhabitants. As a rule, there are 3 main elements inside such a structure: a feeder, a drinking bowl and a small house. To entertain hamsters, it is also recommended to install gaming accessories inside the terrarium: a wheel, hammocks, ladders.
The advantages of a terrarium are:
- absence of noise from animals in the room;
- blocking unpleasant odors;
- ease of monitoring the hamster;
- saving time and effort when cleaning the home - the terrarium for hamsters is easy to clean and disinfect.
Important! When selecting detergents, it is necessary to take into account their aggressive effects on animals.
The disadvantages of the terrarium are minor:
- We'll have to think about a way to strengthen the drinking bowl.
- Communicating with your pet through glass is less fun.
Important! Many breeders of pet rodents place a Velcro drinking bowl inside the terrarium.
How to make a terrarium with your own hands
The basis is a plastic container. It is better to choose larger sizes. For example, for 2 dungeons, a plastic box with dimensions of 57x39x27 cm will be enough. For work you will need: a metal mesh with small cells, scissors, an awl, and wire.
Manufacturing instructions:
- On the lid of the container, mark the perimeter of the hole on which the mesh will be installed.
- We apply the mesh and use an awl to poke holes for the wire.
- We cut the required piece of mesh and secure it with wire on the lid.
- From the inside of the lid, cut out a rectangle along the contour of the wire fastenings, and you also need to leave a gap (1 cm).
- We make several holes in the bottom of the container for additional ventilation.
The modified lid conveniently “snaps” onto the container - the animal will not be able to move it. This terrarium is easy to move and wash. It is advisable to choose transparent containers for homemade designs.
Topping up evaporated water
In aquariums without a lid, water actively evaporates. Instead of evaporated liquid, you need to add new water. Adding evaporated water is not a replacement, since only clean water evaporates, and all minerals, nitrate, phosphate remain in the jar. If you do not make a full replacement, the fish will begin to get sick and die.
Add water carefully, very slowly, so that a powerful stream of water does not wash away the soil lying at the bottom. You can put a plate on the bottom and pour water over it.
From a light bulb
Those who like to give a second life to things sometimes never cease to amaze with their ideas. It was the needlewomen and craftsmen who came up with how to use burnt out light bulbs. It turns out that you can use them to create a real mini-reservoir for fish.
Instructions
A light bulb aquarium can be a charming souvenir, holiday gift, or office desk decoration. You can also give small fish in it. So, how to create an aquarium with your own hands at home?
- Select a larger light bulb and separate the base from it. This can be done by lightly tapping it.
- Remove the insides of the light bulb and clean the sharp edges of the bulb with a file.
- Wash the flask thoroughly and place soil on its bottom. You can plant a small plant or throw a few shells into the light bulb. Fill the flask with water.
- Return the base to its place. The resulting mini-aquarium can be installed on a small stand.
Unfortunately, it will not be possible to keep fish in a pond made in this way. But some craftsmen, using plexiglass and several light bulbs, manage to create containers of unusual shapes. They are quite spacious and allow you to keep fish.
Sorry, there are no surveys available at this time.
How to care for caviar?
Danio reproduction does not end with spawning. Layed eggs are very vulnerable to various infections, so it is important to provide proper care:
- Dim the aquarium lighting.
- Dissolve erythromycin in water, ground to a powder.
- Iodine can also be used for disinfection (at the rate of 3 drops per 10 liters of water).
- Watch the eggs carefully. Some of them sometimes turn white a few hours after spawning, which means they are infected with a fungus. Such eggs must be removed immediately using tweezers to prevent infection of the rest of the eggs.
- Change the water daily (from 10 to 25% of the total volume) and monitor compliance with the temperature regime (26-28°C).
If there is a massive death of eggs, the cause is usually poor quality water.
Therefore, it is important to consider the quality of the water in which the eggs will spawn and be sure to check it for compliance with the required parameters.