On the shelves of pet stores you can find a wide range of aquariums of different sizes and shapes. But more and more amateur aquarists want to assemble a container to create a sea corner at home with their own hands. A mandatory component of such an assembly is aquarium glue. It will help not only connect structural elements, but also repair cracks, chips, and divergent seams that form during operation.
Why make an aquarium with your own hands?
It’s easier to buy any design for your home. However, many craftsmen want to try their hand at assembling something unusual with their own hands. Homemade assembly has the following advantages:
- Experience is gained that may be useful in the future.
- You don't need to spend a lot of money.
- During a homemade assembly, the master does exactly what he wants. He does not need to search for the model of interest around the city.
To make a homemade structure, you need to know how to glue an aquarium with your own hands from individual elements.
How to glue a glass aquarium or choice of glue
Knowing what glue to use for aquarium glass, you can make a reliable design yourself. It will withstand high water pressure without deforming. A special sealant is used to connect the glass plates.
He must have the following qualities:
- Increased elasticity. High water pressure will destroy the extra strong adhesive once it dries. The seam needs to adapt to changing pressure.
- Resistance to changes in loads and temperatures.
- No toxic components. The seam should not emit toxic substances that could kill the inhabitants of the homemade structure.
- Antibacterial substances contained in some adhesives can harm fish.
- Aquarium glue should not contain dyes.
- Safe compounds for living organisms are obtained based on neutral compounds.
- Glue resistance to UV radiation.
- Strong adhesion to non-porous materials.
- The glue is water resistant and also vibration resistant.
Gluing an aquarium can be done using several types of sealants:
- Acrylic compounds are used extremely rarely due to their low resistance to moisture.
- Butyl mixtures - their low strength makes them unpopular.
- Epoxy glue – you can glue an aquarium with this compound; it is safe for fish. But problems arise while working with it.
- Silicone aquarium adhesive - its high elasticity makes this adhesive the best option for gluing glass plates. Connects different materials well.
Silicone adhesives have a number of strengths over other compounds:
- There is no release of harmful substances during contact with water or air.
- There is no need to wear protective equipment when carrying out work.
- Easy to use.
- The hardening process takes about 20 minutes.
The finished seam can withstand a load of up to 200 kg.
Silicone sealant
Soft and plastic silicone sealant is made from a solid substance - silicon, that is, polymers obtained on its basis. The base part of the sealant is silicone rubber. Also includes:
- vulcanizer that affects the viscosity of the material;
- an adhesive component that ensures adhesion of surfaces;
- plasticizer – additive for elasticity;
- colored filler;
- reinforcement necessary for strength.
Silicone for an aquarium should be quick-drying, plastic, and moisture-resistant. Let's consider the advantages and types of silicones used in the manufacture and repair of aquariums.
Advantages
It is recommended to use aquarium silicone sealants when gluing glass tanks for keeping fish, snakes, snails and other inhabitants of the aquatic world. Synthetic products do not contain toxic compounds, so they are safe for living organisms.
Advantages of silicone sealants:
- extensibility;
- increased strength;
- excellent adhesion;
- moisture resistance;
- heat resistance;
- impenetrable to UV radiation.
This is interesting! Products treated with silicone sealants always have high strength seams - to detach the glued plate, a force of about 200 kg will be required. During operation, high-quality silicone does not crack or spill out, and at the same time keeps the joints in a stationary state.
Acid
One-component aquarium silicone comes in three versions: alkaline, acidic or neutral. Alkaline is included in the special-purpose group and is rarely used in everyday life. Acid polymerization silicone sealant is used for constructing aquariums and terrariums. It has a strong vinegary smell that appears as the layer hardens. Perhaps this quality somewhat reduces demand. When working, you must wear a respirator, and you cannot use the prepared container until the vinegar fumes have evaporated. Before adding fish, the aquarium must be rinsed with water several times.
Neutral
A good alternative to acid sealant is neutral glue for aquariums: it is odorless and has enhanced adhesive properties. It dries quickly, but its price is higher than that of acid. The neutrality of the composition is also emphasized by its color – transparent. Repels dyes and does not adhere to the old layer of sealant. Before application, it is necessary to remove any remaining adhesive from the surfaces and degrease them.
Colors
A dye is added to the silicone sealant, which affects the color of the finished product. Aquarium glue can be black, white, or colorless. The white sealant is painted to match the color of plants, medicines, and food additives in the aquarium. Transparent silicone loses its invisibility over time, as a film of plaque and food particles accumulate on it. Black material is considered more aesthetically pleasing, especially in large aquariums.
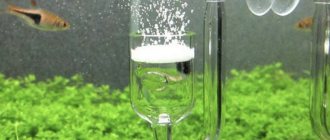
How long does it take for silicone sealant to dry?
To prevent bubbles from forming in the filled seams, it is necessary to tighten the walls of the aquarium with twine. Drying the aquarium after applying silicone glue takes approximately 20-24 hours. The full curing time is indicated on the sealant packaging. In the depths of the seam, polymerization occurs much more slowly than outside. To speed up the process, it is recommended to increase the humidity in the room.
On a note! One or two days after gluing, when the outer layer of sealant ceases to be sticky, you can pour a little water into the aquarium - this will reduce the polymerization time by one and a half times.
Aquarium glue brands
To find out more precisely what you can use to seal an aquarium at home, you need to consider the most popular manufacturers on the market:
- Soudal is an aquarium glue from Belgium, which is intended for self-assembly and repair of aquariums. In terms of quality, it ranks first among other representatives. Silicone base.
- Okyanys Kimya - adhesive composition from Turkey. Advantages: reliability, durability. Consists of silicone and fillers.
- Tytan is a Polish glue that is suitable for working with aquariums. Works well when joining large glass sizes. Silicone compounds are used for glazing.
- Krass – aquarium glue from Poland. According to reviews, the best representative in terms of price/quality ratio. Silicone sealants are produced in several colors: clear, white, gray and brown
- Moment Germent is a specialized adhesive that can withstand high loads. Transparent sealant, 100% silicone. Will withstand contact with sea water.
- In addition to the above, feel free to add here: Jaba glue, Chemlux 9011 glue, JBL AquaSil schwarz, Reef construct glue, TUNZE glue, ORCA CONSTRUCT, JBL Haru black, Bubble-Magus Magic-puddle, JBL AquaSil transparent glue, JBL ProHaru Universal, Acrifix 190 glue , Penosil AQ sealant, Montagefix-AQ adhesive.
It is important to know! There are many silicone sealants on sale that are used for glazing; they cannot be used for mounting the frame of an aquarium.
These adhesives contain
fungicides, and are most often designated as sanitary. You should pay attention to neutral adhesive sealants that do not contain acid or alkali. Sometimes it is still possible to use such adhesives; after hardening and some exposure, the dangerous substances evaporate and they become harmless. You can also find those that, among other things, are recommended for contact with food.
The best option is to take those brands that directly produce glue for the repair and production of aquariums.
The choice here is huge. You can't skimp on glue. The reliability of the connection of individual structural elements, and especially the viability of fish and living organisms, will depend on its quality.
Sealant manufacturers
Retail chains offer an impressive range of sealants, but aquarists use proven products.
A few famous brands:
- Okyanus Kimya. Silicone sealant is suitable for finishing work, as well as for repairing and making aquariums. The paste provides an elastic connection that is resistant to temperature changes, durable and reliable.
- Tytan is a Polish-made product characterized by the highest quality. It is waterproof and sets quickly. Harmless to aquarium inhabitants. Reliable even for the construction of the largest tanks. The disadvantage of this sealant is that it is expensive, at least 300 rubles for a 290 ml tube.
- Ceresit is a joint product from manufacturers in Russia and Germany. Meets the requirements for silicone sealants. It has a shorter shelf life compared to imported samples, but is better in price.
- Soudal is a Belgian brand. Soudal AQ is a one-component silicone specifically for aquariums, environmentally friendly and safe for fish. Easy to use, dries quickly, and does not lose its properties for a long time. According to consumer reviews, it is considered one of the best among silicone sealants.
- Germent is a good analogue of domestic production. It has increased resistance to sunlight and exposure to the aquatic environment. Among the positive qualities are elasticity and tightness of seams, even in those objects that are subject to vibration.
Aquarium sealants ensure structural reliability and prevent possible leaks. You should not save on adhesive products, because low-quality materials can harm the health of people and pets. If you liked the article, leave comments and share a link to it on social networks.
What is important to know and be sure to take into account
There are two methods for gluing an aquarium with your own hands. These include:
- Installing glass plates on the bottom. The method is suitable for assembling small structures.
- Fastening glass around the bottom. A popular method that allows the manufacture of structures of any size due to its high strength.
To make reliable seams, you need to work with adhesives correctly. To do this, you need to take into account a number of features:
- Clean future gluing areas from dirt and dust in advance. Wipe with a cloth moistened with medical alcohol, acetone or gasoline to degrease the surfaces.
- Excess glue is removed using a rag soaked in vinegar.
- While the structure is being repaired, the fish need to be transplanted into separate jars.
- Sealing up an aquarium is sometimes more difficult than buying a new glass panel. If the damage is serious, you need to purchase a new part.
- Do not use adhesives that have expired.
Before sealing the aquarium, it is advisable to draw a sketch of the finished structure. It is important to choose the right shape so that it can be conveniently placed among other interior items.
What you need to prepare before starting work
Not many people know how to glue a glass aquarium together. To do this, you need to prepare materials, glue (sealant), and perform work in certain stages. The quality of the assembly depends not only on the selected consumables, but also on the accuracy of the work.
Before starting work, you need to prepare tools and materials. The basis is glass. His choice will be discussed below. Additionally, you will need silicone in a tube and a mounting gun for applying glue. Details decorating the interior space are selected individually depending on the preferences of the owner of the apartment or house.
Third-party items that will be needed during assembly include:
- Masking tape.
- Liquid for degreasing work surfaces.
- Stationery knife.
- Level.
- Clamps.
- Square.
Don’t forget about the rags you use to wipe the gluing areas and remove any remaining glue.
Tips for use
Aquarium sealant must be used correctly. In skillful hands, a special tool turns into a reliable assistant and fully demonstrates its qualities. If you lack experience, you can waste glue, resulting in the work having to be redone.
Tips for beginners:
- first remove the old glue completely using a stationery knife or blade;
- wipe the gluing area with a cloth soaked in acetone;
- Apply an even bead of sealant to the degreased surface, after the setting time has elapsed, connect it to the second plate and press firmly;
- if the aquarium is being repaired without disassembling, fill the empty seam space with a syringe;
- fix the aquarium in one position, securing it with a special tie.
The strength of the seams depends on the gluing technology. The aquarium sealant will take several days to dry, and it is better not to rush here. You must wait until the product has completely dried and only then remove the screed.
Which glass to choose
Knowing how to seal an aquarium is not enough to assemble a quality product. To do this, you need to choose the right glass. Possible materials of manufacture include:
- Plexiglas - this material can be used to create different shapes due to its flexibility. The disadvantages are low strength indicators and clouding over time.
- Acrylic is a durable, flexible material. It is inferior to glass in terms of durability, it is easily scratched due to which the appearance deteriorates.
- Tempered glass is considered the best option for making structures of complex shapes. This is due to a certain strength, wear resistance, and preservation of appearance for a long time. Not really suitable for high pressure aquariums.
Main varieties
Silicone sealant is available in 2 color options: transparent and dark.
Black
This product is considered the best option for assembling containers. Some aquarists attribute increased strength and rapid hardening to the composition. This is not true, because black differs from transparent glue only in the presence of dye. The dark color gives the seams an aesthetic appeal. The aquarium takes on clear, strict forms. Black sealant is used when assembling volumetric tanks.
Transparent
This sealant makes the container floating and weightless. However, when certain medications are added to water, the transparent seams may change color. The plaque formed by algae and fish stands out more strongly on the joints.
Colorless glue is used in the assembly and repair of small aquariums. The composition is suitable for beginners doing this kind of work for the first time.
Brand and selection of glass
Most companies and manufacturers deal with the M1 brand for aquarium glass.
When making aquariums, they also use denominations of 4, 5, 6, 8, 10, 12, 15 and 19 millimeters. Tempered glass is stronger than raw glass, but much more brittle to deflection and becomes slightly curved after being treated at very high temperatures. This affects the build quality.
After choosing the material, you need to choose the optimal thickness. To do this, you can use online calculators or use the ratio of height and thickness:
- Walls up to 30 cm high - optimal thickness 5 mm.
- Height up to 60 cm – 10 mm.
- Height up to 80 cm – 20 mm.
It is important to check the integrity of glass panels before purchasing. They should not have cracks, scratches, chips, abrasions, air bubbles, or unevenness.
The edge of the glass must be polished to a gloss with a perfectly smooth surface. This is the only way to ensure a truly strong and reliable connection when setting with glue (sealant).
What requirements must silicone meet?
The glue should be:
- Safe (this is the main requirement for compositions used for repairing aquariums). The toxic substances released by the sealant poison fish and plants. It is not advisable to use formulations with synthetic additives
- Elastic (tear-resistant). The connection must withstand the pressure exerted by the water. Material that is too hard will develop cracks over time.
- Does not contain antibacterial additives. Sometimes antifungal substances are introduced into silicone, which are dangerous for aquatic plants and fish.
- Does not contain dyes harmful to aquarium inhabitants.
- Reliable, withstands temperature changes.
- Neutral, acid-free.
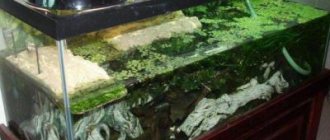
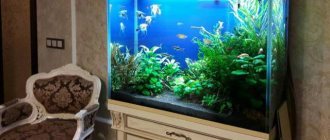
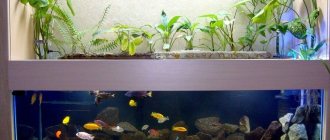
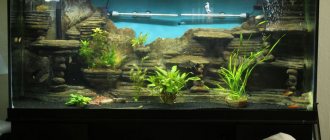
Aquarium shapes
Before gluing the glass of the aquarium yourself, you need to prepare a drawing that will indicate the dimensions and shape of the structure. There are several types of products:
- Classic models. They are rectangular-shaped structures. The length should be twice the height. The optimal volume is 125 liters.
- Panoramic models. The back and front walls bend in an arc so that you can view the underwater inhabitants from any angle. They look more beautiful in large rooms.
- "Fatted" models. They are low products that are suitable for breeding a large number of fish and other underwater inhabitants.
- Round models. Products that are suitable for small spaces. But you can put a small number of fish there. Convex walls distort the image.
- Semicircular or corner models. They save space in the room; in addition, the front curved wall makes the view of the interior visually larger.
- Built-in models. Products installed in wall recesses. Separate plasterboard frames can be assembled under them.
Depending on what form is chosen, materials and their quantities are selected.
Design options
Additionally, you need to understand the connection angles. They can be fastened in three ways:
- Rectangular connections.
- Obtuse connections.
- Acute combination.
The first connection method is considered the most popular due to its simplicity during manufacturing.
Glass cutting
Before gluing a glass aquarium together, you need to prepare the glass plates. They need to be cut to size. When purchasing glass, it is most often cut to the required dimensions, and the cost of the service is included in the total price. It is advisable to entrust the cutting to glaziers who work with special machines.
If you cut with a glass cutter, the edges will not be so smooth. Additional processing will be required.
Preparing glass parts
After cutting the glass panels, it is necessary to prepare them for further work. To do this, use a rag soaked in acetone, gasoline or medical alcohol to wipe the working surfaces to degrease them. Next, you need to seal the areas around the ends with masking tape so as not to stain the glass while working with the sealant.
Strengthening the walls
When we glue an aquarium with our own hands, the process naturally cannot be accomplished without strengthening the structure. To do this, you need to use homemade stiffeners.
Mandatory for large capacity products.
They are made from glass plates up to 8 cm wide. They are fixed with glue between the upper parts of the walls of the structure.
Aquarium cover
Special attention should be paid to the lid of the aquarium. First you need to select the material.
It could be:
- Plexiglas.
- Silicate glass.
- Plastic.
Lid making procedure:
- If the product is large, choose sheets more than 5 mm in thickness.
- On the back of the selected material, attach two loops that need to be glued to the wall of the aquarium. They will allow the lid to open.
- Cut a notch on the front for the hand.
- Attach LED strips to the inside of the lid that will illuminate the space underwater.
Additionally, you need to make holes in the cover for the wire. You can paste it over with colored paper and secure the print.
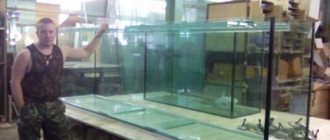
How to glue a large aquarium
You can learn how to glue an aquarium yourself from training videos and step-by-step instructions. Having prepared the materials and tools, you need to start assembling. To do this, you need to perform a number of steps in a certain sequence.
Step-by-step instruction:
- Place the glass plates on the work table, having previously covered it with oilcloth or newspaper.
- Load the mounting gun with sealant, degrease the working surfaces, and clean them from dirt and dust. Cover the edges of the glass with masking tape.
- Place the front glass panel against the end of the bottom and glue it with a gun. Secure it with spacers so that it does not move.
- Secure the back wall of the aquarium in the same way and glue it with a gun.
- Install side panels between the front and back walls. Seal them at the base with sealant. The gun must be moved slowly to ensure an even seam.
- Install spacers at each of the walls, and additionally cover them with masking tape.
After 3 hours, apply an additional layer of sealant along the seams. Using a metal plate, remove the protruding parts of the adhesive. After 1 hour you can continue working. The masking tape is carefully removed and the supports are removed. The blade is used to clean the areas where the sealant has come into contact.
The seams of a large structure will experience high loads during operation. To maintain their integrity, it is necessary to further strengthen the product. Carrying out work:
- It is necessary to cut strips of glass 10 cm wide in advance.
- Glue them to the edges of the structure to evenly distribute water pressure over the glass surfaces.
Additionally, the corners can be strengthened with metal corners, however, this is considered an ineffective solution. First, holes must be made in the walls of the product through which wires for internal equipment will be connected.
Aquarium repair
During operation of the product, various problems may arise due to which the integrity of the structure is compromised. Knowing how to repair an aquarium at home, you can avoid unnecessary expenses and the death of underwater inhabitants.
Leak test
Initially, it is necessary to determine the place through which water leaks out. To do this, the following steps are taken:
- Wash the aquarium from different sides.
- Wipe the glass surfaces dry with a cloth or terry towel.
- Apply toilet paper to dry corners. The leak will appear as a wet spot.
If a leak is detected, you need to check the remaining seams. Small cracks will lead to repeated repair work.
Removing old sealant
Before starting repairs, it is necessary to relocate the fish to separate banks. The larger the size of the underwater inhabitants, the larger the container you will need. Place decorative elements into separate containers. Boil water before putting them back into the aquarium.
Carrying out cleaning:
- Drain the water, remove decorations, fish, plants, stones.
- To remove the layer of old sealant, use a sharp knife or blade. Using gentle movements so as not to scratch the glass, it is removed from its surface.
After removing the old sealant, the surface is wiped with solvent.
Sealing the aquarium
When the preparatory activities are completed, the main repair work can begin. Glass gluing procedure:
- The edges are covered with masking tape. A free gap is left to create a seam.
- Apply the sealant slowly with a gun to ensure an even seal. Remove excess with a metal plate or rag.
- Using a nail file, push the glue deeper between the glass plates.
Install spacers; additionally, you can use small clamps. Remove fastenings after 3 hours.
Subsequent stages of work
When the seams are ready, you need to wait a day and check:
- The container is filled with water.
- After 20 minutes, toilet paper is applied to the joints. If after 15 minutes no wet spots appear on it, you can pour out the water that was tested.
All that remains is to fill up the soil, let the fish back in, secure the filters, heaters, and lighting.
Leaking in an aquarium when the glass is cracked
Mechanical damage may cause cracks to form. You need to know what to use to seal leaks in an aquarium in order to continue using it. Large cracks in glass cannot be repaired. You need to buy a new glass panel, remove the remaining walls, and replace the broken part. While the structure is disassembled, it is advisable to replace the old sealant with a new one.
A corner of the aquarium is leaking
If any of the corners are leaking, you need to do the following:
- Drain the water and move the fish into separate containers.
- Pull out the soil and stones.
- Visually inspect the corner.
- Apply a layer of sealant to the inside. Try to push it deeper with a metal plate.
When the above actions do not produce results, it is necessary to disassemble the glass walls, clean the old sealant, apply a new one, and glue again.
The seam is leaking
Seams often leak if a low-quality adhesive is chosen, and there is no additional glass piping along the contour of the aquarium. To prevent a leak, you need to perform several actions:
- Use toilet paper to check where the liquid is escaping.
- Drain part of the aquarium if the hole is in the second half of the height. Cover the damaged area with sealant and use a file to push the mixture deeper.
- If the damage is on the lower half, drain the aquarium completely and follow the same steps.
In case of severe damage, you need to understand the adjacent walls, remove the old sealant, and make a new seam.
Small bubbles
Often, owners observe bubbles on the surface of the water that appear from one or more seams. Aquarists are starting to think about how to seal a leak in an aquarium. However, moisture may not always be released if bubbles form. First you need to check if there is a leak. It can be removed with silicone sealant.
Repairing a small glass crack
If the crack is small, it can be fixed with a patch. Repair procedure:
- A patch larger than the size of the crack is cut from the glass that was used to make the aquarium.
- Using silicone sealant, it is glued to the damaged area.
You must first drain the water so as not to damage the integrity of the connection.
Now, after reading the article, it became clear that you don’t have to buy an aquarium. You can assemble it yourself. To do this, you need to choose a form and draw up a drawing. Select materials based on ready-made sizes and prepare tools. Decide on a reliable, proven glue. Perform step-by-step assembly without violating technology. Having learned how to glue seams, it is not difficult to carry out repair work during further operation.
Instructions and recommendations for use
The joints are sealed as follows:
- Treat the areas where the glue will be applied with a degreasing compound. Dry the surfaces thoroughly.
- Apply masking tape to help achieve an even connection.
- Cut the tube cap at an angle of 45 degrees. The hole must have a diameter corresponding to the width of the joint.
- Begin to squeeze out the sealant, slowly moving the tube from bottom to top. This makes the seam better.
- Level the applied sealant using a spatula or stick moistened with water.
- Remove excess composition before it hardens. Remove the masking tape.
- Leave the tank until the seams are completely dry. Fill the container with water, checking the quality of the connections.