Hello to all readers of my blog!
In this publication, I want to tell you how you can design a salt heater for an aquarium with your own hands using an ordinary plastic bottle. I can say with confidence that over the course of several years of operation of this heater, it has proven itself to be excellent.
Attention! If you do not know the safety precautions for handling electricity, do not undertake the manufacture of such an electrical appliance. To make a homemade salt heater you will need: a small plastic bottle, a piece of insulated electrical wire (preferably removed from the electrical appliance and with a plug installed), two rings 15 - 20 mm long, necessarily sawed off from a copper tube, and a piece of not very hard wire for making a hook for which hang the heater in the aquarium.
The first thing you need to do is make (you can burn a nail) three small holes in the cork of a plastic bottle. Two holes for the electrical wire, and the third for the exit of condensate, which will slowly evaporate from heating the water in the bottle. You can get by with two holes if they are made free enough.
After you make the holes in them, you need to insert the wires and then flatten the rings on the stripped ends of the wires. To do this, you need to take a hammer and push the wire into the ring and flatten it with a hammer blow; the same must be done with the second wire. Remember, in order to avoid a short circuit, the contacts placed in the bottle should always be apart, that is, one contact at the bottom at the very bottom of the bottle, and the second at the top, closer to the neck itself, but not higher than the level of water filled in the bottle.
Before filling the heater with water and installing it in the aquarium, you must first make a weighting material so that the bottle suspended in the aquarium does not tip over on its side. To do this, you need to pour some stones into the bottle; you can simply take some soil from the aquarium. The norm is checked experimentally: when in an aquarium, a bottle hung on the wall and filled with water stops turning over on its side, which means it is enough. A piece of not very rigid wire will be needed to make a hook for which the heater will be attached.
To do this, wrap the wire tightly around the neck of the bottle, leaving the end of the wire bent into a hook. After everything is done, you need to fill the bottle with water, but not to the edge of the neck to avoid accidental contact with water in the aquarium.
The correct placement of a water heater in an aquarium is to raise the neck of the bottle completely above the water level in the aquarium. It is important to know that the temperature of a salt heater is controlled by adding salt to it. The more salt you add, the higher the temperature of the heater will be and vice versa.
Based on this, you need to be very serious about adding salt, otherwise the water in the bottle will boil and you will kill your fish. I add salt after first dissolving it in a glass of water and only after that add drops to the water heater. Attention! When adding salt to the heater, as well as during all technical work involving moving and removing the plug from the heater, strictly only be carried out when it is disconnected from the network.
After adding salt to the water heater, the water temperature in the aquarium is monitored throughout the day. If after 24 hours it has reached the planned norm and does not rise higher, then the temperature limit is considered adjusted. And if the water temperature has risen above normal, then in this case you need to turn off the heater and replace some of the water in it with fresh water. For very small aquariums, the high water temperature is reduced by adding distilled water to the water heater. This kind of aquarium heater is not safe, but it can be very useful.
When setting up a home aquarium, you will need many components. After all, in order for the inhabitants of an artificial reservoir to feel good and comfortable, everything needs to be done wisely. One desirable tank component is a water heater. In this article we will talk about why it is needed, find out what these heaters , and figure out how to use such a device. In addition, a bonus for you will be detailed instructions on how to make a heater with your own hands, while saving money and learning something new.
Do you need a water heater?
Some novice aquarists believe that a water heater is not the most important thing. But they are very wrong. Many fish in their natural environment live in tropical and warm rivers.
Although summer is not yet an indicator, since the water temperature changes day and night and not every fish will survive these changes (even 2-4 degrees). Also, water can be affected by leaving a window open for a long time or suddenly turning off the heating in the apartment.
AQUARIUM HEATER AND EVERYTHING YOU NEED TO KNOW ABOUT IT.
The most important condition for the favorable functioning of your aquarium is maintaining a certain temperature that is optimal for a particular type of fish. Typically, fish need a temperature of 22 to 32 degrees, depending on their species. Until recently, aquarists actively used simple heaters. Some specialized stores still sell heaters, but purchasing them is not recommended. Now the blessed era of thermostats has arrived. The power of thermostats depends on how large the aquarium is. Experts recommend a power of 1.5 watts per 1 liter of water. For example: a 100 liter aquarium will require a 150 watt heater. Fish owners should also know that the colder the room, the faster the water in the aquarium cools, and the greatest cooling occurs in aquariums with a large area of its walls. Therefore, it is best to purchase heaters “with a reserve”, i.e., more powerful ones. Such heaters easily and quickly cope with temperature drops, operate smoothly, without overheating, and last much longer. But powerful heaters must be of high quality. It would also be useful to know that the cost of a heater does not particularly depend on its power, and neither does energy consumption. The whole question is the reliability of the device, i.e., the thermostat and the heating element. If the thermostat of a powerful heater breaks down, the inhabitants of the aquarium have two little comforting options - to die either from the cold or from an unusually high water temperature. Some, in order to avoid such sad consequences, purchase 2 medium-power heaters. If one thermostat fails, another will maintain the optimal living environment. If one of the thermostats breaks, the water will not reach a critical temperature, and the fish will eventually be fine. But, as you know, good things don’t come cheap. A couple of high-quality heaters will cost you twice as much as one simple one. The right to choose is yours.
Using a water heater
The heaters are manufactured in accordance with currently valid safety standards. The heater may only be connected to an electrical network with the parameters corresponding to those indicated on the heater itself and its packaging. It is forbidden to turn on the heater when it is removed from the water. Before each operation related to the heater, you MUST DISCONNECT the voltage. Before you put your hand in the water, make sure that the heater and all electrical appliances in the aquarium are UNCONNECTED from the mains. Do not use a damaged heater or a heater with a damaged wire. The connecting wire must not be changed or repaired; in this case, the entire heater must be replaced. Also, DO NOT MOUNT THE SWITCH on the wire . The water level must always be above the minimum immersion level, the MINIMUM WATER LEVEL mark marked on the heater body. The maximum immersion depth of the heater is 80 cm. The heater is intended for use only in enclosed spaces and exclusively in aquariums.
How to install a heater in an aquarium
The heater is waterproof and can be installed in the aquarium either in a vertical position - with the adjustment handle located above the water surface, or in a horizontal position - completely submerged. Do not insert the heater into sand or gravel . The water level must always be above the minimum immersion level, the MINIMUM WATER LEVEL mark marked on the heater body. It is necessary to remember that the water level is constantly decreasing as a result of evaporation. The heater is attached to the wall of the aquarium using a bracket with two suction cups, which should be attached to the heater directly below the head. The heater must be fixed in the aquarium in a place where there is constant and uniform circulation of water. ATTENTION! Only about 15 minutes after installing the heater in the aquarium, when the temperature of the bimetallic switch in the heater becomes equal to the temperature of the water in the aquarium, can the heater be connected to the power supply.
| Aquarium volume, l | Difference between water temperatures in the aquarium and in the room, °C | |||||||
| 2 | 4 | 6 | 8 | 10 | 12 | 15 | 20 | |
| 20 | 5 | 12 | 17 | 22 | 29 | 34 | 59 | 80 |
| 40 | 9 | 18 | 26 | 36 | 46 | 55 | 100 | 125 |
| 60 | 12 | 23 | 35 | 47 | 59 | 70 | 128 | 140 |
| 80 | 14 | 29 | 43 | 56 | 70 | 85 | 144 | 170 |
| 100 | 17 | 33 | 49 | 66 | 82 | 99 | 150 | 200 |
| 150 | 20 | 43 | 65 | 86 | 108 | 127 | 200 | 250 |
| 200 | 26 | 52 | 78 | 104 | 130 | 156 | 210 | 300 |
| 250 | 30 | 60 | 91 | 121 | 150 | 182 | 270 | 360 |
| 400 | 42 | 82 | 124 | 169 | 208 | 247 | 390 | 500 |
Types of Aquarium Heaters
To make it possible to create the most comfortable conditions for the habitat of fish and plants, special devices are used - aquarium heaters. There are several types of them, but the principle of operation is the same for all - electrical heating of the element in a sealed environment. The most commonly used heaters are:
Submersible (plastic, glass, titanium). It consists of a heating element built into an impact-resistant, heat-resistant housing in the form of a flask or elongated cylinder, and is designed to be lowered into an aqueous environment.
Flow-through . It has a plastic body and is mounted in a vertical position on the return hose of an external filter, which saves internal space and creates a flow of warm, aerated water.
Heating cables . They are installed under the ground and allow you to evenly heat the entire aquarium and create additional water circulation.
Heating mats . They are rectangular mats that are installed under the aquarium. The heat generated passes evenly through the bottom and increases the temperature of the water.
It is generally accepted that sufficient heating device power should correspond to 1 W per liter, but in practice 0.7–0.8 W per liter is often used.
aquarium-heater
DIY aquarium heater
When making such a device, you need to remember that the operating conditions are associated with a serious risk of electric shock.
But if the decision is made in favor of a homemade craft, then there is a good option to create a structure from resistors (resistance), a piece of glass tube with thick walls, dry filler and a remote thermostat. Installation work occurs in the following order.
1. The power of the heating element is determined based on a special table, which takes into account the difference in temperature between that required in the aquarium and room temperature. The required current is calculated by dividing the selected power by the applied voltage. By dividing the voltage used by the calculated current, you can obtain the resistance value of the heater. The required number of identical resistors is selected so that their total power and resistance indicator corresponds to the calculated values.
2. The length and diameter of the glass tube are determined based on the size and number of resistances.
It is important that the resistors soldered in series are placed in the tube with a free space of 15 cm.
3. Cleaned and calcined sand can be used as a filler.
4. The bottom of the glass tube is closed with a suitable rubber stopper placed on the aquarium sealant.
5. The ends of the network cable are soldered to the upper and lower resistors. The entire structure is placed in a tube and covered with sand. It is important that the sand is at the bottom of the tube and covers the top resistor.
6. The top of the tube is carefully sealed with aquarium sealant. The power cable is connected to a thermostat with a remote temperature sensor, which in turn is placed in the aquarium.
7. The heater is placed vertically so that the part of the tube containing the resistors is hidden under water. The structure is attached to the wall of the aquarium using special suction cups.
Schemes for manufacturing the thermostat itself based on a comparator and thermistors have also been developed.
conclusions
There is a theory according to which aquatic animals must be kept in conditions as close as possible to natural ones. Temperature changes in nature occur constantly, and there seems to be no particular need to use an aquarium heater.
But in practice it has been proven that fish and plants feel much better, get sick less and live longer in a stable microclimate. This is why using an aquarium heater with a thermostat, especially during the cold season, is more than justified.
Aquarium heater with thermostat
The main inconveniences when using the heater are related to the need to constantly monitor its operation. Even having reached the desired water temperature, the device still continues to function and must be disconnected from the network manually.
To get rid of this problem, a special device is used - a thermostat, which is a device with a built-in temperature sensor. It allows you to turn off the heating element when a preset value is reached and turn it on again when the water begins to cool.
This ensures a stable microclimate without temperature changes. The use of modern technologies makes it possible to produce very compact and easy-to-use thermostats.
According to manufacturing technology, they are divided into two types.
Electronic . They are highly accurate (most of them are equipped with an information board). Disadvantages include the relative high cost and lack of reliability.
Mechanical . They are found most often, are characterized by stability and reliability during operation, and are cheaper in price. They often distort real readings by several degrees, so to accurately adjust the device, you must use a separate thermometer.
According to the level of safety during operation and durability of the devices, thermostats are divided into:
- Remote - located outside the aquarium, not affected by the aquatic environment and the waste products of aquatic organisms. This increases their service life and makes it possible to use cheaper heaters and replace them without additional costs. To determine the operating mode, a separate temperature sensor is used, which is located in the aquarium and connected by a wire to the thermostat.
- Built-in - mounted in a sealed housing together with a heating element. With this configuration, the entire water control and heating system becomes very compact and easy to use.
Spiral-heater-for-aquarium
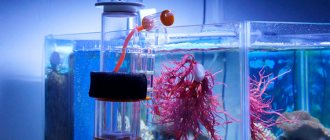
The latter type of design is the most popular among aquarists and is often made in the form of an elongated glass flask, inside of which there is an electric heater and thermostat. For greater thermal conductivity, the space of the flask is filled with the smallest ceramic filler.
The tightness of the structure is ensured by a rubberized or plastic cap through which the power wire passes. There is also a regulator here that allows you to set the required temperature.
Well-known brands of aquarium equipment - Eheim, Fluval, Ferplast, Aquael, Tetra - produce reliable and high-quality submersible heaters for aquariums with a power thermostat from 25 to 300 W. Such devices are capable of providing the necessary conditions in aquariums up to 1500 liters.
To reduce the likelihood of water overheating, there is a practice of simultaneously using several less powerful thermal devices.
If it is not possible to purchase the necessary equipment, you can make it yourself.
READ ALSO MOLLINESIA
aquarium-fish-home.ru>
Types of water heaters
Water heaters come in different types. We will tell you about each of them below. You will choose the one that suits you best.
Submersible
How immersion heaters are used is already clear from their name. Such a water heater is lowered into the water to a certain mark on it. It looks like a cone or an oblong cylinder, inside of which there is a heating element. Its body must be heat-resistant and strong.
This device is made of different materials, it can be glass , plastic , titanium .
Flow-through
Such heaters are installed outside the tank, cutting into the filter hose. This ensures uniform heating of water. This device has a plastic body.
Its external placement, in addition, makes it possible to save on free space inside an artificial reservoir. True, it is recommended to use it in large aquariums, since there are no such water heaters with a power of less than 200 W.
Heating cables for aquariums (more common in terrarium farming)
Such heaters are installed under the ground, allowing the entire tank to be heated evenly. They also have a good effect on plant development.
This heater does not take up much space and is not visible under a layer of soil. True, if you want to remove it, you will have to disrupt the entire atmosphere of the artificial reservoir.
Cable heaters are more common in terrarium farming, but are also used for home aquariums.
Heating mats
These rectangular mats are placed under the bottom of the tank, through which the heat spreads evenly throughout the aquarium. It is believed that such heaters also have a beneficial effect on plants.
Naturally, you won’t be able to remove this water heater without lifting the glass house itself. But it will serve you much longer than other similar devices.
A note for those who, due to their financial capabilities, religious beliefs or other reasons, cannot shell out several tens of dollars for a fashionable (and undoubtedly useful) aquarium accessory, the name of which is given in the title. Dedicated to lovers of aquarium plants who are far from electricity...
Those who have read this essay to the end will be sufficiently prepared to independently manufacture an absolutely safe, extremely budget-friendly, transformable within sufficient limits and, most importantly, adjustable bottom heater. Knowledge of electricity for the eighth grade school physics course is welcome.
Last lyrical digression. When the idea of just such an implementation came into my head, I felt the same thing that Mendeleev probably felt when he woke up in the morning and began feverishly sketching out his revolutionary table until I was convinced that the idea was securely recorded. The joy was not overshadowed even by the evidence of my lack of priority found on the Internet a few days later.
What is bad (not counting the cost) of the existing options?
Security. Of course, 220 volts are present in the aquarium even without a bottom heater. But why increase the chance of an aquarist’s untimely death from electrocution, even if this probability is not great? Actually, the lion's share of the high price of branded products in this category is precisely the cost of their safety. If at least half the price of the product were materials, then these would be, at a minimum, semi-precious metals. Actually, the price in the case of branded products is embodied safety.
Low technology. The article that served as my creative impetus suggests 14 meters of nichrome, 2 millimeters thick (!), to be insulated by “pushing it into a regular silicone hose for aquarium compressors.” With the proper imagination, it is, of course, possible to imagine this. But, obviously, the difficulties of technology have become an insurmountable obstacle to the promotion of such innovations by the broad masses of aquarists.
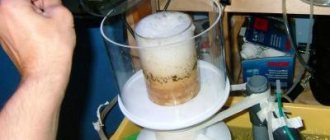
I will carry out further description using the example of my aquarium. 60 liters. According to theoretical postulates, the heater power should be 0.1 - 0.2 W/l, the loop pitch should be 5-7 cm. The theoretical justification for just such parameters can be found on the Internet; it does not contradict common sense. Those. My aquarium requires a heater with a power of approximately 8 W and a length of 7 m. I folded this length in half. Thus, I received 3.5 meters of cable, the beginning and end of which are located nearby for the convenience of further switching. The cable was laid on the bottom, secured with tape in several places and covered with soil on top. Now the most important thing is that we will heat with ordinary PEV-2 copper wire. For the uninitiated: this is an enamel-insulated wire, which is how transformers are wound. In the bins I found one with a diameter of approximately 0.3 mm.
A little more about this parameter. Skipping the theory, let's assume that for future convenience, the resistance of the aquarium heater in our case is desirable to be as large as possible. In this case, the cross-section of the wire will decrease accordingly, and here it is important to stop in time in your diligence. The given cross-section, in my opinion, is a compromise. With sufficient structural strength, the resistance was approximately 1 ohm. This is not much, but it is quite enough to obtain the required 8 W. I measured the resistance on a finished piece of wire with a very cool device that cost the price of an inexpensive car. At home, the result of measuring such a small value can only be obtained with a very large error. Therefore, you need to either take my measurements on faith, or calculate the resistance (this is where physics is needed!) using the formula: R=p*L/0.785*D?, where R is the resistance in ohms, L is the length in meters, D is the diameter in millimeters, p - resistivity of copper, equal to 0.017 Ohm*sq.mm/m.
In accordance with Comrade Ohm's law, to obtain the required 8 watts of thermal power, a current of 3 amperes must be passed through our heater. To do this, you only need a voltage of 3 volts! This is where safety and absolute undemandingness lies in electrical insulation (and therefore in the accompanying thermal insulation, which only harms us in our case)! Unfortunately, the thesis about free cheese has also been confirmed in the world of aquarium technology. A consequence of the relatively large current consumption is increased requirements for the resistance of the supply conductors. Stranded copper wire with a cross-section of 0.5-1 sq.mm (I used a two-core wire from a car speaker) is quite suitable. Its length, after the heater is put into operation, should be reduced to a reasonable minimum.
Now about the last but not least important component - the transformer. If you need four times more power than indicated in this article (i.e. your aquarium has a volume of about 200 liters), then you are very lucky. The required voltage of 6 volts was very common in the era of tube technology to power filaments, and at any flea market you can find a transformer with this parameter for a bottle of beer. The power released depends on the square of the voltage. Therefore, doubling the supply voltage corresponds to quadruple the power for the same load. P(power)=R(resistance)*U?(supply voltage squared).
If the required voltage differs from the easily accessible 6.3 volts, you will have to work with your hands, i.e. wind an additional winding on the existing transformer. To do this, at the same flea market we buy a transformer with a working primary (the one for 220 volts) winding and a small space on top of the existing windings. I found a transformer from a filmoscope (for young people, this is the great-grandfather of modern projectors) with a huge space unfilled with windings. If the power is not indicated on it, rely on weight. The required 20-30 W approximately corresponds to 300-400 grams of “live weight”. The greater the power of the transformer, the fewer turns will be needed in the future to achieve the desired voltage, but the transformer will be heavier. Those. To a large extent, the power is limited only by the potential installation location. We will wind a new winding without disassembling the transformer, because the number of turns will be very small. Almost wind 10 turns over all windings and measure the voltage. It will be around 1-2 volts. The dependence of voltage on the number of turns is linear. Therefore, how many times does the measured voltage differ from the required one? Our 10 turns need to be increased by the same amount. In practice, this amount will differ little from a couple of dozen, and such a small number of turns is a bonus for our perseverance. At this stage, it is easy to make several taps after 3-5 turns, so that in the future you can vary the supply voltage, and, consequently, the power supplied by the heater. We fix all the bends to the terminal block, and install plugs on the cable.
It remains to decide on the measurement of the released power. Since we know the actual resistance of the heater extremely approximately, we will use Comrade Ohm’s law again and calculate the power released theoretically: P=U*I, where P is the power in watts, U is the voltage at the heater plugs in volts, I is the current through the heater in amperes ( It’s most convenient to measure without breaking the circuit with current clamps (a super useful thing in the household, costs less than ten dollars), or you can use the same multimeter).
In conclusion, I would like to clarify that the bottom heater is not intended to heat the entire aquarium. Its goal is to create local heating of bottom areas by 1-2 degrees Celsius to create microcirculation of water in the soil and prevent biomass from rotting without access to oxygen. The pitch of the turns was also chosen for the same purpose.
How to choose the right one
No one can help you decide on a specific type of heater - choose what suits your aquarium best. When purchasing, be sure to consider two points - its power and thermostat.
The thermostat itself monitors the water temperature and, when necessary, turns on or off.
And the required power should be determined based on the following formula: 1 W per 1 liter of water. You should not use a stronger heater! If the device shorts out, the fish may die.
How to properly install a heater (heater) in an aquarium
A city apartment in Russia is not at all a place where tropical fish can be content with water at room temperature when cold weather arrives. The brightest southern species need warm (about 25°C and above) water all year round - failure to comply with this condition leads not only to refusal of spawning, but also to pale color, decreased immunity and activity, deterioration of appetite and gradual exhaustion. To prevent winter from becoming fatal for colorful pets, you should take care of purchasing a heater for the aquarium in advance.
How to install
The device is mounted in the tank both vertically (the adjustment handle should be above the surface of the water) and horizontally, lowering the whole thing. Do not place it in the ground unless you are talking about cables.
The water level must exceed the minimum immersion level, that is, the “MINIMUM WATER LEVEL” icon, which you will see on the body of the device. Please note that due to evaporation this level drops from time to time.
The heater is installed on the wall of the “fish house” thanks to a bracket with two suction cups; it is mounted on the heater immediately under the head. Fix the device where water is always present and its movement is uniform.
Which aquarium heater to choose
Growing fish in a glass container without a heater is doomed to failure. This method of keeping is suitable only for cold-blooded species of exotic creatures that do not need heating. Other individuals will quickly die in cold water. The list of important heating equipment includes:
- Heaters.
- Thermostat.
- Device for measuring temperature.
The listed devices are sold individually or as ready-made kits. The second option is more interesting, which is why many people purchase a complex heater for an aquarium with a thermostat. However, if 1 node is damaged, it will be impossible to restore it without large financial costs. If the devices are independent, you will have to combine them with each other, which requires some effort and time.
The power indicators of heating systems are selected taking into account the following proportions: 1 liter of water requires 1 W of power. However, there is no universal requirement for all systems, so at the selection stage you should consult with a specialist. You also need to read the manufacturer's instructions, which are indicated in the package insert or on the packaging. They are presented in the form of schematic drawings.
The heater is installed in such a way that the water is heated evenly at all levels. This will protect the aquarium flora and fauna from sudden changes and inevitable death.
Temperature is measured at the very bottom and in the surface layers. The permissible difference should not exceed 2ºС. To level it, just filter the water.
To heat the water in an aquarium, you can use the following types of heating systems:
- Glass device. Initially, the model may seem fragile and vulnerable to damage, but it is made of heat-resistant and impact-resistant material and is equipped with a sealed lid. There is a thermostat under the housing that provides temperature control.
- Plastic products. They are characterized by an advanced device and are made of impact-resistant plastic. The device is equipped with LED indicators, and its shape has a flattened appearance. Some models have temperature sensors.
- Devices with an external thermostat. They are famous for their compactness and the presence of a titanium heater. This solution is suitable for large aquariums.
- Compact submersible device. It is very popular and is intended for small containers. The disadvantage of the system is the lack of a built-in thermostat, so the owner of the aquarium must independently measure and regulate temperature indicators.
Flow heater
The flow-through aquarium heater is installed vertically on the return hose of the external filter. Among the key advantages of this type are:
- Ensuring a stable flow of heated water.
- Attractive appearance.
The disadvantage is the limited scope of application - flow-through systems are intended for large aquariums, as well as the lack of devices with low power.
Immersion heater
Submersible systems are lowered into water to a selected level and are an oblong cone or cylinder with a heating element. The devices are made from impact-resistant materials and are closed with a sealed lid. In most cases, they are made of glass, plastic and titanium.
External heater
In the classic version, such a system is connected to an external remote filter, i.e. During the cleaning process, the water will heat up additionally. There are other options where the heater is made in the form of a heating pad made of rubberized material with heating parts inside. The water is heated in a glass bottom.
The downside of the device is the loss of thermal energy, and heating the bottom increases the likelihood of bacterial growth.
Bottom heater for aquarium
Bottom-type systems involve laying special cables at the bottom of the aquarium and then filling them with soil. Among the basic operating characteristics of such systems are the following:
- Bottom heaters are designed to provide a stable flow of water in the soil, which eliminates the problem of soil acidification.
- The device effectively heats the lower layers of water, which cannot be achieved with other solutions.
- The bottom version can be used as a complement to other existing systems.
Experts do not recommend laying cables in soft sand.
How to make it yourself
You can also make a water heater yourself, following our step-by-step instructions. But remember to be extremely careful, because you risk getting an electric shock!
To create the device you will need resistors, a piece of glass tube with thick walls, dry filler, and a remote thermostat.
First you need to determine the power of the heating element based on this table:
Difference between water temperatures in the aquarium and in the room (°C)
- Calculate the current by dividing the power by the applied voltage. This way you will understand the resistance value of the heater. Select the required number of identical resistors (their total power and resistance indicators must correspond to the calculated values).
- Determine the length and diameter of the glass tube based on the size and number of resistances. Please note that resistors soldered in series must be placed in a tube with a free space of 15 cm.
- You can use purified and calcined sand as a filler.
- Close the bottom hole of the tube with a rubber stopper placed on the aquarium sealant.
- Solder the ends of the network cable to the upper and lower resistors. Place all this in a tube and cover it with sand (it should be at the bottom of the tube, covering the top resistor).
- Seal the top of the tube with aquarium sealant. Connect the power cable to a thermostat with a remote temperature sensor, which is lowered into the tank.
Similar video
Video on how to install a bite alarm
Do-it-yourself wooden plinth installation video
How to properly install a car seat in a car for newborns video
DIY installation of an iron door in an apartment video
Installing a bathtub with your own hands step by step video instructions
How to install a double light switch video
DIY installation of a built-in bosch dishwasher video
You can make an aquarium heater with your own hands, but I would prefer a “store-bought” option, as our fathers say. Let’s try to figure out what an “Aquarium Heater” is and what it is needed for.
Many fish are inhabitants of tropical and warm rivers, so the water temperature suitable for their life is about 26-27 degrees Celsius. Therefore, aquarium water heaters are very important equipment. While in summer the water may be warm enough, in winter without an aquarium heater the fish may simply die.
Why you need to buy an aquarium heater :
- In winter, the water in the aquarium may be too cold;
- the water temperature is different at night and during the day, and fish do not tolerate sudden changes;
- For many fish, the optimal water temperature for life is often higher than room temperature, which means that the water will not warm up to the required levels on its own.
Keep in mind that the thermometer readings during the day may be false because the lighting lamps add to the temperature in the aquarium. Therefore, you must be sure that the water is exactly the right temperature for the fish before you decide to buy an aquarium heater. Modern aquarium heaters are equipped with temperature sensors so as not to overheat the water.
Aquarium thermostats are aquarium heaters with a built-in regulator. That is, you set the required temperature that it should maintain, the thermostat heats the water to it. Next, it turns off and turns on again when the temperature drops below the required temperature. Aquarium thermostats can be mechanical or electronic. Mechanical ones are less accurate (the error is 1-2 degrees) but are cheap. Electronic ones have amazing accuracy in measuring temperature, but at the same time they are not cheap at all. And this despite the fact that many manufacturers are just starting to produce electronic thermostats, and their electronics fail quite quickly. Thermostats for aquariums in most cases (with the exception of some models) come without a built-in thermometer. This means that it measures the temperature for itself, but does not show the temperature for you. It is advisable to purchase a thermometer along with the thermostat. This is necessary to control the thermostat itself (just in case), and also in the summer. When water overheats in summer, it needs to be cooled. Refrigerators for aquariums are very expensive, and they make a lot of noise. Therefore, the water in the aquarium is cooled mainly by frequent changes of cold water.
When choosing heaters for an aquarium, you should pay attention to the following characteristics :
- the presence of temperature control - it is better if it is;
- correct choice of power.
It is generally accepted that 10 watts is enough to heat 4.5 liters of water . For large aquariums, it is better to choose not one powerful device, but several weaker ones - this makes it easier to heat the water evenly. If the room is cool in winter, then it is better for the aquarium heater to be more powerful than the volume of water required.
Advantages of modern aquarium heaters:
- reliability;
- can be placed completely underwater;
- don't get shocked.
Keep in mind that heaters may become inaccurate over time, so check the thermometer periodically . Just in this case, the possibility of adjustment will be a plus. If the soil at the bottom of the aquarium is fine, then it is best to use a special heater in the form of a thermal cable, which is laid on the bottom. In this case, you get two important advantages:
- help plants;
- warm water rises to the surface, avoiding stagnation in the ground.
How to choose a water heater?
Rod heaters are manufactured in both moisture-permeable (they must be installed in the aquarium so that the upper part is above the water level) and sealed versions. The maximum immersion depth of the latter is indicated by the manufacturer and is quite sufficient for an aquarium (usually about 1 m). In most cases, immersion heaters are combined with a thermostat built into the housing.
When choosing a heater, pay attention to its length, which should ensure that it can be placed in the aquarium . Domestic heaters, unlike foreign ones, have the same length, which does not depend on power.
When using a heater without automatic temperature control, you should take into account temperature fluctuations in the room and choose a heater of such power that the water temperature in the aquarium does not rise above 28-30 ° C. You can install two heaters and turn off one of them on hot days.
Table 1 shows the heater power values for heating water in aquariums of various sizes to a certain temperature.
Thermostat in the heater: is it necessary?
We have already mentioned that the thermostat in the heater is a necessary and important thing, because it independently monitors the water, heating it if necessary, which prevents temperature surges. You certainly won’t be able to constantly be near the aquarium and control everything. But the thermostat can.
According to manufacturing technology, such a device is of two types:
- Electronic . Highly accurate. Most representatives are equipped with information displays. True, such a thermostat is not cheap. It is also considered not reliable enough.
- Mechanical . The most common thermostat. It costs less, it is called stable and reliable. Although sometimes it distorts the correct readings, but only by a couple of degrees (use a separate thermometer for precise adjustments).
In addition, thermostats differ in their level of safety and duration of use. There are remote regulators that are mounted outside the tank, and built-in ones that are mounted in the housing along with the heating element.
The second option is very common among aquarists, since such a heating system is convenient to use. As they say, two in one.
Do you need a heater in an aquarium?
Most aquarium fish are representatives of tropical ichthyofauna, so a stable temperature is necessary for their normal existence. It varies between +26…+27˚С. This means that the owner of such creatures will need to buy a special thermostat for the aquarium. Its task and role are as follows:
- Many types of fish need thoroughly heated water, the temperature of which is above room temperature. Without additional heating, it is impossible to obtain it.
- At night, the water cools down greatly, and any surge has a negative impact on the condition of the pets.
- During winter, the water level may drop.
The listed factors explain why an aquarium heater is needed in an artificial pond. It is better to assess the water temperature in the morning when the lights are turned on. This is due to the fact that during the day the aquarium is additionally heated by lamps.
If you have a thermostat, you won't have to worry about possible temperature fluctuations. It is enough to periodically take measurements and adjust the mode.
If there is no heater, temperature readings will depend on the following factors:
- Thermal energy from lighting devices and the distance between them and the aquarium.
- Type of construction, shape and volume of the container.
- Compatible with running water supply system.
- Number of water change cycles.
Operating rules
When using a water heater for an artificial reservoir, you should remember the basic rules for its use:
- The heater can only be turned on in an electrical network with parameters that correspond to those indicated on the device.
- Do not turn on the heater when it is removed from the water.
- Before using the heater, be sure to turn off the voltage. And before you plunge your hand into the aquarium, make sure that the heater and other electrical appliances in the artificial pond are turned off.
- Do not use a heater that is damaged or has a damaged cord.
- It is not permitted to replace or repair the wire. If it breaks, buy a completely new device. In addition, it is not allowed to mount a switch on a wire.
- As already stated, the water level must exceed the minimum immersion level. The maximum level is 80 cm.
- The heater can only be used in aquariums and certainly in enclosed spaces.
How to heat water in an aquarium :: DIY aquarium heater :: Aquarium fish
How to heat water in an aquarium
Most aquarium fish are tropical inhabitants. Water at room temperature is not suitable for them. The aquarium must be heated. This can be done in several ways.
Question: “Opened a pet store. Business is not going well. What to do? » — 2 answers
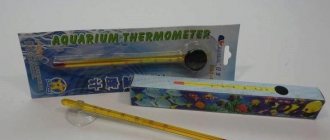
You will need
- - aquarium;
- - water thermometer;
- - thermostat;
- - incandescent lamps;
- - reflector;
- - aquarium heater.
Instructions
1. The oldest means of heating water is a reflector. You can make it yourself in the form of a tin half-cylinder. Attach the socket with an incandescent electric lamp to the end. The lamp must be inside the reflector. Hang the device from the end of the aquarium so that the top edge of the reflector is below the water level. This is necessary so that the glass heats up evenly and does not burst. This method is suitable for both heating and lighting small rectangular aquariums with a capacity of no more than 30 liters.
2. Immerse the incandescent lamp directly into water . At the same time, secure the cartridge on the lid in a special hole so that only the cylinder is in the water. Water must not touch the cartridge. The efficiency of such a system is significantly higher than that of a reflector. The power of this heating device is equal to the power of the lamp. But with this method, the flask becomes overgrown with algae.
3. The most advanced method is heating using a special heater. You can buy it at a pet store. This heater is a long test tube in which an electric coil is placed. The test tube is filled with fine dry quartz sand. The hermetically sealed terminals of the spiral are located in its upper part. Such a heater is connected to the network using a cord.
4. Heaters can be different in height and power. Choose one so that when immersed in the aquarium, the upper part with the wire leads is at least 2 cm above the water level. At the same time, the lower end should not rest against the bottom. To maintain the required temperature, you can adhere to the ratio of 10 l - 10 W.
5. Secure the heater in the aquarium
using rubber suction cups and plastic rings. If you cannot find them, you can use metal wire as a fastener. This mount must be above the water level.
6. Use a thermostat at the same time as the heater. They are also sold in pet stores. Monitor the temperature of the water in the aquarium using a thermometer immersed in it.
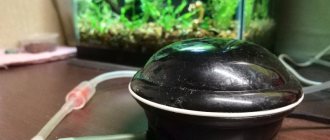
7. To heat the aquarium evenly, ensure water circulation - install some kind of filter. You can arrange aeration using a compressor.
note
The main disadvantage of heating using a reflector is that the device has to be turned off at night, and the water temperature drops to room temperature. The second disadvantage can be considered the increased overgrowth of lower algae on the glass located on the side of the reflector. In addition, this device has a rather low efficiency. There are salt heaters. As a rule, they are homemade. You shouldn't use them. Salt in the water can be harmful to some fish and plants.
KakProsto.ru>
What to look for when purchasing
In a separate paragraph, we will return to what needs to be taken into account when purchasing a water heater.
As you know, this is the presence of a thermostat. We hope that now you understand that, in fact, there is no way to do without it. The main thing is not to forget to monitor its serviceability.
And, of course, this is power. A lot depends on it. After all, incorrectly selected power can cause a lot of trouble. Once again we remind you of the calculation formula: 1 W per 1 liter of water.
After reading this article, you are unlikely to doubt the need for such a device as a water heater. Although there are also aquarists who, for some reason, refuse it. Naturally, the choice is always yours, but it’s probably still not worth risking the lives of the inhabitants of the glass house if they are really dear to you. After all, everyone wants an aquarium to bring joy, and not cause constant trouble.
Currently, there are a large number of people who like to keep exotic fish at home. And their maintenance and breeding cannot be done without special equipment. If you are going to have fish in an aquarium, you will definitely need a water heater. With its help, it is possible to maintain the optimal temperature in an artificial reservoir for the full development and functioning of residents .
There is a wide variety of aquarium heaters:
- Submersible. They are made from a variety of materials (plastic, titanium, glass). They have the shape of a flask with a heating element inserted inside it. This heater is partially or completely lowered into the aquatic environment.
- Instantaneous water heaters. The thermostat of this type of device is located outside the aquarium. This saves interior space.
- Heating cables. Perfect for heating round aquariums. The cable is placed underground. This ensures even heating of the water.
- Mats for heating water. They should be installed under the aquarium. The water is heated through the bottom of the container.
Aquarium thermostats
These are devices with a built-in thermostat. You set the required water temperature, and the device heats it up to the required numbers. After this, it automatically turns off, turning on after the medium begins to cool.
There are 2 types of such water heating devices.
Important! Mechanical devices are less accurate (the error is from 1 to 2 degrees), but have a lower cost. Electronic devices are much more accurate, but their cost is much higher.
Most devices come without a built-in thermometer. The device maintains the optimal temperature, but does not display its value. Therefore, you need to purchase a special thermometer for water along with the thermostat.
When choosing an aquarium water heater, you need to pay attention to the following characteristics:
- Correct selection of power.
- The presence of thermoregulation.
Important! It is believed that a 10 W device is enough to heat 4.5 liters of water. For an artificial reservoir of larger volume, it is better to buy not one powerful device, but several low-power ones: this way it is easier to heat the water to optimal levels.
Advantages
Modern models of water heating devices have the following advantages:
- Reliability.
- Possibility of placement under water.
- Safety.
Important! During prolonged use, the device may produce errors, so it must be checked periodically using a regular thermometer.
Now about which water heater for an aquarium is better. If you are using shallow soil, it is advisable to use a thermal cable heater. In this case, you not only maintain the necessary environmental characteristics, but also create better conditions for aquatic plants. In addition, heated water freely rises to the surface without stagnating in the ground.
Aquarium heater with thermostat
If the aquarium contains tropical fish, the water temperature should be an order of magnitude higher than the air temperature in the room. To maintain uniform water temperature during the day and night, aquarium heaters with a special thermostat are installed. The latter is equipped with a sensor. It heats the water to the set temperature, after which it turns off the heating element. When the water temperature begins to drop, the thermostat turns the device back on.
The thermostat allows you to maintain a certain microclimate, and aquarists do not have to worry that their pets will die due to hypothermia or overheating of the water.
There are two types of thermostats:
Care issues
The device must not be disassembled. Caring for it is quite simple: its surface needs to be periodically cleaned with a soft sponge. Cleaning of boiler stone must be done with special means. After the heater is cleared of stone, it must be rinsed thoroughly.
게시일 Aquarium Installing a heater in an aquarium! great video! more videos like this on the channel! Anime Fan 2 년전. Thank you, now I understand that the heater is important. How to install a compressor in videoforweb.ru na Search results for heater-in-aquarium video. We install a heater and a thermometer, and I’ll also tell you why there is a large bush of plants in the aquarium. If an aquarium heater with a thermostat is installed, then pay attention to the glass aquarium heater. At first glance, it may seem that the device. You can watch a short overview of different aquarium heaters in the video from.
Installation
To maintain the desired microclimate in the aquatic environment, you need to know how to install a heater in an aquarium. The water heater can be installed in both horizontal and vertical positions. When installed vertically, the adjustment handle should be located above the water level. When positioned horizontally, the heater is completely immersed in the aquatic environment.
The body of the heater is usually marked with water immersion level marks. The appliance must be installed so that the water is above the minimum immersion level. Over time, water evaporates, so you need to ensure that it does not fall below the minimum level.
The heater must not be installed in gravel or sand.
A bracket is installed under the heater head, which is attached to the wall of the aquarium using suction cups.
Please note that the installed device can only be turned on after 15-20 minutes. During this time, the temperature of the heater will become equal to the temperature of the water in the artificial reservoir. Only after this the device is connected to the network.
Why do you need a homemade thermostat?
Store-bought thermostats are very massive. They are designed for keeping large aquariums with whimsical animals. They are not suitable for beginner aquarists who breed small fish in small containers. And the costs will be unjustified (purchased water heating equipment is expensive). Therefore, a do-it-yourself thermostat for an aquarium is:
- Cheap (assembled from available materials);
- Practical (suitable for small aquariums and spawning grounds);
- Effective (a homemade device works no worse than an industrially created one).
The only thing you have to spend is time.
When is it necessary to buy a heater?
There is a significant difference between industrial and homemade devices: the purchased one heats the water itself, while the one made by hand heats the bottom. If in small aquariums, using convection, heat quickly spreads throughout the entire volume, then for large containers this is not enough.
To ensure that the water is the same temperature at all levels, you will have to use a commercial aquarium heater with a thermostat. But if you made a mistake in calculating the power, and it turned out to be insufficient, then building an assistant - a homemade thermostat - will help correct the mistake.