Natural lighting does not make it possible to create adequate conditions for underwater inhabitants. It illuminates the tank unevenly. In winter, the length of the day is noticeably reduced. In this regard, it is impossible to do without the use of artificial lighting. Therefore, below we will tell you how to make LED lighting for an aquarium with your own hands using inexpensive and accessible materials.
LED lighting is used to implement decorative functions and create an optimal habitat for plants and organisms. The importance of LED lamps is due to the following reasons:
- Possibility of creating effective lighting intensity.
- High quality LED lamps.
- Long period of exposure to lighting.
Main features of LED lamps
The advantages of this light source are as follows:
- Low energy consumption. Despite the high operating power, the lamps in the aquarium work efficiently.
- The lamp body does not heat up during operation. There is no need to worry about having an additional source of cooling in the aquarium.
- Effective illumination of every corner of the aquarium thanks to the presence of a directed light flux.
- Availability of various color combinations. You can easily install lighting of the required spectrum in the aquarium.
- Maintaining high quality work, even after time. The light spectrum remains unchanged.
- Long service period. The average service life is 30,000–60,000 hours.
Thanks to the long period of operation, you will not often have to wonder about replacing the ice lighting source. Moreover, arrays consisting of several light bulbs can be used. There are no disadvantages to this aquarium device. The only thing I would like to note is that it has recently appeared on the modern market, so this device is not widely distributed.
Choosing LED lamps for your aquarium wisely
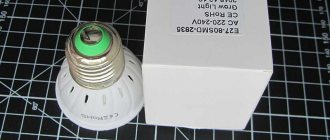
The selection of light bulbs for an aquarium should be based on two key parameters. The first is the intensity of the light flux. The second is color temperature. When choosing a lamp, pay attention to the lumen/W indicator. The higher it is, the greater the energy efficiency, that is, the efficiency of the light source. Also pay attention to the pulsation coefficient of the light flux - let it be less than 5%, ideally 1%. Higher values of this indicator will lead to increased eye fatigue, and why do you need an aquarium that negatively affects your health.
Each aquarium light has a different color temperature range. In an aquarium it should not be less than 5500 K. The ideal solution is if the color temperature is 6000–8000 K.
If an ice light source with a value of less than 4000K or lower is selected, the light will be excessively yellow. Conversely, a value of more than 6000K indicates a predominance of blue color. The most favorable color palette for an aquarium is warm white, cool white or daylight.
The quality level of the light source is no less important. You should not buy overly cheap lamps. They have an increased glow intensity only during the first time of use. After a certain period of time, the process of degradation of the light source can be observed, which negatively affects the inhabitants of the flora and fauna of an artificial home pond. The choice of lamp shade is an individual decision of the tank owner.
What is the best way to install LED lamps?
You can easily install LED lamps in an aquarium with your own hands. During this work, in order to achieve the most comfortable microclimate in the tank and an attractive visual effect, it is important to do this work correctly. When mounting lamps on top, a cover glass should be provided to help prevent excessive evaporation of liquid, fish jumping out, or water droplets falling onto the bulbs. To save electrical energy, we recommend installing a timer that will automatically turn off the lights according to a given pattern.
The main thing is to light the aquarium in such a way that all the needs of living beings and plants are satisfied. If you notice, for example, that the algae are not as bright as before, and the fish have turned pale, then there is a high probability that the backlight is installed poorly. Rotting of plant roots indicates that the LEDs are not directed towards their roots.
It should be noted that the abundance of light is also a mistake in setting the correct amount of lighting. In such a situation, the water blooms and there is a green coating on the walls.
Light spectrum
Colorful temperature.
In a natural body of water, the sun's rays lose part of their spectrum when passing through the water column. The red and orange part is absorbed in the first five meters. After nine meters the yellow spectrum is lost. An aquarium of such depth can only be found in an aquarium. In most aquariums, the light reaches the bottom in the full spectrum.
Experts advise using lamps with a color temperature above 5000 K (blue-violet spectrum). This will create good color rendition in the water and allow plants to develop better.
No lamp can completely replace sunlight. Fluorescent lamps are as close to the “ideal” as possible. Especially their newest type: phytolamps.
How to light an aquarium
There are two simple ways to organize lighting. The first method is the simplest. DIY LED lighting for an aquarium will help significantly reduce your costs. You will need an LED strip.
Next, you simply carefully stick it around the perimeter of the structure. Please note that lighting an aquarium with LED strip will make the lighting as uniform as possible, although it will not be energy efficient enough. This tape is sold in a skein. On one side of the tape there are LEDs, and on the other there is double-sided tape. But you should keep in mind that this type of lighting is not the only source for your aquarium. To create complete lighting, it is advisable to use additional T5 or T8 LED lamps. The place where the tape and cord are fixed must have insulation based on silicone filler.
The second lighting method is the installation of LED lamps. It is more popular and allows you to create complete and high-quality lighting of the entire tank. It is not difficult to assemble an LED lamp for an aquarium with your own hands. The lamp consists of a certain number of lamps. How many of them should you take? For a container of 200–300 liters you will need 40 spot lamps. Each bulb must be rated at 270 lumens (3 watts each).
Intensity calculation
There are various methods for calculating light intensity for aquariums. The main ones:
- selection by volume;
- selection by depth.
Selection by volume
Selecting lighting according to the volume of the aquarium is quite simple. We must assume that 1 liter of water requires 0.5 W of power. And then, using simple mathematical operations, you can calculate the required power of lighting devices for your aquarium and no calculator is needed.
DIY tank lighting with LED lamps
If you first study useful information, installing aquarium lamps will not cause difficulties. Installation of lamps involves the sequential implementation of the following stages:
- Preparation of necessary materials for work. We will need 6-7 LED lamps (3 W, 270 lm, 6000 K) with cold light and about 3-4 pieces oriented towards warm light (3000 K). Based on individual wishes, you can take others.
You should also prepare a gutter or panel made of plastic with parameters of 200 cm by 100 cm. You cannot do without a 12 W power supply and wires (2 mm). The number of 3 W lamps must be selected taking into account the volume of the aquarium. One piece is equivalent to 12–16 liters of tank. For example, if you have a 200 liter aquarium, then you will need about 30 3 W lamps to create good conditions for the inhabitants. For drilling you will need a 48 mm cutter and connector sockets (GU5.3; MR16; MR11) about 10 pieces (for the number of lamps). A fan will be needed if necessary. - It is necessary to insert our lamps into a plastic panel or trough. The length and width of the gutter are selected taking into account the parameters of the aquarium for lamps with LEDs. There are approximately 10 holes per 100 cm. The holes are made using a milling cutter. The lamps are connected to the installed connectors.
- Connecting LED lamps.
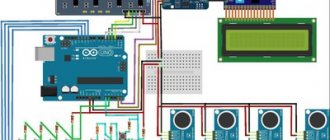
It is produced in parallel with the existing power source. For example, you can use a power supply from a personal computer. Only the necessary outputs of the power supply connector are connected. Below is a diagram. - We install a lamp and a fan. For cooling, you can use any computer fan.
Firmware and configuration
Since I initially set the goal to be able to control it from a smart home system, I immediately wanted to use the MySensors project that I liked. But at some point, realizing that laziness and lack of experience in programming Arduino (to realize all my wishes) could delay the production of the lamp indefinitely, I decided to use something ready-made and configurable during the work process. Among similar projects, I am familiar with WiFi-iot and a little worse with Tasmota (of similar ones there is also ESP Easy and ESPHome...). The choice of Tasmota was determined by a number of factors, such as the PWM frequency, which can be raised up to 4 kHz; built-in wakeup function (dawn), there really is no sunset, I had to do it manually; free in the end, unlike WiFi-iot, for example... and the ability to write scripts through Rules, which were not yet familiar to me at that moment (I had to take the time to figure it out))))... Tasmota firmware can be downloaded in the form of source code (which I would like to tweak something there to suit myself) or in the form of an already compiled binary, which can be immediately flashed into the controller. Let's use the second option, download the binary of the current version of tasmota and flash it into the D1 Mini board. For the firmware I used the NodeMCUFlasher program, you can also use Tasmota PyFlasher
When first launched, an unconfigured Tasmota launches its (name-name) Wi-Fi access point. After connecting, go to the address 192.168.4.1 and in the web interface that opens, the first thing we do is configure the connection to our Wi-Fi router (Configuration=>Configure WiFi). Having set the necessary parameters, click Save, after which the device will reboot and connect to your router. Next, go to Configuration=>Configure Module and select Sonoff LED (here you can also configure the connection of additional devices, such as buttons, temperature sensors, etc.). Returning to the main menu we will see the light controls.
In the original, the Sonoff LED module can control an LED lamp with warm and cold LEDs, and the top slider just adjusts the balance between them.
We don't need it, so we immediately drive it all the way to the left. Using the lower slider we will manually control the illumination of our aquarium. The Toggle button switches the state of the lamp from off to on and vice versa. You can try it! After successful tests, let's move on to more fine-tuning: Open the console and enter the PWMFrequency command and in response we will see RSL: stat/tasmota/RESULT = {"PWMFrequency":800} this means that the PWM signal frequency will be 800Hz. Not bad, but it could be better, so we write in the console: PWMFrequency 3760 (I read somewhere that it is recommended to make the PWM frequency for lighting not a multiple of the network frequency, which is 50Hz) in response we get: RSL: stat/tasmota/RESULT = {“ PWMFrequency":3760} Let's also enable a smooth change in brightness and the speed of brightness change with the commands: Fade 1 Speed 5 It is also necessary to set the time (in seconds) for which the wakeup function will work (dawn); values from 1 to 3000 are available. For experiments, you can set 20 seconds and give the wakeup command from the console to see how it works (the lamp should be turned off). This function can be used by adding a brightness value in percentage. For example, the wakeup 50 command will make, for the specified time in the WakeupDuration parameter, a smooth change in brightness from the current value to 50%. This way you can bypass the restrictions on the length of dawn at 1 hour (3000 seconds). To do this, we simply divide the dawn into several stages, for example from 0 to 30% in the first hour, from 30 to 70% in the second and from 70% to 100% in the third hour. It should be noted that the Fade and Speed commands entered above do not affect the wakeup function in any way, and changes in brightness in the dawn scenario occur a little stepwise (although if you don’t look closely, it’s not noticeable). But they will help us smooth out the sunset process, which we will configure using a sequence of Dimmer commands (indicating the value) collected in a script using the Rule tool. The Dimmer command can be tested by entering from the console: Dimmer 30, Dimmer 70, etc. There are many teams, you can find them all here. Any command can be executed according to a schedule, but first we need to provide our control module with access to NTP servers on the Internet or local network. By default, everything should work fine via the Internet (unless, of course, you specifically blocked anything on the router) and all we have to do is set up the time zone. To do this, enter the command from the console: timezone 3 (substitute your number for 3). You can check the correctness of the time using the time command; if the answer is correct, then the preliminary configuration of the module can be considered complete, you can proceed to writing scripts and setting timers. But if for some reason you cannot provide the controller with access to the Internet, there is only one way - to connect a real-time clock module, but this is beyond the scope of this article. Let's take a break from Tasmota and draw up an action plan in clear language, so: Daylight hours are divided into 4 parts: • dawn from 9:00 to 12:00 • zenith from 12:00 to 14:00 • 90% illumination from 14:00 to 16:00 :00 • sunset from 16:00 to 20:00
Dawn
divided into 3 stages, and after 14:00 the illumination is reduced to 90%. Stages are activated by global timers (Configuration=>Configure Timer):
In the Action field we set the value Rule, now this rule needs to be written.
In total, you can set 3 rules, each of which can contain a certain number of commands, limited to 511 characters. If the number of characters in the first rule is exhausted, then you need to start the second. You can familiarize yourself with the syntax here To enter rules, you will again need the console, open it and write everything in one line: Rule1 on Clock#Timer=1 do wakeup 50 endon on Clock#Timer=2 do wakeup 75 endon on Clock#Timer=3 do wakeup 100 endon on Clock#Timer=4 do dimmer 90 endon Activate the rule: rule1 1 In this rule we have written scripts launched by global timers 1...4.
Sunset
consists of 3 stages (since one rule consists of no more than 511 characters). Starts at 16:00 according to global timer No. 5 (Rule2). Continues at 19:00 according to global timer No. 6 (Rule3) and switches off at 20:00 according to global timer No. 6.
Since there is no “sunset” function in Tasmota, everything is implemented using the dimmer function, and pauses using the RuleTimer (there are 8 pieces). The procedure is described in Rule2 and Rule3 (the rule can only accommodate 511 characters).
For readability, I write everything on a new line, although you can try and copy-paste everything at once
Rule2 on Clock#Timer=5 do backlog Dimmer 80; RuleTimer1 1200 endon on Rules#Timer=1 do backlog Dimmer 70; RuleTimer2 1200 endon on Rules#Timer=2 do backlog Dimmer 60; RuleTimer3 1200 endon on Rules#Timer=3 do backlog Dimmer 50; RuleTimer4 1200 endon on Rules#Timer=4 do backlog Dimmer 45; RuleTimer5 1200 endon on Rules#Timer=5 do backlog Dimmer 40; RuleTimer6 1200 endon on Rules#Timer=6 do backlog Dimmer 35; RuleTimer7 1200 endon on Rules#Timer=7 do Dimmer 30 endon Activate: Rule2 1 Rule3 on Clock#Timer=6 do backlog Dimmer 20; RuleTimer8 1800 endon on Rules#Timer=8 do Dimmer 10 endon Activate: Rule3 1 General summary: • 9:00 – the beginning of dawn. Within an hour, the brightness increases to 50% (Timer No. 1) • 10:00 – continued. Within an hour, the brightness increases to 75% (Timer No. 2) • 11:00 – continued. Within an hour, the brightness increases to 100% (Timer No. 3) • 14:00 – decrease in illumination to 90% (Timer No. 4) • 16:00 – sunset begins. Reducing illumination to 80% (Timer No. 5). -16:20 Reduce illumination to 70% (Rule2) -16:40 Reduce illumination to 60% (Rule2) -17:00 Reduce illumination to 50% (Rule2) -17:20 Reduce illumination to 45% (Rule2) -17 :40 Reducing illumination to 40% (Rule2) -18:00 Reducing illumination to 35% (Rule2) -18:20 Reducing illumination to 30% (Rule2) • 19:00 – continuation of sunset. Reducing illumination to 20% (Timer No. 6). -18:20 Reduce illumination to 10% (Rule3) • 20:00 – turn off the lights (Timer No. 10) • 19:30 – 10% • 20:00 – Turn off (Global Timer No. 10) On the graph it will look like- then like this:
That's probably all, maybe I forgot to tell you about something, ask in the comments... The article turned out to be huge, I hope you like it and will be useful to someone... PS Because... Questions arise in the comments: why do fish need so much light? I’ll answer right here: Yes, of course you are right and fish don’t need that much light, but my wife and I dream of returning to a herbal aquarium. Everything is done with this in mind.
Summing up - LED lamps for an aquarium - how profitable are they?
From the information described above, we can conclude that installing LED lamps for an aquarium does not cause additional difficulties. Having previously read the literature on this issue, you can easily install them in a tank using a self-created lamp. Do-it-yourself LED aquarium lighting organized in this way has a large number of advantages. It creates high-quality and complete lighting for underwater inhabitants, is economical, and has a varied combination of colors. The only disadvantage of using lamps is their relatively high cost. However, over time, these products easily pay for themselves. The aquarium operates in energy-saving mode.
