Almost every modern summer resident dreams of building something original, special, extraordinary on his plot. Among the many ideas presented by landscape designers to owners of personal plots, there is one that lovers of water bodies will certainly find attractive - a garden aquarium. Such a spectacular solution for a dacha pond is one of the novelties in landscape design, but despite its novelty, the idea appealed to many happy owners of land plots.
What is a garden aquarium
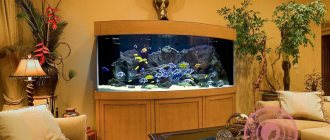
A garden aquarium is a geometrically correct artificial reservoir raised above ground level with transparent walls. Most often this is an ordinary pool, stylized as an aquarium. It performs the same functions as its home counterpart, but outdoors. Country aquariums differ from indoor aquariums in the size of the tank and the range of flora and fauna.
Tools
Before you start creating an aquarium, you need to prepare the appropriate tools. We will need metal corners, backing to create a gap, a utility knife, gloves, a couple of small spatulas, a “skeleton” (a gun for silicone sealant), masking tape, and finally small clamps.
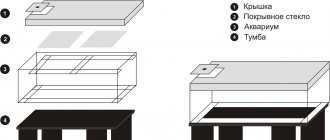
By the way, you need to purchase a lid for your aquarium, but you can make it yourself.
We build a country aquarium ourselves
Purchasing an aquarium for your garden can be quite an expensive pleasure, especially if we are talking about a large-sized structure, but it is quite possible for a home craftsman to equip it on his own. To help, here are recommendations from experienced specialists involved in the manufacture of garden aquariums:
- garden aquarium - the structure is very bulky and heavy, so it is best to make it at the installation site;
- You can use a large outdoor flowerpot as a finished aquarium bowl. It is important that it has no defects - even the smallest cracks and chips will cause water leakage. For greater reliability, you can coat the container with a cement-based sealing compound;
- You can make a tank for an outdoor aquarium based on a concrete slab or some other durable waterproof material;
- the optimal shape for an aquarium is a geometrically correct design consisting of rectangular or square elements;
- for the walls of the aquarium you will need thick glass, cut to the size of the walls;
- It is not necessary to glaze all four walls of the aquarium; at the discretion of the master, you can get by with only one transparent wall, or glaze the structure on two or three sides;
- The elements of the aquarium should be connected together with an environmentally friendly waterproofing sealant;
- It is advisable to equip the aquarium with a device for cleaning and aerating water, as well as a drain hole;
- It is recommended to treat the outside of the seams with some weather-resistant protective agent (varnish, paint);
- if the tank is installed on a pedestal or on supports, it should be secured using a concrete mixture;
- the structure can be decorated with LED lighting, or equipped with fluorescent lamps, which will support the vitality of the aquarium fauna on cloudy days
- If the aquarium will be used all year round, it should be equipped with a water heating system.
Aquarium herbalist - a natural aquarium with live plants with your own hands with useful photos and videos
I really hope you liked it! Below I will try to focus on those aspects and nuances of creating a “herbalist” that are either not talked about or information about them is insufficient. I will try to give step-by-step instructions for creating a dense aquarium with live aquarium plants.
But first I'd like to talk about the emotional side of things. Remember and tell how it was. Tell me what I was afraid of, what didn’t work, where I freaked out, and where I was happy like a baby. I think this is important, because it is our fears that prevent us from achieving the desired result.
So, before creating my “herbalist”, I had some aquarium experience. However, I did not have the slightest idea about ground cover plants or the subtle principles of constructing an aquarium composition. I didn’t know anything about the quantitative and qualitative components of such an aquarium: lighting, water parameters, fertilizers, filtration, etc. Therefore, the first thing I started with was reading articles, forums on the topic, watching thematic videos on the YouTube channel, master classes and webinars of aquascapers. This process took me two weeks. After it, my head was a complete mess!!! However, the entire array of this information allowed me to decide what exactly I want. It helped, in general, to imagine what my “herbalist” should be like and what would be needed for it. It seems to me that it is at this stage that it is very important to imagine the final result. Visualization is a very powerful tool. This is the transitional stage of materializing your idea. To finally decide, in my free time on the beach, under the rays of the summer sun and the sound of the surf, I drew sketches of my future “herbalist”. There were many of them, but I settled on this option.
This concludes the virtual stage of conceptualizing the idea and its rough visualization. The material side of the issue began to emerge. The prices were scary, there was a fear of making a mistake and taking the wrong thing. But it was necessary to decide and act! You won’t believe it, but my visualization worked, and... free money appeared that I could safely spend on my favorite hobby.
Taking into account the huge markups on goods in pet stores, the modest range and incompetence of sellers, I decided to purchase most of the necessary goods on the Internet. So an external filter, soil for plants, chemicals, a diffuser, a drop checker, etc. were purchased. While the order was being processed and was coming to me along long postal roads, I began to thoroughly study the issue of lighting, because... Without proper and correct lighting there will be no good “herbalist”. I settled on a combination of LED (hereinafter referred to as LED) spotlights and T5 fluorescent lamps. My thoughts and conclusions were as follows: “The best lighting for a herbalist is a combination of a metal halide lamp (hereinafter referred to as MG) with T5 fluorescent lamps. But, MG lamps heat up very much and can only be installed on a stand, so the aquarium must be open. But I want the aquarium to have a lid. What to do?"
I found out that LED spotlights are no less efficient than MG ones, but they heat up much less. It was decided to take and install them. But the question is, which ones to take? How many Watts, Lumens, Kelvins... The frantic reading of information on the Internet began again. The trouble is that there is a lot of unverified, outdated and incomplete information on the Internet. Nevertheless, I dug through everything I could and realized what kind of spotlights I needed. I won’t further fool anyone with a description of the lengthy process of selecting lighting for the “herbalist”. I’ll just say that after a two-week run through “electrical stores”, the necessary LED spotlights were found, purchased, and a week later installed together with a T5 lamp and coolers in the lid. While solving the problem of lighting, I, along the way, read information about the plants that are used in aquavaping, including ground cover. I put everything into one list and declared a hunt for them. And then another disappointment awaited me; in my city I somehow found only Hemianthus cuba . The pathetic bunch cost 200 rubles! I bought it, but realized that things wouldn’t go any further. You can go broke on grass alone. A solution was found, all the rest of the herb was purchased from the Arovana online store (Ukraine), where the prices are simply pleasing. For little money I collected a whole herbarium! They sent it quickly, and the plants came to me almost alive. However, they were not enough. Therefore, all the Vallisneria, crypts and echoes were pulled out from the old aquarium, and under the new lighting a growing bed was built - a vegetable garden of various plants for the scape.
Now I can’t even believe that this turned into a whole carpet of hemianthus cubes
(herbalist photo) BEFORE AFTER )))
I specifically pay so much attention to plants because many aquarists are faced with the problem of where to get a huge number of plants without going broke? In my opinion, buying a small amount of varied grass and growing the required amount yourself is a good solution to the problem. Moreover, during the growing process you will be able to understand how the plant behaves, how it feels in a given situation, under what light, with what fertilizers, how it lays down, spreads or stretches... In general, you will be able to get to know the plant better, what will eliminate unwanted situations with transplanting and adjusting an already finished aquascape. Time passed, the bed grew... But I didn’t sit around waiting. All my attention was focused on UDO (fertilizers), in particular, on studying the issue of composition, the need and correctness of the use of micro and macro fertilizers, and the supply of carbon dioxide. With CO2, the issue was resolved quite simply - I had already used the “mash” in the aquarium before, and I decided to grow the scape on it. As you can see, I succeeded. By using the mash in the aquarium, I completely debunked the fears of a novice aquascaper, which is that for a dense “herbal” you definitely need to buy an expensive CO2 cylinder, reducer, magnetic valve, etc. Issues with micro and macro fertilizers for plants, in principle, were also resolved quite simply. Homemade paroles (so-called self-messes) were immediately rejected as a stupid exercise for alchemists. I chose the brand “UDO Ermolaev”, in particular the drugs “Algicide + CO2”, “MICRO”, “MAKRO”, “Iron”, “Potassium”. Additionally, I decided to use tourmaline . Finally, two months later, the culmination came - the garden was pulled out, the can was washed... pleasant minutes, hours and days of creativity began. Laying the substrate, soil, adding biostarters and tourmaline, installing stones and forming a hardscape . Then an equally exciting event - planting plants according to the planned pattern. When everything was finished, there was no limit to the joy! I was already anticipating: “Now everything will take root, there will be a balance, and it will be possible to show your work on our forum.” But it was not there! Out of nowhere, the thread , so much so that not only the scape, the plants were not visible, they were withered, wasted... and the thread was pearly and pearly! While frantically reading information on this problem, I understood only one thing - there is no panacea! All advice is of the same type, stupid and, as they say, “finger in the sky.” One thing was clear, that something was “wrong” and this “wrong” needed to be urgently eliminated. Having gathered the last of my strength and passion, putting on a rubber swimming cap, I dived into my jar for a whole month... and during the breaks I sat by the aquarium with a stingy man's tear, which flowed down onto the rubber cap that had already been removed from my head... gray hair was visible on my head))) All gone...What have I not done this month! I collected filament every day mechanically, used algaecide, played with the amount of lighting, water and water changes. A crowd of cods (SAE), otocinclus, snails were planted in the aquarium... The filament did not retreat, the plants did not grow, but withered away. And then, at the suggestion of our Esta website moderator (Natalia Polskaya), it was decided to introduce “heavy artillery” - Amano shrimp. But, bad luck, in my city it’s a real problem to get amanoks! In the end, I still found a dozen, planted them, and in addition to them I introduced a detachment of sakura shrimp, red and black crystals. And... hallelujah!!! The evil thread shuddered and disappeared in horror within a week. The plants “bloomed”, the sun rose above my scape, the fish merrily scurried here and there, and the shrimp chirped together about something on their favorite snag. I performed unprecedented African dances around the aquarium!!! This is such a Happy End))) Now let's talk about more mundane things and the technical side of the issue. Here are my notes.
Landscaping of country aquariums
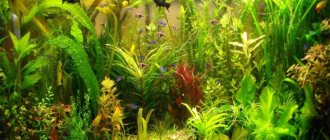
The biological environment in garden aquariums can be organized in different ways: representatives of aquatic fauna can be placed in them, or the aquarium can be made purely plant-based. In the first case, the bottom of the tank is covered with coarse white sand and/or pebbles, as for the concept of a planted aquarium - garden soil is quite applicable in it; an alternative to it can be soil taken from the floodplain of a reservoir.
Amphibious plants adapted to open water bodies will feel best in a garden aquarium: elodea, urut, hornwort, etc. They will not only decorate the water column of the aquarium, but will also serve for the benefit of the ecosystem, performing the functions of an oxygen generator filter. If a constant heat, light and oxygen regime is maintained in an outdoor aquarium, species intended for indoor aquariums that are more demanding in terms of growing conditions can be placed in it. As a rule, these are beautiful ornamental aquatic plants whose natural habitat is tropical waters.
In order for aquatic fauna to feel comfortable in an ordinary outdoor aquarium, it is worth placing plants there that will grow on the water surface, creating shade for fish and other living creatures - Azolla, Vodokras, Pistia, Salvinia. If the depth and size of the aquarium allow, then it can also be decorated with hydro-glue, egg capsules, and nymphs.
Aquarium vegetation located in a closed ecosystem will require periodic feeding. In principle, it is permissible to use garden fertilizers for an aquarium, but this must be done with great care. Of course, feeding can only be done in planted aquariums.
Customized solutions
Self-assembly has clear advantages:
- the aquarium can be placed anywhere, is made with the necessary parameters, and will be pleasing to the eye;
- proportions and filling depend on the preferences of the owner;
- You can make the backlight with a pleasant design effect.
To study analogues, you can look at photo samples on the Internet. The disadvantage of this approach is the amount of financial investment; it will also require time and effort to work.
In general, there will be little savings in self-production. Modern aquariums are made using automated methods, using unique equipment; all stages are tested for quality.
The production process is very productive, but in the case of self-production, the emphasis is on originality and design flexibility. This will not be a typical factory product that the master can be proud of. Assembly does not require special technical knowledge or engineering skills. You can buy a ready-made filter - the most important part - and do the rest yourself.
List of materials
To work, you will need approximately the following list of components and tools:
- gun for pouring silicone sealant;
- stone for sharpening knives;
- thin knives, blades of increased sharpness;
- wipes and sponges for cleaning;
- degreasing agent;
- measuring instruments: tape measure, ruler;
- high-quality glass cutter;
- masking tape;
- glass clamps for fixing the walls.
It is also better to stock up on newspapers or wrapping paper - you can put the structure on it. Having prepared a set of necessary items, you can begin purchasing and processing glass, glue and creating a composition.
Aquarium animals
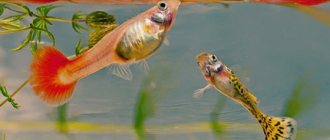
Fish are usually placed in an outdoor aquarium for one season. Therefore, when choosing inhabitants for such a reservoir, you should take into account not only their decorative properties, but also their ability to quickly adapt to new conditions.
In fact, you can keep the same fish in a garden aquarium as in a garden pond, while correlating the number of inhabitants with the volume of the tank. The best choice for such an ecosystem would be unpretentious koi carp, goldfish, ide, and colored crucian carp. Decorative species of snails, aquarium crayfish, and freshwater turtles can keep fish company.
Suitable sealant
The substance that will glue the parts of the aquarium and ensure tightness should be chosen especially carefully, since the strength of the product will depend on its quality.
In addition to the ability to reliably connect parts, the adhesive-sealant must meet certain requirements:
- No harmful substances;
- High adhesiveness;
- Elasticity;
- Fast hardening;
- Ease of use;
- Durability;
- Neat appearance.
Silicone sealants have all these properties. But when purchasing, you should pay attention to the composition of the substance. There should not be various impurities and additives (especially antiseptic), since certain microorganisms must live in aquarium water.
Silicone sealants are available for sale in three versions: white, colorless and black. It is better not to use white, as it does not look very neat; colorless is good for gluing small containers; black is ideal for large structures, as it gives them a special clarity of lines.
Many manufacturers specifically produce sealants for aquariums.
Decorating garden aquariums
When it comes to the aesthetics of garden aquariums, there are many ways to decorate the interior of your aquarium.
An indispensable aquarium decor is colored pebbles. In water, smooth pebbles of different shades look brighter than on land, and this effect cannot be ignored. It is important that the size of the pebbles is in harmony with the volume of the tank - you should not put too large pebbles in a small aquarium, and vice versa. You can also place several pebbles painted with luminous paint in different places of the aquarium, then a spectacular look is guaranteed even in the dark.
Originally shaped shells, spongy stones, large colored glass beads and much more will certainly find their place in the aquarium. Aquarium decor can also be purchased in specialized stores; unleashing your imagination will help you make a pond truly unique.
Choosing glass
When choosing glass, you should pay attention to the grade. The varieties start with the highest M1 and end with the lowest M8 (the higher the grade, the better the quality). For an aquarium, you should not take glass below M3. If you are making a simple aquarium for your home, there is no need to fuss with the glass material. Regular display glass is an excellent choice. It can be bought at any glass workshop. The only thing is to check that there are no inclusions, scratches or bubbles. Next, you need to determine the thickness of the required glass; this is done using special tables. But first you need to know the dimensions of the future aquarium. We select the desired length, height and width of the aquarium, focusing on the required volume of the aquarium (based on the calculation that the volume of a rectangular vessel is equal to V = l•a•h, where 1 is the length, a is the width, h is the height of the reservoir). Then we look at the table - from it you will understand what thickness of glass is needed for your aquarium.
| Height (cm) | Length(cm) | |||||||
| 50 | 60 | 70 | 80 | 90 | 100 | 110 | 120 | |
| 30 | 5mm | 5mm | 6mm | 6mm | 6mm* | 6mm* | 6mm* | 6mm** |
| 35 | 5mm | 5mm | 6mm | 6mm* | 6mm* | 6mm* | 6mm** | 8mm* |
| 40 | 5mm | 6mm | 6mm | 6mm* | 6mm* | 6mm** | 8mm* | 8mm** |
| 45 | 6mm | 6mm | 6mm* | 6mm* | 6mm** | 6mm** | 8mm** | 8mm** |
| 50 | 6mm | 6mm | 6mm* | 6mm* | 8mm* | 8mm* | 8mm** | 8mm** |
| 55 | 6mm* | 6mm* | 6mm* | 8mm* | 8mm* | 8mm** | 8mm** | 8mm** |
| 60 | 6mm | 6mm* | 8mm* | 8mm* | 8mm* | 10mm* | 10mm* | 10mm** |
| 65 | 6mm* | 6mm* | 8mm* | 8mm* | 10mm* | 10mm** | 10mm** | 10mm** |
| 70 | 8mm | 8mm* | 10mm* | 10mm* | 10mm* | 10mm* | 10mm** | 10mm** |
| 75 | 8mm | 10mm* | 10mm* | 12mm* | 12mm* | 12mm* | 12mm** | 12mm** |
| 80 | 8mm | 10mm* | 10mm* | 10mm* | 12mm* | 12mm** | 12mm** | 12mm** |
| 85 | 10mm | 10mm* | 12mm* | 12mm* | 12mm* | 15mm* | 15mm* | 15mm** |
| 90 | 10mm | 10mm* | 12mm* | 12mm* | 12mm* | 15mm* | 15mm** | 15mm** |
| 95 | 12mm | 12mm* | 12mm* | 12mm* | 15mm* | 15mm* | 15mm** | 15mm** |
| 100 | 12mm | 12mm* | 12mm* | 15mm* | 15mm* | 15mm* | 15mm** | 19mm** |
* — with stiffening ribs; ** - with ribs and ties Stiffening ribs are strips of glass to strengthen the walls of the aquarium to prevent them from bending under water pressure. They have the same thickness as the walls of the aquarium themselves, the length is equal to the internal length of the aquarium, the width is 2-5 cm. In vessels longer than 50 cm, stiffeners are required (although they can be glued in smaller aquariums). They are glued perpendicular to the front and side windows from the front and rear windows, at a distance of 2-3 cm from the top. In addition to imparting strength, the presence of stiffeners has other useful properties. Firstly, it is convenient to place a cover glass on it, and secondly, it makes it easier to carry. If the length of the aquarium is more than 1.5 meters, in addition to the stiffening ribs, ties are also required. These are strips of glass of the same thickness and width as the stiffeners. They are glued to the stiffening ribs from below or at the bottom. The width of each tie is 3-5 cm.
Garden aquarium care
Keeping a garden aquarium in order is quite simple - you just need to change the water on time and clean its walls from dirt as necessary.
Aquariums located outdoors can be used year-round only in regions with a warm climate and only when they are equipped with a water heating system. In other cases, aquarium plants and living creatures must be transferred to an indoor aquarium for the winter, and the garden structure must be completely emptied of water. In the spring, the aquarium tank must be cleared of blockages, washed thoroughly, and then filled with prepared water.
The good thing about a seasonal aquarium is that it can be decorated in a new way every year. So, once you install a garden aquarium on your property, you will have the opportunity every summer to enjoy extremely interesting and varied pictures from underwater life.
Most common forms
Aquariums are:
- rectangular;
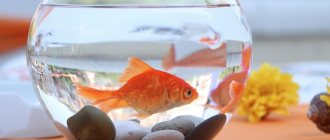
- round;
- corner;
- panoramic.
A round aquarium is very aesthetically pleasing and will fit well into the interior, but without special equipment and glassblowing skills it is unlikely to be made at home. Corner and panoramic aquariums will require significant experience in creating frame elements and working with glass. Therefore, if you are not a pro at all, but decide to make your first aquarium, it is best to start with the simplest rectangular one.
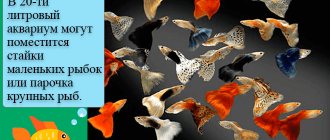
Decide what you want your aquarium to look like in the end. An important parameter is size. It is better to start your journey in aquarium keeping with a small specimen, 40 liters. Even if something goes wrong, you can always quickly correct the situation by rebuilding the aquarium again.
Launch and content
Microclimate
Before introducing fish into a reservoir, you must carefully consider this event, since it is important for the subsequent existence and reproduction of fish in an artificial reservoir. Before filling the pond with fish, it should already contain various plants suitable for its nutrition and supplying the water with oxygen. There should be food and mixtures for fish in stock in order to be able to provide it with regular nutrition. Before launching fish, the reservoir should settle and warm up properly. At the same time, the fish must be released in stages. First, you should measure the temperature of the pond and the temporary residence temperature of the fish. The temperature in the pond should be no lower than 14-16 degrees, only then can fish be introduced. The temperature in the container containing them must correspond to the temperature of the body of water into which they will be released in order for acclimatization to take place successfully.
Fish feeding
The fish needs to eat twice a day, at the same time, for which the fish must be accustomed to the regime with the same simple signals. For example, hitting a stick against a stick. Various mixed feeds and cereals are used as feed, which are also fed to livestock. It is possible to feed peas and other legumes, this is especially true for the carp family. Although fish are almost omnivorous by nature. They also feed on plants in the pond. During times of stress, for example at the time of launching into a pond, you should not give a lot of food.
Water quality
The quality of water plays an important role in ensuring adequate conditions for fish in a summer cottage pond. A normal level of acid-base balance is essential. The optimal indicators are 7-8 units. Any deviations from the norm are detrimental to the inhabitants of the reservoir. If the water in the pond is acidic, that is, the indicators fall below acceptable levels, then the acidity level should be increased using slaked lime. In the opposite situation, when the alkali increases, you need to use special peat tablets. The acidity of water can be determined using litmus papers or drop testers. It is necessary to check the balance of the reservoir regularly, as indicators may change and deviate from what should be expected. In addition, the water should be free of any tastes or odors. There should be no chlorine or various impurities.
Oxygen
Most fish need a good supply of oxygen, which is one of the sources of natural life. Certain types of fish are especially sensitive to the amount of oxygen in the water and for them the pond should be equipped with an oxygen circulation device.
Important! In winter, make ice holes and holes around the perimeter of the reservoir so that oxygen flows in sufficient quantities. If the fish do not have enough oxygen, the pond will become polluted very quickly.