How did the process of creating an incubator for caviar take place? Having decided to try my hand at keeping and breeding incubating cichlids from Lake Malawi, I was faced with the need to artificially incubate cichlid eggs. The fact is that females raised in captivity have largely lost their parental instinct.
After carrying caviar in their mouths for several days, careless mothers cannot bear the burden of care and swallow it. True, sometimes the opposite happens - the fish “overstays” the offspring and eventually releases exhausted, “overextended” fry, which subsequently will not please the aquarist with a healthy appearance and good growth.
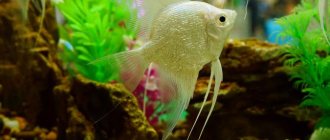
Malawi cichlid photo
But even if everything went more or less successfully, the fry that are born in a common aquarium are usually immediately eaten by the rest of the fish. It is not always possible or advisable to place a female with eggs in a separate container: in order for a fairly large fish (the length of the smallest Malawians exceeds 8-10 cm) to live comfortably for about three weeks, a free reservoir of about twenty to forty liters is required. What if there are many such females?
An important role for the breeder is also played by the fact that the female from whom her eggs are “taken away” spawns much more often. Thus, serious aquarists prefer to incubate the eggs of endemic species from lakes Malawi and Tanganyika artificially.
To do this, of course, you will need a cichlid incubator. On the second attempt, I managed to make a more or less tolerably working incubator from thin plexiglass according to the traditional scheme (the description of which, by the way, has not appeared in aquarium literature for fifteen years). The principle of its operation is that the eggs are located between two walls that form a downward angle, while at the base of the angle there is a narrow gap through which the flow of water is ensured in one way or another. I encountered a number of problems while assembling this design. The most significant was that at home it is difficult to cut and glue the incubator parts so that the gap between the inclined walls is of equal width.
The slightest distortion leads to “sticking” and crowding of eggs in that part of the section where the gap is narrower.
The design turns out to be bulky, especially if it has several sections for isolated incubation of the eggs of several females (in products of this type, partitions between sections are usually glued “tightly”). I tried to make the partitions removable so that I could arbitrarily adjust the width and number of sections, but I was unable to perfectly match the ends of the partitions to the main walls and this led to eggs “sticking” to the gap between the wall and the partition.
Video incubation of Malawian cichlid eggs
In such an incubator, the water flow through all cells is the same, and it is not possible to regulate the turbodynamic mode in a single cell, although this is often necessary. During the incubation process, as the embryo develops, the egg significantly “loses weight” and the intensity of the water flow should gradually weaken. In addition, the eggs of large and small cichlid species vary in size and weight. This can also lead to problems during simultaneous incubation.
Having given freedom to engineering, I designed and successfully operate an incubator for caviar, devoid of the disadvantages listed above. It is extremely compact and easy to manufacture, while the necessary materials are not in short supply and are quite affordable.
Breeding the first offspring
So, if the incubator was started in the first days of March, then already at the end of the month (after 20 days) you can expect the first addition of young stock, especially chickens, and this means that one more March care in the farm yard begins to increase.
However, even in the south at this time it is still extremely cool, so it is necessary to remember how to properly hatch the first offspring and what conditions they need. So, in short, after the chicken hatches and dries, it must be taken out of the incubator and placed in a warm house. Ideally, it would be great to place it under the hen, but in the month of March such a miracle practically does not happen, unless the chickens live in a warm chicken coop, so it is necessary to prepare a box or box with fairly large sides for the young animals. Lay a warm bedding on the bottom, and it’s good to put a heating pad on it at first. A great place to keep chickens is a complete brooder.
You also need to worry about lighting, because for the first month it must be around the clock (by the next month of life, 10 hours is enough). As for the temperature, the first week you need to maintain about 30 degrees Celsius, in the second week you can reduce it to 27 degrees, and then lower it by three degrees every week. Small chickens are fed only with specialized food, adding greens, cottage cheese, and eggs to the diet over a period of time.
The March chores in the household yard are a good bustle that will give the dacha owner, who has missed work over the winter, the opportunity to again feel strength in his hands and pleasant fatigue after a day of work. Let's get ready for spring, because the season is just beginning and there are still many useful activities ahead!
Incubator for caviar.
| The use of incubators for cichlid eggs is due to the fact that not starving fish spawn more often, as well as the fear of aquarists of the destruction of the clutch by producers. Eating eggs by cichlids is usually associated with improper maintenance: overcrowding of the aquarium, constant disturbance (walking, extraneous noise, etc.), fluctuations in temperature and water composition, and a sharp change in “day” and “night.” All this causes stress in fish, suppressing the instinct to incubate eggs, emphasizes Uwwportal.ru. Now among the cichlids, which can be classified as the old-timers of the aquarium, there are fewer and fewer breeders caring for their offspring. We are losing the most interesting thing about these fish - their behavior. What nature has created over millions of years, aquarists destroy in a few generations. Don't doubt it - it's true! Unnecessary organs or instincts are lost quickly, even during the life of one individual they can become rudimentary. More and more female “Malawians” carry the eggs purely symbolically – for a day or two, and then eat them. Therefore, I appeal to all fellow aquarists: use incubators only in exceptional cases, create conditions for your charges under which artificial incubation is not required. Select producers not only by appearance, but also by the usefulness of the incubation cycle. By doing this, you will not only preserve the beauty of cichlids, but also their spawning behavior, and also obtain stress-resistant populations adapted to the conditions of the aquarium. Unfortunately, it is impossible to completely abandon incubators, so I propose my own design. Most of them described in aquarium literature are bulky, awkward and require a significant area for installation. The device I developed is free of these shortcomings. It consists of an airlift pump and a set of incubation sections with a perforated bottom. The parts are made of plexiglass on a lathe. After polishing the inner and outer surfaces of the incubation sections, their joints are machined (it is better to cut the threads - Ed.). There is no need to polish the airlift pump parts. By attaching one section to the pump, we get an incubator with a length of 145mm; adding each new section will increase the length of the structure by 45mm. The assembled incubator is lowered into the water by the pipe and attached to the wall of the aquarium using a thermometer suction cup. An air duct hose with a clamp is put on the pipe. A mechanical filter can be attached to the bottom of the incubator. Eggs taken from females are placed in sections (from each separately), and clutches at later stages of development should be located in the lower tiers of the structure. Using a clamp or tap, the optimal air flow is set. in which the eggs move slightly, but do not “fly up”. Dead eggs have a lower specific density and are easily carried out of the incubator by the current of water. |
How to make a device for hatching eggs from foam plastic?
A homemade foam incubator will hold heat well and is easy to make. The cost of such a product is close to zero, so this is one of the most popular options for home use.
Styrofoam incubator
Consumables and their costs
To make a foam incubator with your own hands you will need:
- Incandescent lamps 2-4 pieces, 25 W each. The cost of one piece is from 30 rubles.
- 6 sheets of polystyrene foam 35 cm wide, 60 cm long, at least 2.5 cm thick. You can get polystyrene foam for free.
- Glass 20x20 cm costs no more than 150 rubles.
- Welded galvanized mesh 16x24 mm - no more than 300 rubles.
- Glue - about 100 rubles.
- Wooden slats - 8 pieces. The cost is about 200 rubles.
- Thermometer.
Assembly instructions
Now that we have all the necessary materials, it's time to figure out how to make a foam incubator. First of all, determine which piece of foam will be used as the bottom. It can be glued to wooden boards to add strength and stability to the structure. Boards or slats should cover no more than 50% of the base area. It is advisable to place them at the edges. Make ventilation holes in the foam.
After this, assemble the tray. To do this, use a mesh, attaching it to a frame made of slats. Make as many cells as needed. Now you can attach the tray to the base.
Glue the walls to the base. You need to make a hole 20x20 cm in the lid and install a viewing glass there. Also make a hole for the thermometer. Glue or otherwise attach lamp sockets to the lid from the inside.
Here are the basic steps needed to assemble a foam incubator with your own hands.
Water preparation and use of preventive agents
Water intended for incubation of eggs should be as close as possible to natural waters in temperature and hydrochemical properties. To reduce the risk of damage to eggs and larvae by pathogenic microorganisms, it is advisable to sterilize water using ultraviolet irradiation or ozonation. In the absence of an ultraviolet lamp or ozonizer, you can use various preventive drugs, for example, Funji Stop, Neski Prophylactic, or a solution of methylene blue. To do this, a three percent solution is prepared from fish-breeding or chemically pure methylene blue dye (3 g of dye is dissolved in 97 ml of water). This solution is low-toxic, therefore it is added to the water of the incubator aquarium in such a way that it is possible to distinguish eggs in the aquarium - in this case, an overdose is practically impossible.
Whitened, unfertilized and deformed eggs should be removed from the incubator as quickly as possible using a glass pipette of suitable size. This is the basis of the so-called calf bust. Subsequently, the same operation is performed on the larvae, removing ugly ones with pronounced developmental defects, as well as larvae with the yolk sac partially or completely affected by fungal diseases, which is the internal source of nutrition for the developing organism. As the larvae develop and the yolk sac decreases, the concentration of the prophylactic solution in the incubator is gradually reduced (by the time the larvae begin to feed independently, it should be zero).
When breeding viviparous fish, especially mollies, it should be borne in mind that adult fish are better adapted to unfavorable conditions than fry. Often, fry of especially sensitive viviparous animals, protected in the mother's womb from the external environment, quickly die after birth in the hatchery due to poisoning by waste products of fish and snails. The most interesting thing is that such concentrations of pollutants are completely safe for adult fish. To avoid such troubles, experienced amateur breeders change up to 90% of the water daily in aquariums in which females are kept.
In the aquarium where the eggs will be incubated, it is necessary to clean the internal walls and glass in advance using salt or soda crystals. A similar operation is carried out periodically (sometimes daily) in the event of rotting eggs or dead larvae. Obviously, the success of breeding fish in an aquarium will largely depend on compliance with hygiene rules.
If signs of mass death of eggs appear for unknown reasons, the entire aquarium and the equipment used in it should be completely disinfected using ozone or antiseptics (see book one).
By the time the larvae begin to feed on their own, the aquarist should have at his disposal a complete set of live or artificial food, crushed to the required size (also called “pulverized”) food. Focusing on the expected offspring and based on the instructions for breeding food crops - ciliates, rotifers, microworms, grindal, brine shrimp - you should prepare the necessary assortment in advance. It is too late to think about preparing starter feed if the larvae have already begun to switch to independent feeding. Everything is decided by the first hours, and not the days, when it is necessary, as professionals put it, to “disperse” the fodder crop.
Making a device out of the box
Let's consider the question of how to make an incubator out of a box. This option will be the cheapest of those offered; production will take several hours. Cardboard is a fragile material, but at the same time, it retains heat well and is easy to work with.
Incubator out of the box
Consumables
Let's take a closer look at how to make an egg incubator from a cardboard box. First of all, you must understand that it will be extremely difficult to make it with a capacity of more than 60 eggs. Due to its compact size, there is no need for automatic reversal.
What you will need:
- Wooden base (bottom) – can be purchased for free.
- Egg tray – no more than 300 rubles.
Lattice
- Incandescent lamps. No more than two lamps with a power of 25 W - the cost of one lamp is from 30 rubles.
- The box that will be used as a lid is free.
- Thermometer - about 200 rubles.
Thermometer
Assembly instructions
You need to place the tray on a wooden base. The most economical tray option is a regular wooden egg packaging. You can also make a tray from 4 mm electrodes attached to the base in the form of a grid. Two holes are made in the center of the lid. One is for ventilation and the other is for the thermometer.
Finished design
Preparing for spawning
For successful breeding of fish, the conditions for feeding and keeping cichlids must be observed. It should be immediately noted that fish can spawn both in a general aquarium and in a hatchery, however, to save eggs and keep the fish calm, it is better to prepare the spawning container in advance. Of particular importance for fish spawning is:
- Temperature – fish are kept at a temperature not lower than 27C, gradually increasing the number of degrees to 29-30C, thereby initiating spawning. At the same time, frequent water changes are performed, renewing 10% of the liquid volume 3-4 times a week. If angelfish are kept in hard water, then it is advisable to reduce the hardness.
- Nutrition - The type and quality of food greatly influences the fish's ability to produce viable offspring. Throughout their lives, future parents are fed live food: daphnia, bloodworms, and tubifex. Angelfish raised on dry food are sometimes unable to lay healthy offspring.
Fish reach sexual maturity at 6-12 months. Before spawning, the couple must be kept together, since the males are ready to fertilize angelfish eggs only in the presence of a female. Under favorable environmental conditions, angelfish spawn every two to three weeks, provided that the eggs are removed from the reservoir.
It is advisable to plant vegetation with strong leaves in the spawning tank, and be sure to place a piece of plastic, tile or something durable, since the fish lay their eggs on a hard surface. If this is not done, the angelfish will lay eggs on the filter or the wall of the tank, after which it will be difficult to move the eggs into the incubator.
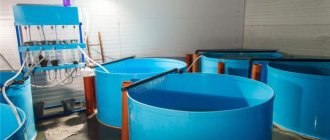
Incubation plastic containers
| Used successfully for 25 years in professional hatcheries for various types of fish. Made of high-strength transparent lightweight plastic, the device perfectly creates optimal natural conditions for caviar, and is easy to clean and maintain. The device allows water to circulate with caviar very gently and evenly. The device works very simply, water enters from the top and is directed down an open pipe in the center of the tank. The tube (diameter 3 cm) freely distributes the required water flow so that the caviar receives gentle rotation. The transparent container has a height of 45.8 cm, a diameter of 16 cm and a volume of 6.86 l. Weighs only 1.1 kg. A circular screen prevents the eggs from spilling out of the container, while water is diverted through the outlet (length 7.5 cm, width 5.3 cm) at the top and allows the larva to emerge only at the right time. This creates natural conditions for caviar. |
Matching
Sexual dimorphism in cichlids is secretive, and it is difficult, but possible, to determine the sex of angelfish before maturity visually. Those aquarists who are well acquainted with the anatomy of the angelfish are able to distinguish the sex of the fish. How to distinguish a female from a male:
- In mature male representatives, a seal is placed on the forehead.
- When examining the fish from the front, you can see that the lower part of the body is similar to a wedge. For boys this wedge is pointed, and for girls it is blunt.
- Sex can be determined by the genital papilla - a growth that is located near the anus. In girls, the papilla (ovipositor) is larger, while in boys it is smaller and more pointed.
- Males also differ from females in having a long dorsal fin. There are stripes on the fin, the number of which is at least 7 pieces. In females the number reaches no more than 6.
However, in some cases it is impossible to distinguish the sex by these features, especially in decorative varieties: albino, angelfish with a marbled or golden color. In such cases, gender is revealed by the habits of the pets when the fish create pairs. However, even then, sex determination can be unreliable: sometimes, in the absence of males, a same-sex couple is formed that lays eggs, but the eggs remain unfertilized.
Experienced aquarists recommend the following: when purchasing adult fish, you should give preference to fish with typical characteristics, or purchase a ready-made pair right away. If you plan to buy small fish, then buy 8-10 angelfish fry with extensive and long fins, which will be divided into pairs.
A pair of angelfish is found on its own, and aquarists prefer not to interfere in this process. However, if you wish, you can select partners personally, for which two fish of the same size and age are placed in the same body of water. After a while, the two fish get used to each other and form a pair. There is a strict rule regarding newly formed couples: the couple is not separated, otherwise both halves will experience stress and will not soon decide to start a new family. You can determine the existing couple by their behavior:
- The two fish stay together without swimming far from each other.
- The male begins to chase the female, driving the fish into the corners of the tank.
Spawning
A couple ready for spawning is identified by their appearance and behavior: a pregnant angelfish stands out with a rounded belly, and the male guards the space and intensively cleans the surface on which the female will lay eggs.
In most cases, cichlid spawning occurs in the late afternoon and lasts 40-90 minutes. The female lays her eggs in straight rows on the surface vacated by the male, pressing tightly against the area. At the same time, the male reproduces movements, fertilizing the eggs.
If the owner removes the eggs from the tank immediately, then repeated spawning is possible after two weeks. The number of eggs is 500-800.
Weiss incubators
These systems are made of stainless steel and equipped with 8-liter glass vessels. Through a special reservoir, all vessels can be individually supplied with water.The standard system consists of 7 containers, 200x40x165 cm, each with a capacity of 8 liters. There are other sizes of vessels, as well as the required quantity. The system can be equipped with cooling or heating with circulation, as well as a UV sterilizer.
Article rating:
DIY fish incubator Link to main publication
Related publications
- Breeding aquarium fish
How to change the chick ratio to favor hens rather than roosters
It turns out that it's all about temperature! I read that if you slightly increase the temperature in the incubator, then most likely the cockerels will hatch, and if you lower it, then it is more likely that the hens will hatch. It is also interesting that eggs hatched by a hen are more likely to hatch into females. I think that in nature everything is arranged intelligently, because a flock of birds needs hens more than roosters. It seems that the temperature at which hatching eggs are stored does play an important role. Try keeping the storage temperature at 4°C for a few days instead of the usually recommended around 16°C to help produce more female chicks. Australian scientists who conducted research came to these conclusions.
And now the most important thing! Keep in mind that no matter what you do, it will not change the sex of the chick inside the egg - it is already predetermined. However, for some reason, male embryos seem to be more sensitive to cold temperatures, so they simply won't hatch from their eggs
This will reduce the total number of chicks hatched, but the percentage of female chicks among them will be significantly higher.
It's sad to know that most roosters are never born. But even those who prefer to keep them in their flocks do not strive to breed males in equal numbers with females. So the poor roosters are doomed from the start. However, it is much more humane than letting unwanted chicks hatch.
I really find this information very interesting. The weather was cold in Maine when I ordered the hatching eggs, and I wouldn't be surprised that at one point during the trip, the eggs were in temperatures around 4°C. During the early days of the incubation period, I also lowered the temperature in the chick incubator a bit. eggs It will be interesting to see what the ratio of hens to roosters in the brood will be.
Have any of you tried this method? If so, it would be interesting to hear about your results.
Where to start, what tools will you need?
Before you start assembling, decide on the main material from which the product will consist. If you have an old refrigerator, then you can use it as a basis. Large pieces of polystyrene foam, no less than 40 by 25 centimeters, or a simple cardboard box are also suitable. The determining factor when choosing a material is its thermal insulation ability.
For heating, you will need to equip the device with a lamp or heating device, and take care of temperature control. In incubators, you can customize auto-rotation by adding additional mechanisms.
Automatic egg turning in the incubator is needed to save time. It is usually installed on large devices designed for 200 or more eggs.
All you need for assembly:
- Refrigerator (if you are planning to assemble an incubator from an old refrigerator), box or polystyrene foam.
- Standard incandescent lamps range from 25 to 40 W. The number of lamps depends on the size of the incubator; a small device for 100 eggs can be heated with four lamps.
- As an alternative to lamps, you can use electric heating elements.
- An incubator tray made of metal mesh or similar. The net should hold the eggs tightly. Wooden trays can be installed in the refrigerator.
- Thermometer, fan.
- Thermostat (if you are designing an automatic incubator). To do this, you can use bimetallic strips, electrical contactors or barometric sensors.
- Geared motor (what the turning mechanism consists of). If necessary, bearings - 4 pieces, clamps to tie them.
- Sealant for sealing cracks for insulation purposes, screws, various fastening materials, metal corners.
- A hygrometer is used to monitor humidity levels.
Attention! Heating lamps should be installed at a distance of more than 25 centimeters from the eggs.
Decide on the size of the incubator, decide what you will assemble it from. Then select all the necessary components from the list above, and you can start assembling.
The principle of operation of a homemade caviar incubator
Using a compressor, the incubator is filled with water, which will be constantly updated. The eggs are collected by hand using a “pear” and placed in an incubator. Because of the mesh, adult fish will not be able to swim into the container with caviar. Since the bottles are transparent, you can watch the development of the caviar.
When the fry hatch, you will need to empty the incubator manually. You can install a partition inside plastic bottles. Thus, you will get two compartments, the bottom of which is used for the development of eggs, and the second for the growth of fry.
When using a homemade caviar incubator, you can breed aquarium fish.
In an effort to optimize the breeding process of African cichlids, aquarists often resort to the help of incubators. Females, as a rule, carry eggs in their mouths for a month, which leads to their exhaustion and inability to spawn again. This does not suit the breeder, who shakes out the clutch and places the eggs for maturation in a specially created tank. In this article we will talk about the simplest homemade incubator for African cichlids, which is an improved version of a previously known model.
The basic requirements that an incubator must meet are as follows:
1. Continuous flow in the container with eggs. The incubator should receive clean aerated water, similar in hydrochemical parameters to aquarium water.
2. The absence of sharp edges on which eggs and larvae can be damaged and areas where they can get stuck. The masonry must be in a continuous circulating state.
3. The masonry should not be allowed to crowd together. Otherwise, hypoxia occurs, and, in addition, the fungus from the dead eggs will transfer to healthy ones.
The body of the homemade incubator is a 1.5 liter bottle with a cut off bottom. A cut from a 20 ml syringe is inserted into the neck, which includes a cut piston and a spray nozzle. The upper part of the incubator protrudes slightly above the surface of the water, and is perforated just below for outflow. The bottle is attached to the walls of the aquarium using two suction cups.
A piece of 20 ml syringe is tightly inserted into the neck. Inside its body there is an inclined bottom of the incubator, which is a piece of a piston. The surface of the syringe and piston are smooth, which prevents damage to the eggs. Just in case, you can melt their edges a little. The slope of the bottom leads to the rolling of the descending eggs towards the slot, from which there is an influx of water and aeration.
There are no dead spaces in the incubator and all the masonry is mixed.
The area where the nozzle is turned is indicated in red. This space will allow air and water to enter the incubator.
The piston turning area is indicated in red. The sprayer will come from below.
General view of the lower part of the incubator.
It is not advisable to take eggs from female African cichlids immediately after spawning. It is recommended to wait 3-5 days.
“>
How to make an incubator from a refrigerator with automatic egg turning?
The design of an incubator has many similarities with that of a refrigerator. Therefore, you can easily make an egg incubator out of a refrigerator. The body of this device retains heat well. You can place more eggs in it, each incubator tray will be on a separate rack.
Refrigerator shelves will serve as shelving. There will be optimal humidity inside thanks to the liquid exchange system located at the bottom of the household appliance. In this chapter, you will learn how to make your own incubator from a refrigerator by adding a thermostat, a heater, and a turning mechanism.
Fig 2. Diagram of a homemade incubator from a refrigerator
Consumables and their prices
Knowing how to make a homemade incubator, you will save 70% of the store price of the device. The simplest incubator from a refrigerator can be assembled without investment. But if you want to make it convenient and effective, you will have to buy a few additional items.
- An old refrigerator is usually purchased for free, but can be purchased through an advertisement for no more than 1,000 rubles.
- 220 Volt light bulbs - from 25 rubles apiece.
- Thermostat – from 300 rubles.
- Fan – from 200 rubles.
- Sprocket chain or metal rod.
- Drive for turning eggs - from 500 to 5,000 rubles. You can get it for free because Any gear motor will do, for example, from a car windshield wiper.
Basic camera requirements
A homemade refrigerator incubator must meet the minimum requirements that will make hatching chicks possible. About twenty days are allotted for hatching the cubs. During this period, the humidity in the incubators is maintained at 40-60 percent. As soon as the chicks begin to emerge, the humidity is increased to 80 percent. At the final stage, before chicks are selected, the humidity is returned to its original level.
Eggs require temperature control. Therefore, your device must be manufactured keeping this fact in mind. Temperature requirements vary depending on what eggs you place in the incubator tray. Select the mode in accordance with the table below.
Temperature table
| Type of eggs | Required temperature in the first days of incubation (degrees Celsius) | Temperature during the last days of incubation (degrees Celsius) |
| Chicken | 38-39 | 37,6 |
| Duck | 37,8 | 37,1 |
| Goose | 38,4 | 37,4 |
| Turkey eggs | 37,6 | 37,1 |
Ventilation system
Making an incubator from a refrigerator involves installing a ventilation system. Ventilation affects the temperature and humidity inside the device. Prevents the formation of an unfavorable climate for eggs. The average ventilation speed should be about 5 m/s.
A homemade incubator made from a refrigerator should be equipped with two ventilation holes, which are drilled in the body. One of them is located below, and the other above. Plastic or metal tubes are inserted into the holes so that air masses do not interact with the glass wool located under the casing of the cooling device. Ventilation adjustment is carried out by partially or completely blocking the holes.
Figure 3. Ventilation system
Note: embryos begin to consume oxygen from the outside already on the 6th day of incubation. In the third week, the egg consumes 2 liters of air per day. In the last days before hatching, each chick consumes 8 liters of oxygen.
There are two types of ventilation:
- Constant is a system that involves the creation of continuous air movement, with constant exchange and smooth distribution of heat.
- Periodic - a device that operates once every 24 hours to actively change the air in the chamber.
Please note that even the best ventilation does not allow you to completely avoid turning eggs. Therefore, a mechanism for turning eggs in the incubator is needed in any case. Auto-flip prevents the embryo from sticking to the shell.
Constant
Constant ventilation for a refrigerator has the following operating principle:
- A fan installed inside the chamber drives air flow into the holes. Due to this, the air escapes out. When making a home incubator with your own hands, you should pay maximum attention to this moment.
- When exiting, the air flow mixes with fresh air and passes through the heaters.
- Then the air goes down, where it is moistened by a container of water.
- The incubator device heats the air, which subsequently transfers heat to the eggs.
- After heat transfer, the air returns to the fan.
The design of an incubator with constant ventilation is more complicated than with a periodic system. But this allows you to simultaneously solve three problems: air humidification, ventilation and heating of eggs.
Periodic
Periodic system. If you are making an egg incubator with your own hands, then most likely it will be a manually operated mechanism. To set it to turn on automatically, you will need an electronic controller. Using a controller is not always justified, especially if you are making a simple homemade incubator with automatic egg turning. Ventilation in such a system occurs as follows:
- The heating is turned off.
- A fan is started, which replaces the air and cools the eggs.
- After 30 minutes, the fan is turned off and the heating system is started.
The characteristics of the fan are determined depending on how many eggs the chamber is designed for. If you are making a medium-sized incubator with your own hands with automatic turning with a capacity of 100-200 eggs, then you need a fan:
- operating from a 220 Volt network;
- with a diameter from 10 to 45 centimeters;
- with productivity from 35 to 200 m3/hour.
In addition, the incubator design must include a fan filter. The filter prevents dust, dirt and lint from entering the blades of the device.
Incubator body from a refrigerator
This is an important aspect of the topic “how to make an incubator from a refrigerator with your own hands,” since the efficiency of its operation will depend on the correct preparation of the device’s body.
Fig 4. Refrigerator housing
First you will need to remove the freezer and other built-in equipment. Then make holes for ventilation, as described above in the text about installing this system. Install shelves and trays in the quantity that you consider necessary.
Installation of a heating system
When making an incubator with your own hands with automatic turning, you will have to organize the heating system yourself. To do this, use 4 incandescent lamps of 25 Watt or two lamps of 40 Watt. Lamps are distributed in equal numbers between the bottom and top of the refrigerator. The lower lamps should not interfere with the installation of a container with water intended for humidification.
Before making an incubator at home, you need to make the necessary calculations and prepare tools. Take your time while working, as this can lead to disastrous results.
Selecting a thermostat
Many people are interested in the question of how to make a home incubator with optimal temperature conditions. To do this you will need a high-quality thermostat. There are three types that poultry farmers use:
- An electric contactor is a mercury thermometer with an electrode responsible for turning off the heating when a certain temperature is reached.
- Bimetallic plate - closes the circuit when the desired heating parameter is reached.
- Barometric sensor - closes the circuit when there is excessive pressure.
Fig 5. Ready thermostat
If you are thinking about how to make an incubator with convenient control, then install an automatic thermostat. This will greatly increase convenience and save time.
Coup mechanism
According to generally accepted technology, the mechanism for turning eggs in the incubator should operate 2 times a day. Some experts recommend turning eggs twice as often.
There are two types of egg turning in the incubator:
- frame;
- inclined.
The frame rotating device for the incubator functions by pushing the egg with a special frame, which rotates it relative to its axis.
An inclined rotary device for an incubator involves periodically tilting a tray with eggs at a certain angle. Due to this, the position of the embryos inside the eggs and their location in relation to the lamps change.
Fig 6. Rotation mechanism
The main principle of the automatic turning device is that the motor drives a rod, which acts on the tray with eggs.
How to make a simple turning mechanism for a refrigerator:
- Install the gearbox inside the refrigerator at the bottom.
- A wooden frame is installed inside the refrigerator to hold the trays. The trays must be secured in such a way that they can tilt 60 degrees in the direction of the door and also in the opposite direction.
- The gearbox must be firmly fixed.
- A rod is attached to the engine, connected to the tray on the other side.
- The motor drives the rod, which in turn tilts the tray.
Video
Tender care for newborn goats and lambs
On this topic:
BACK
FORWARD
1 of 4
The most important tasks in a farm yard are caring for newborn animals. Helpless kids need human attention and help when it's frosty and snowy outside. Therefore, summer residents try to make every effort to raise healthy pets. One ancient book says that a caring shepherd treats his livestock with love, especially newborn babies.
The first thing that baby goats need when born is release from the umbilical cord. It is trimmed with clean, sharp scissors, leaving 2 cm from the body. After this, the blood is squeezed out of it and dipped in iodine for a moment. It is necessary to monitor her condition for several hours in order to notice possible bleeding. If this happens, you need to quickly tie the umbilical cord with a simple thread and treat the wound with iodine. There is no need to remove it; after 14 days it will fall off with the remains of the umbilical cord.
Since the baby goat is born very weak, the best food for it is colostrum. It is given to the animal 2 hours after birth. For the first week, it feeds exclusively on milk from its mother, which is filtered and heated. Feeding regimen – up to five times a day. After 2 weeks, the baby is taught to eat solid food by adding hay to the feeder. Even in February, it is recommended to let the young animals go for a walk, if it is not too cold outside.
Newly born lambs need full care from their owners, especially during the February cold. To prevent them from catching a cold, a container of hot water or a reflector is brought into the room. As a result, they quickly dry out and after 40 minutes they are ready to unite with their mother.
For the first few days they eat only milk. Allow them to the uterus every 2 or 3 hours. Wise summer residents keep track of the time so that the kids do not go hungry. Lambs that are weaker than others are fed milk. Tender care for newborn lambs in February is the key to healthy sheep in the farm yard.
Incubation of Malawian cichlid eggs
How did the process of creating an incubator for caviar take place? Having decided to try my hand at keeping and breeding incubating cichlids from Lake Malawi, I was faced with the need to artificially incubate cichlid eggs. The fact is that females raised in captivity have largely lost their parental instinct. After carrying caviar in their mouths for several days, careless mothers cannot bear the burden of care and swallow it. True, sometimes the opposite happens - the fish “overstays” the offspring and eventually releases exhausted, “overextended” fry, which subsequently will not please the aquarist with a healthy appearance and good growth.
Malawi cichlid photo
But even if everything went more or less successfully, the fry that are born in a common aquarium are usually immediately eaten by the rest of the fish. It is not always possible or advisable to place a female with eggs in a separate container: in order for a fairly large fish (the length of the smallest Malawians exceeds 8-10 cm) to live comfortably for about three weeks, a free reservoir of about twenty to forty liters is required. What if there are many such females?
An important role for the breeder is also played by the fact that the female from whom her eggs are “taken away” spawns much more often. Thus, serious aquarists prefer to incubate the eggs of endemic species from lakes Malawi and Tanganyika artificially.
To do this, of course, you will need a cichlid incubator. On the second attempt, I managed to make a more or less tolerably working incubator from thin plexiglass according to the traditional scheme (the description of which, by the way, has not appeared in aquarium literature for fifteen years). The principle of its operation is that the eggs are located between two walls that form a downward angle, while at the base of the angle there is a narrow gap through which the flow of water is ensured in one way or another. I encountered a number of problems while assembling this design. The most significant was that at home it is difficult to cut and glue the incubator parts so that the gap between the inclined walls is of equal width.
The slightest distortion leads to “sticking” and crowding of eggs in that part of the section where the gap is narrower.
The design turns out to be bulky, especially if it has several sections for isolated incubation of the eggs of several females (in products of this type, partitions between sections are usually glued “tightly”). I tried to make the partitions removable so that I could arbitrarily adjust the width and number of sections, but I was unable to perfectly match the ends of the partitions to the main walls and this led to eggs “sticking” to the gap between the wall and the partition.
Video incubation of Malawian cichlid eggs
In such an incubator, the water flow through all cells is the same, and it is not possible to regulate the turbodynamic mode in a single cell, although this is often necessary. During the incubation process, as the embryo develops, the egg significantly “loses weight” and the intensity of the water flow should gradually weaken. In addition, the eggs of large and small cichlid species vary in size and weight. This can also lead to problems during simultaneous incubation.
Aquarium lamp
I tried to make a lamp as in the project: https://pikabu.ru/story/osveshchenie_dlya_akvariuma_svoimi_r. I really liked this decision. So far I have enough strength: to make a case, glue LEDs to thermal paste, solder wires, connect everything to DC converters, and them to a 300-watt power supply from a computer.
This is how it all began
It looks like I drilled and screwed everything that needed to be done; in some places it was frankly crooked, but I’m not a master) Overall, it’s tight and reliable.
That guy had a black cat Caffeine, I have a black cat Coconut. Constantly stole wiring and heat shrink.
I attached LEDs to the ties and made corners for the glass
Then for a long time I could not muster up the strength to start soldering. At first I soldered with a simple soldering iron with a copper tip, since I was learning there were a lot of mistakes, now I bought a soldering iron with a set from Alik and I understand how easier it is to do everything with them.
Coconut demanded to do more
Connected a white circuit of 36 LEDs
This is how it was in Aqua
I added a red contour - 10 pieces and a blue + green contour - 18 pieces, here is the final result. I've done all the mechanics, now I need to do the automation, write a sketch, I plan to make an auto timer, sunrise sunset, and control of 3 circuits. Aquarium 120 liters. I do not power the LEDs at full power so that there is no harsh spotlight. I have a chain of 3 diodes in the circuits and set the required voltage in series on the converters. Since the red ones are powered by a lower voltage of 2.2V and there are 10 of them, I selected a resistor for the last LED, which balanced the chain of 1 LED. When I connected some lights. The diodes were shorting to the case, I was tired of searching and resoldering. My first post, sorry that everything is so crooked and abrupt. I plan to post more when I figure out the Arduino. If anyone has sketches similar to this I would be grateful. When I was doing all this, I used Alex Guyver’s videos and the project of that guy from exile, he did a decent job) I’m a child compared to him)
