Since fish are cold-blooded animals, they cannot maintain a constant body temperature and need a warm environment. Freshwater fish are comfortable in water with a temperature of 24-29 °C, while tropical fish prefer the range of 24-26 °C. It is very difficult to maintain such indicators manually, so it is worth getting an aquarium heater. It’s not difficult to choose the appropriate option yourself; the main thing is to understand the functions and differences.
It is very difficult to maintain the required water temperature in the aquarium manually, so it is worth getting a heater.
Circuit operation
The operating principle of a voltage comparator is to compare the voltage at the inputs of the microcircuit. One of the inputs is connected to a voltage divider assembled using resistors R4 and R6. The lower resistor is selected as variable so that the temperature threshold for turning on the comparator can be set. The second input of the microcircuit is connected to a voltage divider across resistor R5 and thermistor R8. The property of a thermistor is such that it changes the resistance value depending on the temperature. For proper operation of the circuit, a thermistor with a negative resistance change coefficient is required. That is, as the temperature increases, the resistance should decrease.
If the water temperature in the aquarium is lower than that set by the variable resistor, then there is voltage at the output of the comparator, which turns on the electromagnetic relay. In turn, the relay switches the aquarium heater. As the temperature increases, the comparator switches and the output voltage disappears and the relay turns off.
Recommendations for the radioelements used:
- Currently, it may be difficult to purchase a domestically produced K554CA3. LM311 , which is widespread and is a complete analogue.
- The thermistor must be with a negative temperature coefficient, for example, type MMT-1s, resistance in the range from 5 to 15 kOhm. The selected type of resistor is good because it is small in size and allows the sensor to be well sealed to protect it from water ingress. Instead, you can also use any imported thermistor with similar characteristics.
- The actuation voltage of the electromagnetic relay must be designed for the supply voltage of the circuit. In this case, 12 V. The relay must, with some margin, allow switching the current consumed by the aquarium heater. The low power heater share of the RES-9 type relay is the best option.
- Diode VD1, which shunts the relay winding, can be of any type, since its purpose is to protect the output transistor of the comparator from surges of self-induction EMF at the moment the relay is turned off.
- The variable resistor should ensure smooth adjustment. It is undesirable to use potentiometers with a carbon layer, especially from cheap Chinese-made equipment. The best option is a wirewound potentiometer PP-3.
- The diode bridge of the power supply must provide a current of up to 1 A and can be of any design, including either a monolithic design or from individual diodes.
- The circuit supply voltage is 12 V.
- The LED indicating the heater is turned on can be anything. It does not affect the operation of the device in any way. You just need to select the resistance of the limiting resistor R7 to provide the required current.
The LED is at mains potential and must be carefully insulated together with the resistor.
Thermostat for an aquarium and everything you need to know about it.
Keeping fish requires certain temperature conditions. Many fish are tropical, so the water temperature acceptable for their life can be no lower than 23-27 degrees. In winter, without heating the water, the fish may simply die. Therefore, water heaters are important equipment.
An aquarium water thermostat is a water heater with a built-in regulator. It consists of a glass tube with a heating element. Thermostats automatically turn off when the set heat level is reached and turn on when the temperature drops below the required level. They operate in the range of 18-32 degrees Celsius.
Installing a thermostat for an aquarium
First you need to choose the power of the device, which is necessary for the aquarium and depends on the volume of water in it. It is generally believed that 10 watts of power is sufficient to heat 4.5 liters of water. For a large aquarium, instead of one powerful device, it is better to buy several weak ones - this way the water will heat up more evenly.
There are submersible or ground water heaters. It is necessary to install and operate the aquarium thermostat strictly according to the instructions in order to prevent damage to the device or its failure.
The submersible aquarium thermostat is waterproof and can be installed both vertically and horizontally. The water level in the container must always be above the minimum immersion line, which is marked on the body. The heater is attached to the wall of the aquarium using brackets with suction cups. It must be installed in a place in the aquarium where there is constant circulation of water. The submersible thermostat cannot be installed in the ground. The maximum depth of location usually varies within 1 meter. You can connect the thermostat to the electrical network 15 minutes after its installation.
There is another type of thermostat - a ground heater (thermal cable). It is placed at the bottom of the aquarium and masked with plants and decorations. The thermal cable will ensure uniform heating of the water, because warm water circulates and rises to the surface.
It is forbidden to turn on the heater when removed from the aquarium, or to put your hand in the water while the device is on.
Heaters are essential equipment for an aquarium during the cold season. By maintaining the temperature level in the aquarium, optimal comfortable conditions will be created for its inhabitants.
What power thermostat to choose.
In general, you can calculate the thermostat here: calculating the power of the thermostat
But, there is one BUT. Chinese products, non-Chinese products, and even branded products are prone to sticking. Sticking thermostat A situation where, regardless of the temperature setting, the thermostat works to heat all the time, i.e. becomes a heating pad of a certain power.
What happens as a result of sticking. If we don’t look at the thermometer every day or put our hands in the water, if at the same time it’s warm in the apartment, if the wattage was selected using a calculator based on the lower threshold of the temperature in the room, and now it’s warm in our house, in the totality of this situation we can easily get fish soup.
In addition, it was previously accepted, and even now this trend is roaming the network, to assume a power of 1 watt per 1 liter. This is as wrong as 1 cm of fish per 1 liter. But unfortunately, even famous brands do not hesitate to write wild ranges of use on their boxes. And we, having a standard 23 degrees in the apartment and wanting to raise it to 25, buy a 150-liter thermostat, a 150-watt thermostat. This is a great evil. Because If such a heating pad sticks, we can get fish soup. Of course, a lot depends on the current, surface ventilation, etc., but the fish will easily lie at 35 degrees. And this is quite possible to achieve.
How to be. Let me explain with a simple example. We have 150 liters, we need to get 30 degrees in it (for example). The standard temperature in our room, for example, is 25, but during periods when housing residents are blown away, it drops to 21, and in the summer it rises to 28-30. We enter the boundary zones in the calculator, 21 as the minimum temperature in the room and 30 as the desired maximum in the aquarium. Using the calculator we get a value of 116 W. What should I do? The correct solution in this case is to install 2 heating pads of 50 W each. If one sticks, nothing will happen to your fish, and the likelihood of two sticking at the same time is reduced to zero.
What I would like to note. If you are at home all the time, constantly look at the thermometer and easily notice non-standard behavior of fish, then perhaps you do not need these instructions, but, as they say, it’s better to be safe. Well, if you don’t care about fish, you can also ignore everything written)
Another important digression is mini aquariums. A scheme with 2 heating pads will not work in them. Why? Because the minimum power of heating pads for 99% of manufacturers is 25 watts. Putting 25 watts, for example, in 10 liters is, IMHO, harsh. How can we be here? The simplest option is not to install a heating pad if temperature conditions and hydrobionts allow it.
Most aquatic organisms live in a wide range of temperatures and their slow movement within the limits is not a problem. The second option, which will cost you much more than your aquarium, is connecting the heating pad through an additional temperature relay. Essentially, you get a circuit protected by 2 relays, one built into the thermostat and an external one. In this case, the probability of fish soup is again 0.
Of course, many will say, “What for do I need all this reinsurance?” Of course, this is some kind of reinsurance, but if you have expensive hydrobionts in your aquarium or they are simply dear to you, then taking into account the fact that the quality of aquarium products is steadily declining in order to reduce production costs, this scheme still makes sense.
- Twin heaters with thermostat . As a rule, the design of such a device is quite simple: a heater in the form of a spiral is enclosed in one glass flask with a bimetallic thermostat. These two devices are already connected to the same circuit, so the aquarist does not need to connect anything, just insert the plug into the socket. This device must be secured in a strictly vertical position, otherwise the thermostat will turn off prematurely.
Why do you need a homemade thermostat?
Store-bought thermostats are very massive. They are designed for keeping large aquariums with whimsical animals. They are not suitable for beginner aquarists who breed small fish in small containers. And the costs will be unjustified (purchased water heating equipment is expensive). Therefore, a do-it-yourself thermostat for an aquarium is:
- Cheap (assembled from available materials);
- Practical (suitable for small aquariums and spawning grounds);
- Effective (a homemade device works no worse than an industrially created one).
The only thing you have to spend is time.
When is it necessary to buy a heater?
There is a significant difference between industrial and homemade devices: the purchased one heats the water itself, while the one made by hand heats the bottom. If in small aquariums, using convection, heat quickly spreads throughout the entire volume, then for large containers this is not enough.
To ensure that the water is the same temperature at all levels, you will have to use a commercial aquarium heater with a thermostat. But if you made a mistake in calculating the power, and it turned out to be insufficient, then building an assistant - a homemade thermostat - will help correct the mistake.
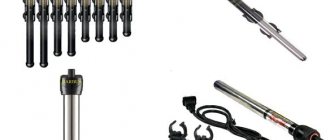
The simplest DIY heater
The device is actually simple: it does not have a thermostat. But due to the low power, you will not be able to overheat the water in the aquarium: no one will cook in it. However, exceeding the norm by 1-2 degrees is quite likely. To prevent this, place a water thermometer in the aquarium. And when the water heats up to the desired level, turn off the heater (if you forget to turn it off, nothing bad will happen if you chose the right wire resistance).
To build it you will need:
- Silicone tube or dropper;
- Transformer winding or wires of various diameters (will need to be selected);
- Power supply in the range of 12-24 V;
- Two plastic tube plugs;
- Silicone;
- Glycerin is liquid, or at worst, just water;
- Soldering iron, wire cutters.
First you need to calculate the power of the heater based on the standard: 0.5-1 W per liter of water. The warmer the water is needed, the more powerful the heater should be. The calculation is made using the formula:
W=w*V,
Where W is the desired heater power, w is the selected power for 1 liter of water, and V is the volume of the aquarium.
Example : the volume of your aquarium is 20 liters, and you want to heat it medium. Then take the average power (0.75 W/l). We get: 0.75*20=15 W.
Now you need to calculate the length of the wire from the transformer winding. To do this, calculate the required resistance using the formula:
R=U*U/W,
Where R is the desired resistance, U is the voltage of the current source (which one do you have, 12 or 24 Volts?). And W is the required power, which you have already found.
Example : you need a 15 W heater with a 12 V source. Then the resistance is 12 * 12/15 = 9.6 Ohms.
Now you need a formula to calculate the length of the wire:
L=S*R/p,
Where L is the required length, S is the cross-section of the wire, and p is the resistivity of the material from which it is made.
Attention! Transformer winding has a thickness of 0.3 mm. Therefore, the cross section will be equal to the area of a circle of the same diameter - 0.07 square meters. mm. The winding is made of copper, the resistivity of which is known to be 0.018 Ohm*sq. Mmm.
Example : You need a resistance of 9.6 ohms. Substituting known values into the formula, we get: 0.07*9.6/0.018=37.3 m.
Then make your own thermostat for the aquarium according to the instructions:
- Insert the wire inside the tube;
- Solder the ends to the wire going to the current source;
- Place the soldering area in a plastic plug;
- Fill the cavity of the plug with silicone so that the tube becomes airtight at one end;
- Pour liquid glycerin through the other end of the tube. If it is not there, then water will do, but it conducts heat worse;
- To seal the remaining end of the tube, use a second plug and some silicone.
Now the heater can be used for its intended purpose: lower it to the bottom and connect to the power source. But if you want to be able to regulate the temperature, you will have to invest more effort and money to make an aquarium water heater with a thermostat.
DIY automatic heater
This method allows you to create an aquarium heater that independently regulates the temperature set by the user. But you can make a device only if you have special knowledge in the field of radio engineering.
To make an aquarium heater with a thermostat, you will need:
- Transformer 12-volt;
- IN4007 (diodes) – 6;
- Electrolytic capacitors at 47, 100 and 2000 μF;
- 5V stabilizer chip (fits 7805);
- KT 814A (transistor);
- Adjustable zener diode (KR142EN19A or TL431);
- Fixed resistors for 150, 910, 4,700 and 160,000 Ohms;
- 150,000 ohm variable resistor;
- Instead of a sensor, you will need a 50,000 Ohm thermal resistor (TCS “-”);
- Low power consumption diode;
- Electromagnetic relay (12 V and < 0.1 A);
- Toggle switch (button).
A failed meter (Granit-1 in the photo) is suitable for the case. And the payment will come in handy from him. Both the power supply and the electromagnetic relay are placed inside.
The photo shows a suitable automotive relay, where the coil operates at 0.1 A.
It is impossible to include an auto relay in the circuit, since the maximum current of the adjustable zener diode cannot be more than 100 mA. In this regard, the purchase of a powerful resistor KT814 is required. If you want to make the circuit simplified, then instead of a car relay, take another one so that the current is less than 0.1 A (for example, SRA-12VDC-AL, and another one - SRD-12VDC-SL-C). Such models can be connected to a zener diode circuit without a resistor.
The photo shows an unusual transformer. This is a coil borrowed from an outdated induction electric meter.
It can be seen that there is some free space that can be used to wind the winding. But since the cross-section of the core is small, it will not be possible to achieve high power. However, for an aquarium regulator, adding 540 turns will be sufficient, based on the fact that 1 Volt is 45 turns. There will be no problems with their capacity if you choose the right diameter - 0.4 mm. But in order not to waste time, you can purchase an adapter or a new unit, initially designed for 12 Volts.
It can be seen that the circuit provides a 7805 stabilizer with a constant output voltage of 5 V. It is from this that the zener diode is powered. Therefore, the thermostat will have stable characteristics that will remain constant even when the supply voltage surges.
The temperature sensor in this case is a thermal resistor, the resistance of which is 50,000 Ohms at room temperature. However, its resistance will drop when heated.
It must be protected from mechanical damage using heat-shrinkable tubes.
On the right side of the temperature controller is a good place for resistor R1. If its axis is short, you will have to solder a flag (you can turn it over). And on the left is a toggle switch that regulates the operation of the device at a constant temperature set by the user.
It can be seen that the terminal block is too large, but there is no need to remove it, because any plug fits perfectly into it. To measure the current that will be supplied to the load, you need to remove the yellow jumper on the right and instead connect an ammeter in series.
Now it’s time to make a thermostat scale using the TM-902C electronic thermometer. Device sensors must be combined with electrical tape.
Use a thermometer to measure the temperature of bodies of varying degrees of heat. The scale can be made in different ranges. In the figure it was 8-60 degrees Celsius. If the temperature needs to be adjusted, this can be done using resistors R1-3.
Now the homemade heater with a thermostat for the aquarium is ready. It looks something like this.
Since the transparent glass of the meter exposes all the insides of the thermostat, it does not look aesthetically pleasing. You can fix this by covering everything unsightly with tape. However, if you are a creative person, then you can work on the body more.
Such a heater with a temperature controller will turn on at a temperature below the user set one. If necessary, it can be done so that the load is supplied at a temperature if it is higher than the set one. To do this, you need to swap the resistor that plays the role of sensor (R2) with resistors numbered 1 and 3.
AQUARIUM LAMPS AND EVERYTHING YOU NEED TO KNOW ABOUT THEM.
AQUARIUM PUMP AND EVERYTHING YOU NEED TO KNOW ABOUT IT.
CO2 FOR AQUARIUM WITH YOUR OWN HANDS PHOTO VIDEO DESCRIPTION.
DO IT YOUR HANDS AQUARIUM COVER PHOTO VIDEO.
Circuit adjustment
An aquarium thermostat, assembled correctly and from serviceable components, does not require any adjustments other than the initial calibration of the temperature regulator positions. To do this, you need to use a standard thermometer placed in the same container of water as the temperature sensor. Using a thermometer, measuring the water temperature at which the heater turns on at different positions of the regulator, the measured values are plotted on the potentiometer scale. The desired range of temperature adjustments can be changed by selecting within small limits the values of resistors R4 and R5.
How to choose a heater for an aquarium?
There are several important points that you should pay attention to when purchasing such equipment:
- The aquarium heater must have a thermostat to maintain a constant water temperature. When the required value is reached, the device will turn off and start working again when the water cools down. The thermostat can be immersed in water or placed outside the aquarium.
- Some heaters have additional functions, for example, forced emergency shutdown in the absence of water.
- When figuring out how to choose a heater for an aquarium, it is worth noting that different devices can regulate temperatures differently. In some models you can set a range, and in others a specific value that will be constantly maintained. When choosing, it is recommended to pay attention to the adjustment interval.
- A heater for a round aquarium or a vessel of any other shape can have a different heating area. This information can be read in the instructions that came with the device.
- Pay attention to the package; if necessary, the kit should include fasteners or a protective cover that will prevent damage to fragile parts.
- If you need to choose a heater for sea water, be sure to check whether the salt will damage the parts of the selected device.
Aquarium heater power
One of the most important indicators that should definitely be taken into account when choosing such equipment is power. Its value is determined taking into account the volume of the selected vessel. In most cases, a water heater for an aquarium with and without a thermostat should have 1-1.5 watts per 1 liter of water. Experts recommend choosing devices with a small margin, that is, with a large power rating, in order to increase heating if something happens, for example, if the room is too cold.
Schema improvements
To improve the characteristics of the circuit and increase reliability, some changes should be made to the original version. First of all, this concerns stabilization of the supply voltage. The accuracy of adjustment and temperature stability will depend on the stability of the supply voltage.
As a stabilizer, it is most advisable to use an integrated voltage stabilizer on the KR142EN8B (KREN8B) microcircuit; its imported analogue will be the 7812 microcircuit. This microcircuit is designed to stabilize a voltage of 12 V at a current of up to 1 A. Since the current consumed by the device does not exceed the specified value, you can limit yourself to installing only an integrated stabilizer without powerful additional transistors.
To prevent overheating, it is advisable to place the integrated stabilizer chip on a small radiator made of a duralumin plate.
The housing of the microcircuit is connected to one of its terminals, so the cooling radiator should not have electrical contact with the rest of the circuit elements.
In the stabilizer, the requirements for the diode bridge are the same as in the basic circuit. Since for normal operation of the circuit the voltage after the diode bridge must be 15–25 V, filter capacitor C1 must be designed for a voltage of at least 50 V. Capacitor C2 is designed to eliminate high-frequency ripples. Without it, the operation of the stabilizer may become unstable.
The option for switching on the relay shown in the diagram is permissible only with a small load in the heater circuit. For more powerful consumers, the relay must also be powerful. In this case, the operating current of powerful relays is usually greater than that allowed for the output transistor of the comparator. To increase the reliability of the circuit and protect the output stage of the microcircuit from overload, the relay should be connected through an additional stage on a powerful transistor.
The transistor switch is made on transistors KT815–817 with any letter index.
In this case, you can use any powerful relay that has a permissible voltage of 220 V at the switching contacts. A car relay is not suitable here because it is not designed for high voltage switching. Electromagnetic relays, which are used in relay-type mains voltage stabilizers, are very convenient.
To be able to adjust the temperature in steps, so as not to constantly turn the regulator, you can use two potentiometers connected to the circuit via a switch (day-night), each of which is set to its own temperature.
Which aquarium heater to choose?
There are several classifications used for heating equipment. Each type has its own advantages and disadvantages, which should be taken into account in order to choose the most suitable option for a particular case. An aquarium water heater can have a different design, so it can be mounted in different parts of the vessel, providing the desired heating of the liquid.
Flow-through heater for aquarium
Devices of this type involve passing water through themselves. There is a special heating element inside, which heats the water as it passes through it. Flow-through heaters for aquariums turn on automatically when liquid begins to move. Such a device must have high power. The disadvantages of this type include high energy consumption.
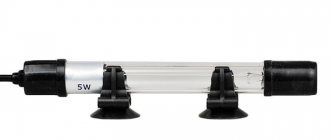
Submersible heater for aquarium
This option is more common, and it has several subtypes:
- Glass.
The submersible aquarium heater has a body made of shock-resistant and heat-resistant glass. It turns on and off automatically, maintaining the set temperature. - Plastic.
More modern models that are technically advanced when compared with the first subtype. These aquarium heaters are compact. - With titanium element.
This heater is suitable for a small aquarium and for large aquariums, that is, it is universal. It can be used to heat large quantities of water, for example, if a person is breeding turtles rather than fish. - Mini heaters for aquariums.
Such devices have a flat shape, so they can be placed anywhere, even under the ground.
External heater for aquarium
In most cases, such a device is built into the system of an external remote filter, that is, the water that passes through it will not only be cleaned, but also heated. There is another option for an external heater, which is a heating pad made of rubberized material, which contains flexible heating elements. The water is heated through the glass bottom of the vessel. An external aquarium heater with a thermostat has a drawback - a lot of heat goes into the stand. Heating through the bottom provokes rapid growth of bacteria.
Bottom heater for aquarium
In this case, heating cables are used, which are laid along the bottom before filling the soil. The main characteristics include:
- Their main task is to ensure the movement of water flow in the soil, which helps prevent its acidification.
- Such an aquarium heater with a thermostat helps to heat the bottom layer of water, which is always colder when using traditional equipment options.
- It is recommended to use the bottom heating option as an additional option to any of the previously discussed devices.
- The cable cannot be laid in fine sand and it should account for about 1/3 of the total power.
Temperature sensor design
In order for a temperature sensor to function normally, it must have direct contact with the medium being measured. For obvious reasons, you cannot immerse the thermistor in water. It needs to be placed in a sealed case.
The easiest way to do this is to take a polyvinyl chloride tube of suitable length with one end sealed and place a thermistor with soldered wires into it. There should be no air in the tube where the sensor is located, since it is a good heat insulator and the sensor readings will not correspond to the true ones. You can fill the tube with the sensor with mounting silicone sealant. In addition, this method further improves the isolation of the sensor from the environment.
The sealant must be acid-free. Otherwise, the thermistor will quickly fail.
Instead of PVC tubing, heat-shrinkable tubing can be used. After placing the sensor in it, you need to blow it with hot air, for example, from a hair dryer. When heated, the tube decreases in diameter and tightly compresses the sensor along with the wires. One end of the tube must also be securely sealed. You need to blow hot air onto the tube, starting from the sealed end, so that there is no air left there. If you take a colored tube, for example green, it will be almost invisible in the water.
In both cases, the top edge of the tube must be above the water level.
The assembled structure is placed in a suitable housing. The length of the connecting wires from the sensor and heater must be such that the regulator can be conveniently placed and water cannot enter it.
Rating of the best aquarium heaters
| Nomination | place | Name of product | price |
| Rating of the best aquarium heaters | 1 | JBL ProTemp S with thermostat 300W | 2 341 ₽ |
| 2 | Eheim, 3656010, 150 W | 1 490 ₽ | |
| 3 | AQUAEL Ultra Heater UH-75W | 1 390 ₽ | |
| 4 | Fluval E 50W | 3 856 ₽ | |
| 5 | TETRA TEK NT200200W | 1 090 ₽ | |
| 6 | Eheim Thermocontrol 75 | 1 645 ₽ | |
| 7 | Barbus “New generation”, with thermostat, 25 W | 451 ₽ |
JBL ProTemp S with thermostat 300W
Rating: 4.9
For large aquariums, the most often chosen heater is the JBL ProTemp S 300W, equipped with a precise disc thermostat over a wide range of 20-34 degrees. It can be used to maintain temperature in a volume of water up to 400 liters!
The design of JBL ProTemp S allows it to be used not only in aquariums of any size, but also for fresh and salt water - the body of the fully submersible element is covered with thick glass and plastic braiding, which, moreover, protects fish from burns, which is especially important when keeping catfish and other bottom fish. The design provides a sensor for turning off the power when the water level drops. Despite the presence of a 37.5 cm long rod, the device is compact and does not take up much space and fits almost all models of aquariums.
The manufacturer provides a 4-year warranty on the heater, but we have not found a single user review complaining about shortcomings in the operation of the JBL ProTemp S.
The average price is 1800 rubles.
Advantages
- Power 300 W;
- Suitable for maintaining temperature in aquariums of 160-400 liters;
- Fast water heating;
- Safety device for fish;
- Convenient care with specialized products.
Flaws
- Difficult to find on sale.
Cautions
Quite often one can encounter objections that electromagnetic relays have low reliability and are prone to burnt contacts. For these reasons, the above thermostat circuit can be adapted for the use of thyristors - contactless semiconductor switches.
Such a heater with a thermostat for use in conjunction with an aquarium is completely unacceptable, since there is no galvanic isolation from the power supply! For the same reason, for safety reasons, the power source of such a circuit must be exclusively transformer.
Connecting a temperature sensor with a negative characteristic has its own characteristics. If the thermistor malfunctions or the connecting wires break, its resistance increases and the comparator believes that the temperature has decreased, so it sends a signal to turn on the relay. The heater will be turned on constantly, regardless of the water temperature. Therefore, it is extremely important to carefully design the temperature sensor.
Connection recommendations
First of all, before you start using the heating, you need to choose a suitable place to install the device. First of all, this is important for the safety of the fish, which always strive to get into some kind of shelter. To be more confident, you can add more different decorations and plants to the tank to give the fish something to do.
Based on location, it is not recommended to place the aquarium near drafts, uninsulated walls or in cold basements. Otherwise, the thermostat will not be able to heat the water to the desired temperature.
Before starting the device for the first time, you should first set the thermostat to a low temperature to allow the water to heat up gradually and prevent cracks in the glass due to the temperature difference when the electric heater is turned on.
Before starting the device for the first time, you should first set the thermostat to a low temperature.
Likewise, it is important to turn off the heater half an hour before removing it from the aquarium. This is necessary so that the glass shell of the thermostat cools down. Thus, the main safety recommendations are as follows:
- Always allow the device to cool before removing it from the water.
- After installing the heater, you should wait at least 30 minutes before turning it on.
- Always ensure that the cord and plug are dry when connecting to the electrical outlet.
For better heat circulation, it is recommended to place heaters under or behind the filter. In addition, you should not install decorations or other foreign objects directly in front of the stream.
It is important to make sure there is water between the heater and any other surface. If the glass shell of the device touches walls, gravel or decorations, there is a possibility of destructive processes developing in the glass.